Samsung SF-565PR Win 2000/xp/2003/vista/2008/win 7(32,64bit) ( 20.6 - Page 110
Organising Address Book Items, Add group, Add New, Group
 |
UPC - 635753610277
View all Samsung SF-565PR manuals
Add to My Manuals
Save this manual to your list of manuals |
Page 110 highlights
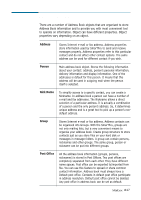
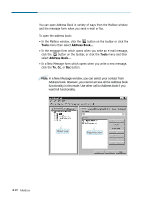
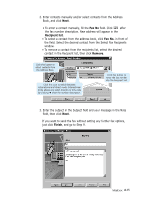
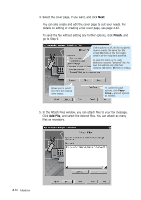
Creating a Group 1. Open the Address Book window. See page 4.28. 2. Select the desired group location on the left pane of the Address Book window. 3. Click Add group. You can see the new group under the selected location. Or, in the Edit menu, click Add New then click Group, or click button on the toolbar. A new group is created. 4. Type in the new group name in place of New group suggested by the system. 5. Click outside new group name. 6. Fill the new group by copying or moving address book items to it or by creating new items in this group. Notes: • Group name participates in address resolution. • Group can contain other groups, persons and nicknames. 4.32 Mailbox Organising Address Book Items A large address book can be organised in several ways to make it easy to retrieve contacts. You can sort names alphabetically in ascending or descending order. You can also view items in a Hierarchical or Alphabetical view allowing you to view persons as a list combining them with nicknames and groups. You can also import address book items from variety file formats and messaging systems including Eudora, Outlook Express and Netscape Messenger. For further details, click Help and refer to the on-line help.
-
 1
1 -
2
-
3
-
4
-
5
-
6
-
7
-
8
-
9
-
10
-
11
-
12
-
13
-
14
-
15
-
16
-
17
-
18
-
19
-
20
-
21
-
22
-
23
-
24
-
25
-
26
-
27
-
28
-
29
-
30
-
31
-
32
-
33
-
34
-
35
-
36
-
37
-
38
-
39
-
40
-
41
-
42
-
43
-
44
-
45
-
46
-
47
-
48
-
49
-
50
-
51
-
52
-
53
-
54
-
55
-
56
-
57
-
58
-
59
-
60
-
61
-
62
-
63
-
64
-
65
-
66
-
67
-
68
-
69
-
70
-
71
-
72
-
73
-
74
-
75
-
76
-
77
-
78
-
79
-
80
-
81
-
82
-
83
-
84
-
85
-
86
-
87
-
88
-
89
-
90
-
91
-
92
-
93
-
94
-
95
-
96
-
97
-
98
-
99
-
100
-
101
-
102
-
103
-
104
-
 105
105 -
 106
106 -
 107
107 -
 108
108 -
 109
109 -
 110
110 -
 111
111 -
 112
112 -
 113
113 -
 114
114 -
 115
115 -
116
-
117
-
118
-
119
-
120
-
121
-
122
-
123
-
124
-
125
-
126
-
127
-
128
-
129
-
130
-
131
-
132
-
133
-
134
-
135
-
136
-
137
-
138
-
139
-
140
-
141
-
142
-
143
-
144
-
145
-
146
-
147
-
148
-
149
-
150
-
151
-
152
-
153
-
154
-
155
-
156
-
157
-
158
-
159
-
160
-
161
-
162
-
163
-
164
-
165
 |
 |