Samsung SF-565PR Win 2000/xp/2003/vista/2008/win 7(32,64bit) ( 20.6 - Page 52
Setting Up a Client Station, Configuration
 |
UPC - 635753610277
View all Samsung SF-565PR manuals
Add to My Manuals
Save this manual to your list of manuals |
Page 52 highlights
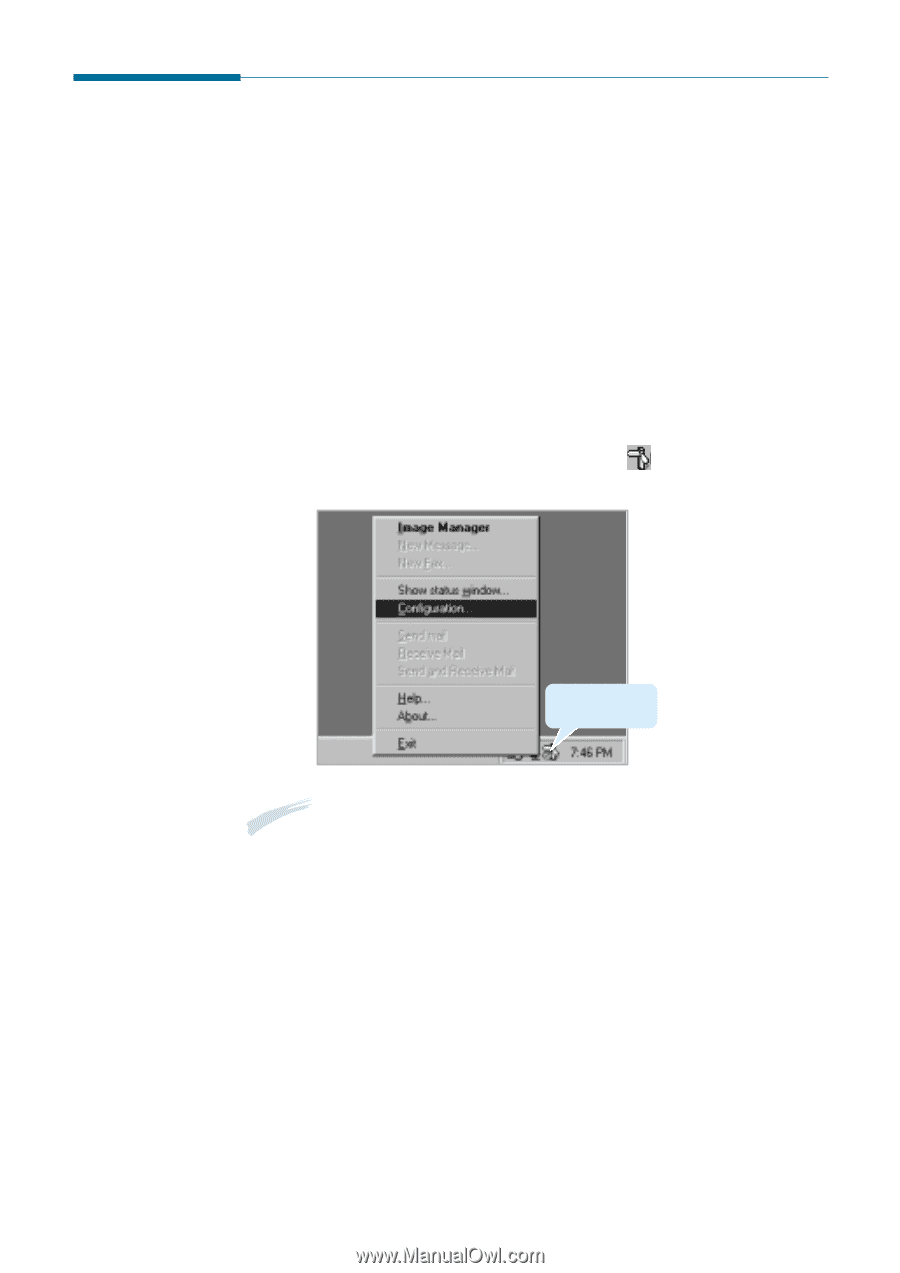
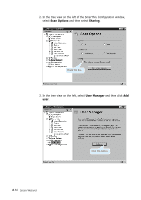
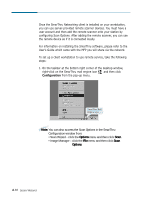
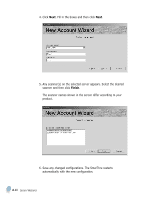
Setting Up a Client Station Once the SmarThru Networking client is installed on your workstation, you can use server-provided remote scanner devices. You must have a user account and then add the remote scanner onto your station by configuring Scan Options. After adding the remote scanner, you can use the remote device as if it is connected locally. For information on installing the SmarThru software, please refer to the User's Guide which came with the MFP you will share via the network. To set up a client workstation to use remote service, take the following steps: 1. On the taskbar at the bottom right corner of the desktop window, right-click on the SmarThru mail engine icon and then click Configuration from the pop-up menu. SmarThru Mail Engine icon. Note: You can also access the Scan Options in the SmarThru Configuration window from: • Scan Wizard - click the Options menu and then click Scan. • Image Manager - click the File menu and then click Scan Options. 2.38 Scan Wizard
-
 1
1 -
2
-
3
-
4
-
5
-
6
-
7
-
8
-
9
-
10
-
11
-
12
-
13
-
14
-
15
-
16
-
17
-
18
-
19
-
20
-
21
-
22
-
23
-
24
-
25
-
26
-
27
-
28
-
29
-
30
-
31
-
32
-
33
-
34
-
35
-
36
-
37
-
38
-
39
-
40
-
41
-
42
-
43
-
44
-
45
-
46
-
 47
47 -
 48
48 -
 49
49 -
 50
50 -
 51
51 -
 52
52 -
 53
53 -
 54
54 -
 55
55 -
 56
56 -
 57
57 -
58
-
59
-
60
-
61
-
62
-
63
-
64
-
65
-
66
-
67
-
68
-
69
-
70
-
71
-
72
-
73
-
74
-
75
-
76
-
77
-
78
-
79
-
80
-
81
-
82
-
83
-
84
-
85
-
86
-
87
-
88
-
89
-
90
-
91
-
92
-
93
-
94
-
95
-
96
-
97
-
98
-
99
-
100
-
101
-
102
-
103
-
104
-
105
-
106
-
107
-
108
-
109
-
110
-
111
-
112
-
113
-
114
-
115
-
116
-
117
-
118
-
119
-
120
-
121
-
122
-
123
-
124
-
125
-
126
-
127
-
128
-
129
-
130
-
131
-
132
-
133
-
134
-
135
-
136
-
137
-
138
-
139
-
140
-
141
-
142
-
143
-
144
-
145
-
146
-
147
-
148
-
149
-
150
-
151
-
152
-
153
-
154
-
155
-
156
-
157
-
158
-
159
-
160
-
161
-
162
-
163
-
164
-
165
 |
 |