Samsung SF-565PR Win 2000/xp/2003/vista/2008/win 7(32,64bit) ( 20.6 - Page 67
Toolbox, Properties, Apply Annotations, Working with Annotations
 |
UPC - 635753610277
View all Samsung SF-565PR manuals
Add to My Manuals
Save this manual to your list of manuals |
Page 67 highlights
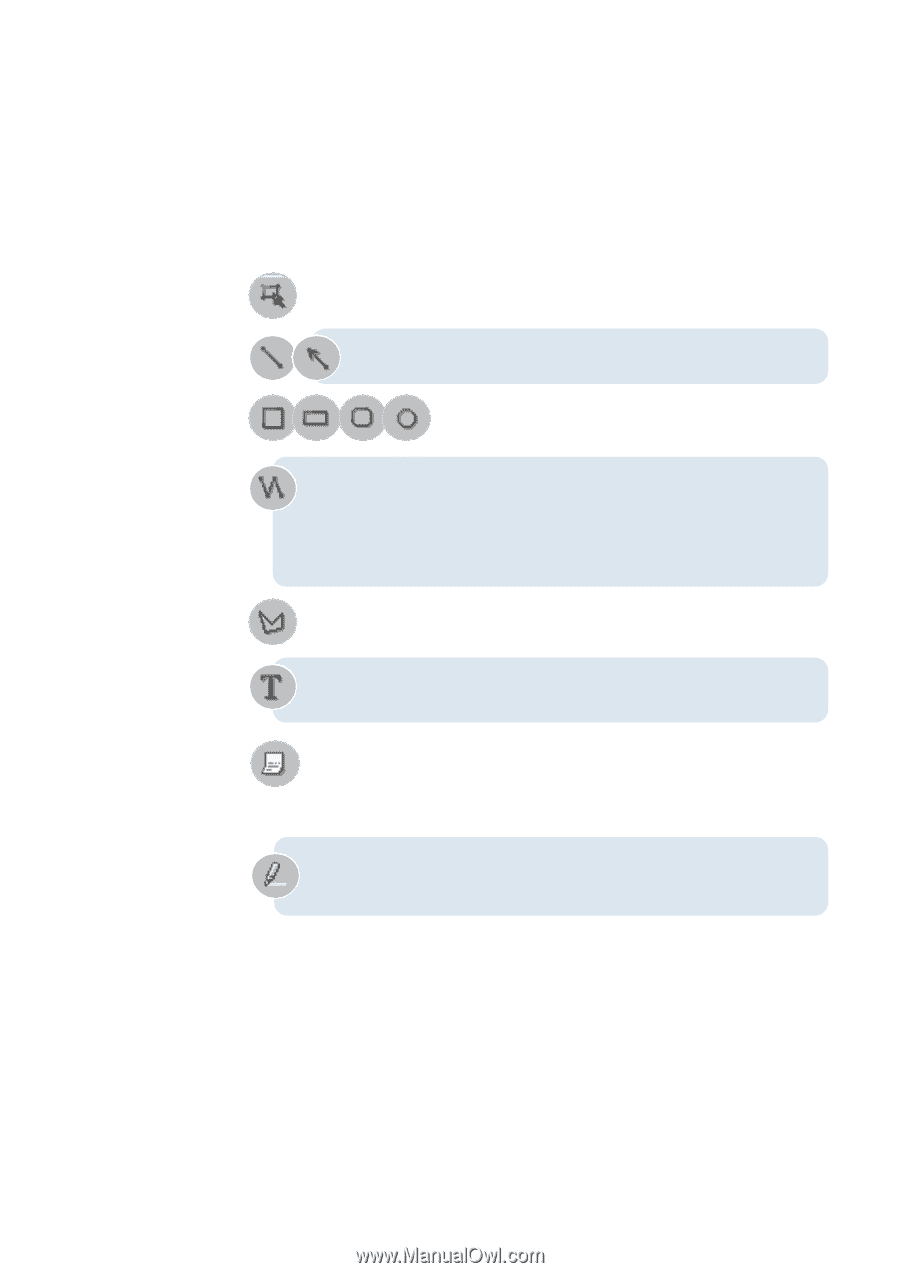
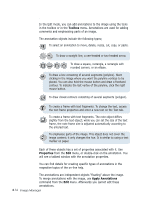
Working with Annotations In the Edit mode, you can add annotations to the image using the tools in the toolbox or in the Toolbox menu. Annotations are used for adding comments and emphasising parts of an image. The annotation objects include the following types; To select an annotation to move, delete, resize, cut, copy, or paste. To draw a straight line, a one-headed or two-headed arrow. To draw a square, rectangle, a rectangle with rounded corners, or an ellipse. To draw a line consisting of several segments (polyline). Start clicking in the image where you want the polyline vertices to be placed. You can also hold the mouse button and draw a freehand contour. To indicate the last vertex of the polyline, click the right mouse button. To draw closed contours consisting of several segments (polygon). To create a frame with text fragments. To change the text, access the text frame properties and enter a new text on the Text tab. To create a frame with text fragments. The note object differs slightly from the text object; while you can set the size of the text frame, the note frame size is adjusted automatically according to the entered text. To emphasise parts of the image. This object does not cover the image content; it only changes the hue. It is similar to using a text marker on paper. Each of these objects has a set of properties associated with it. Use Properties from the Edit menu, or double-click on the annotation. You will see a tabbed window with the annotation properties. You can find details for creating specific types of annotations in the respective topics of the on-line help. The annotations are independent objects "floating" above the image. To merge annotations with the image, use Apply Annotations command from the Edit menu. Afterwards you cannot edit these annotations. 3.12 Image Manager
-
 1
1 -
2
-
3
-
4
-
5
-
6
-
7
-
8
-
9
-
10
-
11
-
12
-
13
-
14
-
15
-
16
-
17
-
18
-
19
-
20
-
21
-
22
-
23
-
24
-
25
-
26
-
27
-
28
-
29
-
30
-
31
-
32
-
33
-
34
-
35
-
36
-
37
-
38
-
39
-
40
-
41
-
42
-
43
-
44
-
45
-
46
-
47
-
48
-
49
-
50
-
51
-
52
-
53
-
54
-
55
-
56
-
57
-
58
-
59
-
60
-
61
-
 62
62 -
 63
63 -
 64
64 -
 65
65 -
 66
66 -
 67
67 -
 68
68 -
 69
69 -
 70
70 -
 71
71 -
 72
72 -
73
-
74
-
75
-
76
-
77
-
78
-
79
-
80
-
81
-
82
-
83
-
84
-
85
-
86
-
87
-
88
-
89
-
90
-
91
-
92
-
93
-
94
-
95
-
96
-
97
-
98
-
99
-
100
-
101
-
102
-
103
-
104
-
105
-
106
-
107
-
108
-
109
-
110
-
111
-
112
-
113
-
114
-
115
-
116
-
117
-
118
-
119
-
120
-
121
-
122
-
123
-
124
-
125
-
126
-
127
-
128
-
129
-
130
-
131
-
132
-
133
-
134
-
135
-
136
-
137
-
138
-
139
-
140
-
141
-
142
-
143
-
144
-
145
-
146
-
147
-
148
-
149
-
150
-
151
-
152
-
153
-
154
-
155
-
156
-
157
-
158
-
159
-
160
-
161
-
162
-
163
-
164
-
165
 |
 |