Samsung SF-565PR Win 2000/xp/2003/vista/2008/win 7(32,64bit) ( 20.6 - Page 64
Foreground, Background, Color, They are always applied to the, entire image., Halftone, Grayscale
 |
UPC - 635753610277
View all Samsung SF-565PR manuals
Add to My Manuals
Save this manual to your list of manuals |
Page 64 highlights
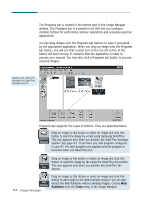
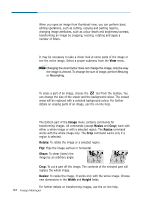
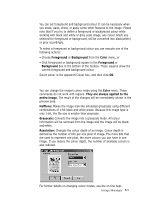
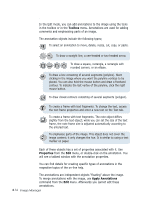
Choosing Foreground and Background Colour You can set foreground and background colour. It can be necessary when you erase, paint, shear, or apply some other features to the image. Please note that if you try to define a foreground or background colour while working with black and white or grey scale image, any colour which you selected for foreground or background, will be converted into black(white) or grey accordingly. To select a foreground or background colour you can execute one of the following actions: • Choose Foreground or Background from the Color menu, or • Click foreground or background square in the Foreground or Background box in the bottom of the toolbox. These squares show the current foreground and background colour. Select colour in the appeared Colour box, and then click OK. Changing Colour Mode You can change the image's colour mode using the Color menu. These commands do not work with regions. They are always applied to the entire image. The result of the changes will be immediately shown in the preview area. Halftone: Makes the image look like simulated greyscales using different combinations of 1-bit black and white pixels. Because this image type is only 1-bit, the file size is smaller than greyscale. Grayscale: Converts the image into a greyscale mode. All colour information will be removed from the image and the image will be blackand-white. Resolution: Changes the colour depth of an image. Colour depth is defined as the number of bits per one pixel of image. The more bits that are used to represent one pixel, the more colours you can have in one image. If you reduce the colour depth, the number of available colours is also reduced. For further details on changing colour modes, use the on-line help. Image Manager 3.9
-
 1
1 -
2
-
3
-
4
-
5
-
6
-
7
-
8
-
9
-
10
-
11
-
12
-
13
-
14
-
15
-
16
-
17
-
18
-
19
-
20
-
21
-
22
-
23
-
24
-
25
-
26
-
27
-
28
-
29
-
30
-
31
-
32
-
33
-
34
-
35
-
36
-
37
-
38
-
39
-
40
-
41
-
42
-
43
-
44
-
45
-
46
-
47
-
48
-
49
-
50
-
51
-
52
-
53
-
54
-
55
-
56
-
57
-
58
-
 59
59 -
 60
60 -
 61
61 -
 62
62 -
 63
63 -
 64
64 -
 65
65 -
 66
66 -
 67
67 -
 68
68 -
 69
69 -
70
-
71
-
72
-
73
-
74
-
75
-
76
-
77
-
78
-
79
-
80
-
81
-
82
-
83
-
84
-
85
-
86
-
87
-
88
-
89
-
90
-
91
-
92
-
93
-
94
-
95
-
96
-
97
-
98
-
99
-
100
-
101
-
102
-
103
-
104
-
105
-
106
-
107
-
108
-
109
-
110
-
111
-
112
-
113
-
114
-
115
-
116
-
117
-
118
-
119
-
120
-
121
-
122
-
123
-
124
-
125
-
126
-
127
-
128
-
129
-
130
-
131
-
132
-
133
-
134
-
135
-
136
-
137
-
138
-
139
-
140
-
141
-
142
-
143
-
144
-
145
-
146
-
147
-
148
-
149
-
150
-
151
-
152
-
153
-
154
-
155
-
156
-
157
-
158
-
159
-
160
-
161
-
162
-
163
-
164
-
165
 |
 |
