Yamaha DM2000 Owner's Manual - Page 109
Metering Aux Send Masters, Monitoring Aux Send Masters, Attenuating Aux Send Masters, EQ’ing Aux
 |
View all Yamaha DM2000 manuals
Add to My Manuals
Save this manual to your list of manuals |
Page 109 highlights
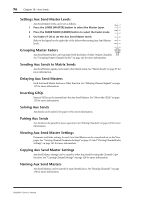
Metering Aux Send Masters 95 Metering Aux Send Masters Aux Send Master levels can be metered on the Meter pages. See "Metering" on page 103 for more information. Monitoring Aux Send Masters Aux Send Masters can be assigned to the CONTROL ROOM [ASSIGN 1] or [ASSIGN 2] button for monitoring. See "Control Room Monitoring" on page 132 for more information. Aux 11 and Aux 12 can be monitored via the STUDIO MONITOR OUT (see page 133). Attenuating Aux Send Masters Aux Send Master signals can be attenuated pre-EQ. See "Attenuating Signals" on page 106 for more information. EQ'ing Aux Send Masters Each Aux Send Master features 4-band parametric EQ. See "Using EQ" on page 107 for more information. Grouping Master EQs Aux Send Master EQs can be grouped with the EQs of other Output Channels. See "Grouping Output Channel EQs" on page 110 for more information. Aux Send Master Inserts Internal effects processors and external signal processors can be patched into the Aux Send Masters by using the Inserts. See "Using Inserts" on page 111 for more information. Compressing Aux Send Masters Signal dynamics can be controlled by using the Aux Send Master Compressors. See "Compressing Channels" on page 113 for more information. Grouping Master Compressors Aux Send Master Compressors can be grouped with the Compressors of other Output Channels. See "Grouping Output Channel Compressors" on page 116 for more information. Muting Aux Send Masters (ON/OFF) Aux Send Masters can be muted as follows. 1 Press the LAYER [MASTER] button to select the Master Layer. 2 Use channel strip [ON] buttons 9-20 to mute the Aux Send Masters. The [ON] button indicators of Aux Send Masters that are on light up. ON Grouping Master Mutes (ON/OFF) Aux Send Master Mutes can be grouped with the Mutes of other Output Channels. See "Grouping Output Channel Mutes (ON/OFF)" on page 123 for more information. DM2000-Owner's Manual
-
 1
1 -
2
-
3
-
4
-
5
-
6
-
7
-
8
-
9
-
10
-
11
-
12
-
13
-
14
-
15
-
16
-
17
-
18
-
19
-
20
-
21
-
22
-
23
-
24
-
25
-
26
-
27
-
28
-
29
-
30
-
31
-
32
-
33
-
34
-
35
-
36
-
37
-
38
-
39
-
40
-
41
-
42
-
43
-
44
-
45
-
46
-
47
-
48
-
49
-
50
-
51
-
52
-
53
-
54
-
55
-
56
-
57
-
58
-
59
-
60
-
61
-
62
-
63
-
64
-
65
-
66
-
67
-
68
-
69
-
70
-
71
-
72
-
73
-
74
-
75
-
76
-
77
-
78
-
79
-
80
-
81
-
82
-
83
-
84
-
85
-
86
-
87
-
88
-
89
-
90
-
91
-
92
-
93
-
94
-
95
-
96
-
97
-
98
-
99
-
100
-
101
-
102
-
103
-
 104
104 -
 105
105 -
 106
106 -
 107
107 -
 108
108 -
 109
109 -
 110
110 -
 111
111 -
 112
112 -
 113
113 -
 114
114 -
115
-
116
-
117
-
118
-
119
-
120
-
121
-
122
-
123
-
124
-
125
-
126
-
127
-
128
-
129
-
130
-
131
-
132
-
133
-
134
-
135
-
136
-
137
-
138
-
139
-
140
-
141
-
142
-
143
-
144
-
145
-
146
-
147
-
148
-
149
-
150
-
151
-
152
-
153
-
154
-
155
-
156
-
157
-
158
-
159
-
160
-
161
-
162
-
163
-
164
-
165
-
166
-
167
-
168
-
169
-
170
-
171
-
172
-
173
-
174
-
175
-
176
-
177
-
178
-
179
-
180
-
181
-
182
-
183
-
184
-
185
-
186
-
187
-
188
-
189
-
190
-
191
-
192
-
193
-
194
-
195
-
196
-
197
-
198
-
199
-
200
-
201
-
202
-
203
-
204
-
205
-
206
-
207
-
208
-
209
-
210
-
211
-
212
-
213
-
214
-
215
-
216
-
217
-
218
-
219
-
220
-
221
-
222
-
223
-
224
-
225
-
226
-
227
-
228
-
229
-
230
-
231
-
232
-
233
-
234
-
235
-
236
-
237
-
238
-
239
-
240
-
241
-
242
-
243
-
244
-
245
-
246
-
247
-
248
-
249
-
250
-
251
-
252
-
253
-
254
-
255
-
256
-
257
-
258
-
259
-
260
-
261
-
262
-
263
-
264
-
265
-
266
-
267
-
268
-
269
-
270
-
271
-
272
-
273
-
274
-
275
-
276
-
277
-
278
-
279
-
280
-
281
-
282
-
283
-
284
-
285
-
286
-
287
-
288
-
289
-
290
-
291
-
292
-
293
-
294
-
295
-
296
-
297
-
298
-
299
-
300
-
301
-
302
-
303
-
304
-
305
-
306
-
307
-
308
-
309
-
310
-
311
-
312
-
313
-
314
-
315
-
316
-
317
-
318
-
319
-
320
-
321
-
322
-
323
-
324
-
325
-
326
-
327
-
328
-
329
-
330
-
331
-
332
-
333
-
334
-
335
-
336
-
337
-
338
-
339
-
340
-
341
-
342
-
343
-
344
-
345
-
346
-
347
-
348
-
349
-
350
-
351
-
352
-
353
-
354
-
355
-
356
-
357
-
358
-
359
-
360
-
361
-
362
 |
 |