Yamaha DM2000 Owner's Manual - Page 205
Channel Strips, INSERT ASSIGN/EDIT, INSERT/PARAM Display, Encoder Display
 |
View all Yamaha DM2000 manuals
Add to My Manuals
Save this manual to your list of manuals |
Page 205 highlights
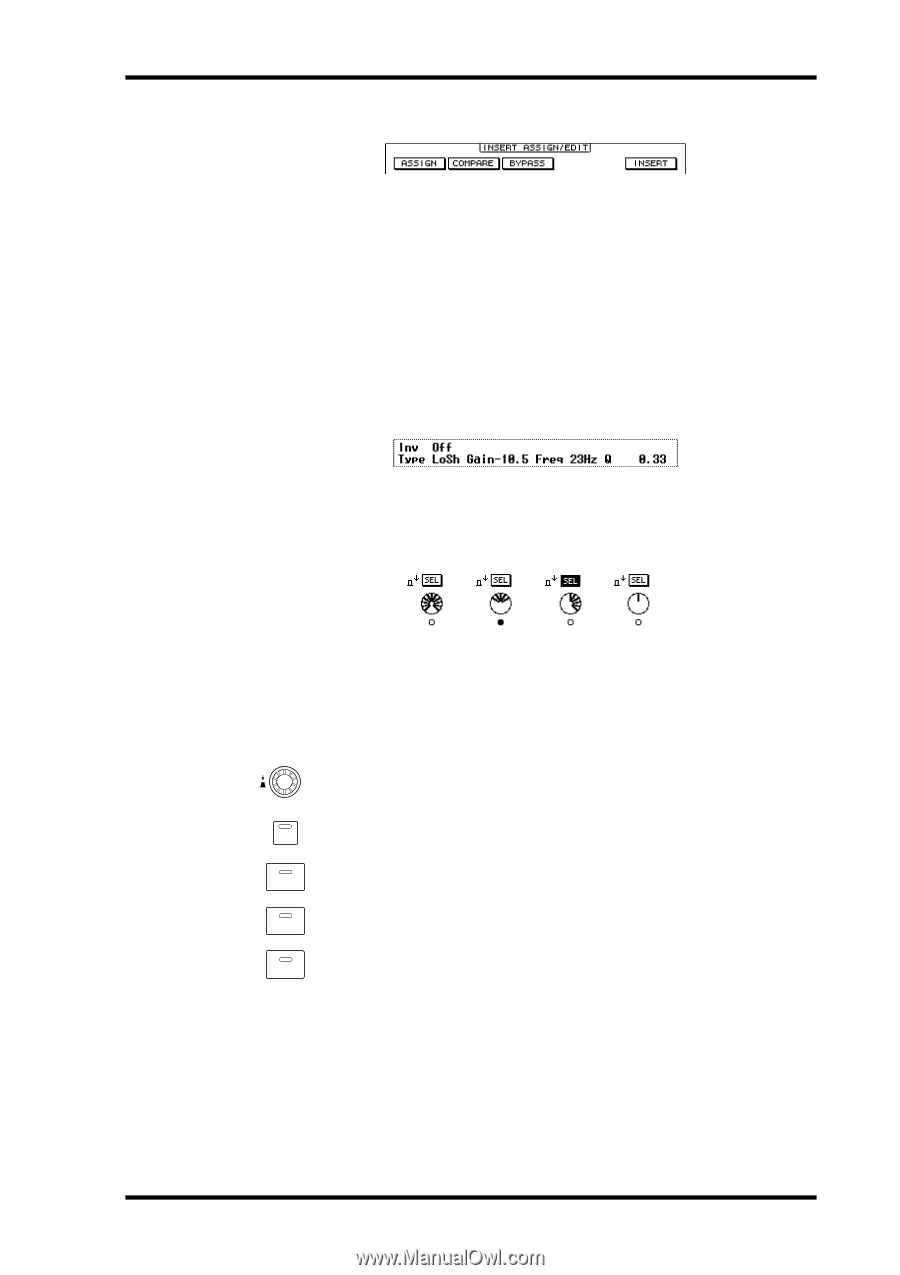
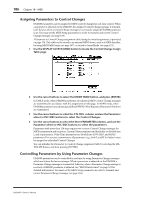
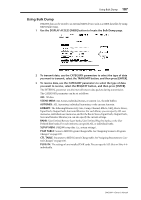
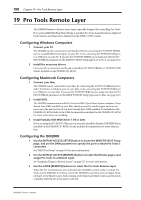
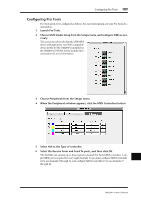
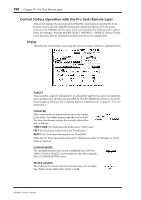
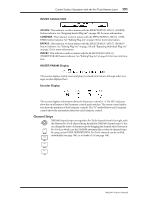
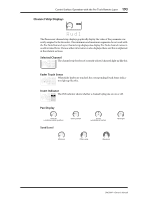
Control Surface Operation with the Pro Tools Remote Layer 191 INSERT ASSIGN/EDIT ASSIGN: This indicator works in unison with the EFFECTS/PLUG-INS [5] (ASSIGN) button indicator. See "Assigning Inserts/Plug-ins" on page 209 for more information. COMPARE: This indicator works in unison with the EFFECTS/PLUG-INS [6] (COMPARE) button indicator. See "Editing Plug-ins" on page 210 for more information. BYPASS: This indicator works in unison with the EFFECTS/PLUG-INS [7] (BYPASS) button indicator. See "Editing Plug-ins" on page 210 and "Bypassing Individual Plug-ins" on page 211 for more information. INSERT: This indicator works in unison with the EFFECTS/PLUG-INS [8] (INSERT/PARAM) button indicator. See "Editing Plug-ins" on page 210 for more information. INSERT/PARAM Display This section displays mainly insert and plug-in-related information, although other messages are also displayed here. Encoder Display This section displays information about the Parameter controls 1-4. The SEL indicators show the on/off status of the Parameter control push-switches. The rotary control indicators show the positions of the Parameter controls. The "O" symbol below each Parameter control shows the automation status for each Parameter control. Channel Strips DM2000 channel strips correspond to Pro Tools channels from left to right, with the leftmost Pro Tools channel being handled by DM2000 channel strip #1. You can change the order of channel strips by dragging the channel select buttons in Pro Tools, in which case the DM2000 automatically reorders its channel strips. AUTO By using certain USER DEFINED KEYS, Pro Tools channels can be scrolled individually (see page 198), or in banks of 24 (see page 198). SEL SOLO ON DM2000-Owner's Manual
-
 1
1 -
2
-
3
-
4
-
5
-
6
-
7
-
8
-
9
-
10
-
11
-
12
-
13
-
14
-
15
-
16
-
17
-
18
-
19
-
20
-
21
-
22
-
23
-
24
-
25
-
26
-
27
-
28
-
29
-
30
-
31
-
32
-
33
-
34
-
35
-
36
-
37
-
38
-
39
-
40
-
41
-
42
-
43
-
44
-
45
-
46
-
47
-
48
-
49
-
50
-
51
-
52
-
53
-
54
-
55
-
56
-
57
-
58
-
59
-
60
-
61
-
62
-
63
-
64
-
65
-
66
-
67
-
68
-
69
-
70
-
71
-
72
-
73
-
74
-
75
-
76
-
77
-
78
-
79
-
80
-
81
-
82
-
83
-
84
-
85
-
86
-
87
-
88
-
89
-
90
-
91
-
92
-
93
-
94
-
95
-
96
-
97
-
98
-
99
-
100
-
101
-
102
-
103
-
104
-
105
-
106
-
107
-
108
-
109
-
110
-
111
-
112
-
113
-
114
-
115
-
116
-
117
-
118
-
119
-
120
-
121
-
122
-
123
-
124
-
125
-
126
-
127
-
128
-
129
-
130
-
131
-
132
-
133
-
134
-
135
-
136
-
137
-
138
-
139
-
140
-
141
-
142
-
143
-
144
-
145
-
146
-
147
-
148
-
149
-
150
-
151
-
152
-
153
-
154
-
155
-
156
-
157
-
158
-
159
-
160
-
161
-
162
-
163
-
164
-
165
-
166
-
167
-
168
-
169
-
170
-
171
-
172
-
173
-
174
-
175
-
176
-
177
-
178
-
179
-
180
-
181
-
182
-
183
-
184
-
185
-
186
-
187
-
188
-
189
-
190
-
191
-
192
-
193
-
194
-
195
-
196
-
197
-
198
-
199
-
 200
200 -
 201
201 -
 202
202 -
 203
203 -
 204
204 -
 205
205 -
 206
206 -
 207
207 -
 208
208 -
 209
209 -
 210
210 -
211
-
212
-
213
-
214
-
215
-
216
-
217
-
218
-
219
-
220
-
221
-
222
-
223
-
224
-
225
-
226
-
227
-
228
-
229
-
230
-
231
-
232
-
233
-
234
-
235
-
236
-
237
-
238
-
239
-
240
-
241
-
242
-
243
-
244
-
245
-
246
-
247
-
248
-
249
-
250
-
251
-
252
-
253
-
254
-
255
-
256
-
257
-
258
-
259
-
260
-
261
-
262
-
263
-
264
-
265
-
266
-
267
-
268
-
269
-
270
-
271
-
272
-
273
-
274
-
275
-
276
-
277
-
278
-
279
-
280
-
281
-
282
-
283
-
284
-
285
-
286
-
287
-
288
-
289
-
290
-
291
-
292
-
293
-
294
-
295
-
296
-
297
-
298
-
299
-
300
-
301
-
302
-
303
-
304
-
305
-
306
-
307
-
308
-
309
-
310
-
311
-
312
-
313
-
314
-
315
-
316
-
317
-
318
-
319
-
320
-
321
-
322
-
323
-
324
-
325
-
326
-
327
-
328
-
329
-
330
-
331
-
332
-
333
-
334
-
335
-
336
-
337
-
338
-
339
-
340
-
341
-
342
-
343
-
344
-
345
-
346
-
347
-
348
-
349
-
350
-
351
-
352
-
353
-
354
-
355
-
356
-
357
-
358
-
359
-
360
-
361
-
362
 |
 |