Yamaha DM2000 Owner's Manual - Page 236
Using Shuttle & Scrub, Using the Locator, LOCATE MEMORY [1-8] buttons, AUDITION] button
 |
View all Yamaha DM2000 manuals
Add to My Manuals
Save this manual to your list of manuals |
Page 236 highlights
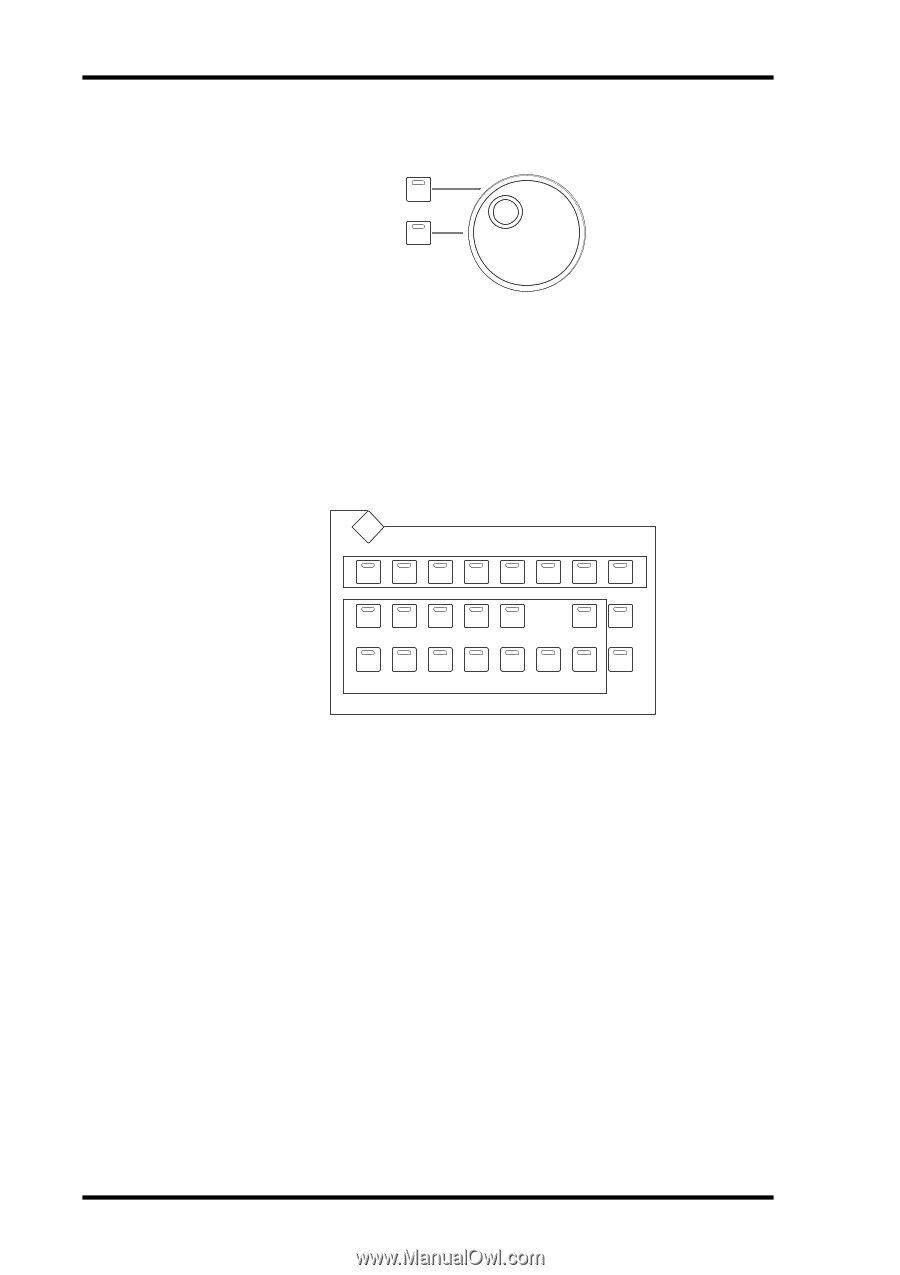
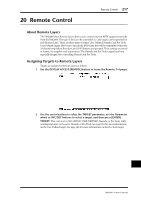
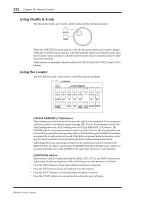
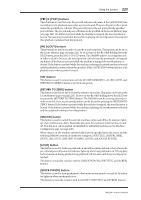
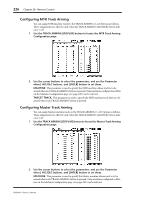
222 Chapter 20-Remote Control Using Shuttle & Scrub The Parameter wheel can be used to shuttle and scrub the external machines. SHUTTLE SCRUB When the [SHUTTLE] button indicator is lit, the Parameter wheel can be used to shuttle. When the [SCRUB] button indicator is lit, the Parameter wheel can be used to scrub. Turn the Parameter wheel clockwise to shuttle/scrub forwards. Turn it counterclockwise to shuttle/scrub backwards. These buttons are mutually exclusive with the LOCATOR [QUICK PUNCH] and [LOOP] buttons. Using the Locator The LOCATOR section can be used to control the external machines. LOCATOR DISPLAY LOCATE MEMORY 1 2 3 4 5 6 7 8 AUDITION PRE IN OUT POST SET MTR RETURN TO ZERO ONLINE LOOP QUICK ROLL REHEARSAL MASTER PUNCH BACK LOCATE MEMORY [1-8] buttons These buttons are used to set and to locate to the eight Locate memories. Locate memories can be set on the Locate Memory page (see page 224). To set a locate memory on-the-fly, while holding down the [SET] button, press a LOCATE MEMORY [1-8] button. The DM2000 must be receiving timecode in order to do this. Once set, the stored position can be located by pressing the corresponding button. If the button is pressed while the machine is stopped, the stored position is located. If the button is pressed while the machine is playing, the stored position is located and then playback continues from that position. When using P2, locate operations are based on the control information received at the REMOTE port. In order to synchronize the MB2000 Peak Meter Bridge's time counter, it's recommended that you set the DM2000 to the same timecode source as the machine. [AUDITION] button This button is used in conjunction with the [PRE], [IN], [OUT], and [POST] buttons for auditioning. Its indicator lights up while auditioning is on and operation is as follows: • Press the [PRE] button to locate and audition from the pre-roll point. • Press the [IN] button to locate and audition from the in point. • Press the [OUT] button to locate and audition from the out point. • Press the [POST] button to locate and audition from the post-roll point. DM2000-Owner's Manual
-
 1
1 -
2
-
3
-
4
-
5
-
6
-
7
-
8
-
9
-
10
-
11
-
12
-
13
-
14
-
15
-
16
-
17
-
18
-
19
-
20
-
21
-
22
-
23
-
24
-
25
-
26
-
27
-
28
-
29
-
30
-
31
-
32
-
33
-
34
-
35
-
36
-
37
-
38
-
39
-
40
-
41
-
42
-
43
-
44
-
45
-
46
-
47
-
48
-
49
-
50
-
51
-
52
-
53
-
54
-
55
-
56
-
57
-
58
-
59
-
60
-
61
-
62
-
63
-
64
-
65
-
66
-
67
-
68
-
69
-
70
-
71
-
72
-
73
-
74
-
75
-
76
-
77
-
78
-
79
-
80
-
81
-
82
-
83
-
84
-
85
-
86
-
87
-
88
-
89
-
90
-
91
-
92
-
93
-
94
-
95
-
96
-
97
-
98
-
99
-
100
-
101
-
102
-
103
-
104
-
105
-
106
-
107
-
108
-
109
-
110
-
111
-
112
-
113
-
114
-
115
-
116
-
117
-
118
-
119
-
120
-
121
-
122
-
123
-
124
-
125
-
126
-
127
-
128
-
129
-
130
-
131
-
132
-
133
-
134
-
135
-
136
-
137
-
138
-
139
-
140
-
141
-
142
-
143
-
144
-
145
-
146
-
147
-
148
-
149
-
150
-
151
-
152
-
153
-
154
-
155
-
156
-
157
-
158
-
159
-
160
-
161
-
162
-
163
-
164
-
165
-
166
-
167
-
168
-
169
-
170
-
171
-
172
-
173
-
174
-
175
-
176
-
177
-
178
-
179
-
180
-
181
-
182
-
183
-
184
-
185
-
186
-
187
-
188
-
189
-
190
-
191
-
192
-
193
-
194
-
195
-
196
-
197
-
198
-
199
-
200
-
201
-
202
-
203
-
204
-
205
-
206
-
207
-
208
-
209
-
210
-
211
-
212
-
213
-
214
-
215
-
216
-
217
-
218
-
219
-
220
-
221
-
222
-
223
-
224
-
225
-
226
-
227
-
228
-
229
-
230
-
 231
231 -
 232
232 -
 233
233 -
 234
234 -
 235
235 -
 236
236 -
 237
237 -
 238
238 -
 239
239 -
 240
240 -
 241
241 -
242
-
243
-
244
-
245
-
246
-
247
-
248
-
249
-
250
-
251
-
252
-
253
-
254
-
255
-
256
-
257
-
258
-
259
-
260
-
261
-
262
-
263
-
264
-
265
-
266
-
267
-
268
-
269
-
270
-
271
-
272
-
273
-
274
-
275
-
276
-
277
-
278
-
279
-
280
-
281
-
282
-
283
-
284
-
285
-
286
-
287
-
288
-
289
-
290
-
291
-
292
-
293
-
294
-
295
-
296
-
297
-
298
-
299
-
300
-
301
-
302
-
303
-
304
-
305
-
306
-
307
-
308
-
309
-
310
-
311
-
312
-
313
-
314
-
315
-
316
-
317
-
318
-
319
-
320
-
321
-
322
-
323
-
324
-
325
-
326
-
327
-
328
-
329
-
330
-
331
-
332
-
333
-
334
-
335
-
336
-
337
-
338
-
339
-
340
-
341
-
342
-
343
-
344
-
345
-
346
-
347
-
348
-
349
-
350
-
351
-
352
-
353
-
354
-
355
-
356
-
357
-
358
-
359
-
360
-
361
-
362
 |
 |