Yamaha DM2000 Owner's Manual - Page 37
Data Entry & Transport - history
 |
View all Yamaha DM2000 manuals
Add to My Manuals
Save this manual to your list of manuals |
Page 37 highlights
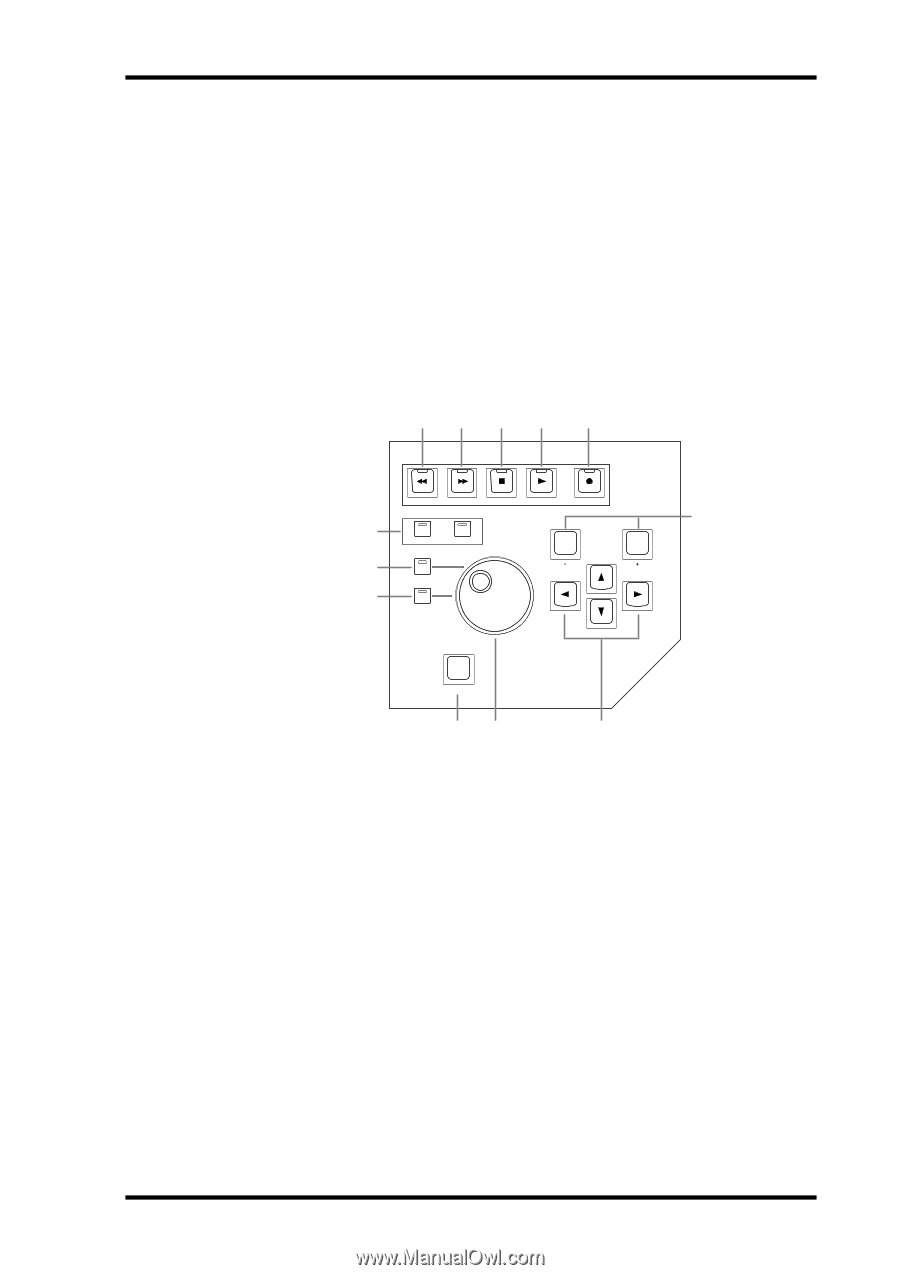
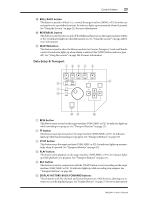
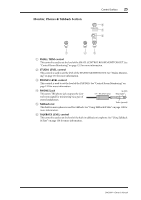
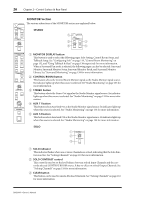
Control Surface 23 O ROLL BACK button This button is used to roll back (i.e., rewind) the target machine (MMC or P2) from the current position by a predefined amount. Its indicator lights up momentarily when it's pressed. See "Using the Locator" on page 222 for more information. P REHEARSAL button This button is used to turn on and off the Rehearsal function on the target machine (MMC or P2). Its indicator lights up when Rehearsal is on. See "Using the Locator" on page 222 for more information. Q MASTER button This button is used to select the Master machine for Locator, Transport, Scrub, and Shuttle control. Its indicator lights up when Master is selected (the [MTR] button indicator goes off). See "Using the Locator" on page 222 for more information. Data Entry & Transport 1234 5 6 REW FF DISPLAY HISTORY STOP BACK FORWARD PLAY REC 7 8 SHUTTLE SCRUB DEC INC 9 ENTER JK L A REW button This button starts rewind on the target machine (DAW, MMC or P2). Its indicator lights up while rewinding is in progress. See "Transport Buttons" on page 221. B FF button This button starts fast forward on the target machine (DAW, MMC or P2). Its indicator lights up while fast forwarding is in progress. See "Transport Buttons" on page 221. C STOP button This button stops the target machine (DAW, MMC or P2). Its indicator lights up momentarily when it's pressed. See "Transport Buttons" on page 221. D PLAY button This button starts playback on the target machine (DAW, MMC or P2). Its indicator lights up while playback is in progress. See "Transport Buttons" on page 221. E REC button This button is used in conjunction with the [PLAY] button to start recording on the target machine (DAW, MMC or P2). Its indicator lights up while recording is in progress. See "Transport Buttons" on page 221. F DISPLAY HISTORY BACK/FORWARD buttons These buttons work like the back and forward buttons on a Web browser, allowing you to return to recently displayed pages. See "Display History" on page 37 for more information. DM2000-Owner's Manual
-
 1
1 -
2
-
3
-
4
-
5
-
6
-
7
-
8
-
9
-
10
-
11
-
12
-
13
-
14
-
15
-
16
-
17
-
18
-
19
-
20
-
21
-
22
-
23
-
24
-
25
-
26
-
27
-
28
-
29
-
30
-
31
-
 32
32 -
 33
33 -
 34
34 -
 35
35 -
 36
36 -
 37
37 -
 38
38 -
 39
39 -
 40
40 -
 41
41 -
 42
42 -
43
-
44
-
45
-
46
-
47
-
48
-
49
-
50
-
51
-
52
-
53
-
54
-
55
-
56
-
57
-
58
-
59
-
60
-
61
-
62
-
63
-
64
-
65
-
66
-
67
-
68
-
69
-
70
-
71
-
72
-
73
-
74
-
75
-
76
-
77
-
78
-
79
-
80
-
81
-
82
-
83
-
84
-
85
-
86
-
87
-
88
-
89
-
90
-
91
-
92
-
93
-
94
-
95
-
96
-
97
-
98
-
99
-
100
-
101
-
102
-
103
-
104
-
105
-
106
-
107
-
108
-
109
-
110
-
111
-
112
-
113
-
114
-
115
-
116
-
117
-
118
-
119
-
120
-
121
-
122
-
123
-
124
-
125
-
126
-
127
-
128
-
129
-
130
-
131
-
132
-
133
-
134
-
135
-
136
-
137
-
138
-
139
-
140
-
141
-
142
-
143
-
144
-
145
-
146
-
147
-
148
-
149
-
150
-
151
-
152
-
153
-
154
-
155
-
156
-
157
-
158
-
159
-
160
-
161
-
162
-
163
-
164
-
165
-
166
-
167
-
168
-
169
-
170
-
171
-
172
-
173
-
174
-
175
-
176
-
177
-
178
-
179
-
180
-
181
-
182
-
183
-
184
-
185
-
186
-
187
-
188
-
189
-
190
-
191
-
192
-
193
-
194
-
195
-
196
-
197
-
198
-
199
-
200
-
201
-
202
-
203
-
204
-
205
-
206
-
207
-
208
-
209
-
210
-
211
-
212
-
213
-
214
-
215
-
216
-
217
-
218
-
219
-
220
-
221
-
222
-
223
-
224
-
225
-
226
-
227
-
228
-
229
-
230
-
231
-
232
-
233
-
234
-
235
-
236
-
237
-
238
-
239
-
240
-
241
-
242
-
243
-
244
-
245
-
246
-
247
-
248
-
249
-
250
-
251
-
252
-
253
-
254
-
255
-
256
-
257
-
258
-
259
-
260
-
261
-
262
-
263
-
264
-
265
-
266
-
267
-
268
-
269
-
270
-
271
-
272
-
273
-
274
-
275
-
276
-
277
-
278
-
279
-
280
-
281
-
282
-
283
-
284
-
285
-
286
-
287
-
288
-
289
-
290
-
291
-
292
-
293
-
294
-
295
-
296
-
297
-
298
-
299
-
300
-
301
-
302
-
303
-
304
-
305
-
306
-
307
-
308
-
309
-
310
-
311
-
312
-
313
-
314
-
315
-
316
-
317
-
318
-
319
-
320
-
321
-
322
-
323
-
324
-
325
-
326
-
327
-
328
-
329
-
330
-
331
-
332
-
333
-
334
-
335
-
336
-
337
-
338
-
339
-
340
-
341
-
342
-
343
-
344
-
345
-
346
-
347
-
348
-
349
-
350
-
351
-
352
-
353
-
354
-
355
-
356
-
357
-
358
-
359
-
360
-
361
-
362
 |
 |