Yamaha DM2000 Owner's Manual - Page 183
Channel Strip [AUTO] Buttons, Automix Memory FADER], [ON], [PAN], [SURROUND], [AUX]
 |
View all Yamaha DM2000 manuals
Add to My Manuals
Save this manual to your list of manuals |
Page 183 highlights
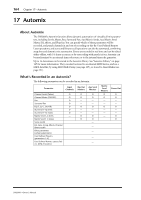
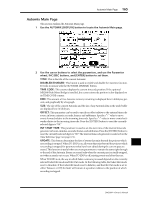
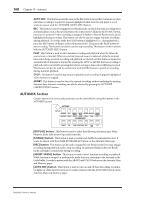
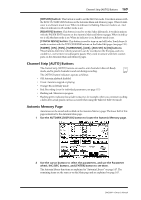
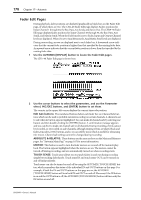
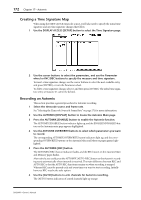
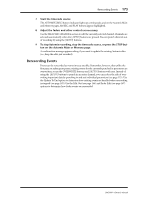
Channel Strip [AUTO] Buttons 169 [RETURN] button: This button is used to set the Edit Out mode. It works in unison with the EDIT OUT RETURN buttons on the Automix Main and Memory pages. When its indicator is on, Return mode is set. When its indicator is flashing, Takeover mode is set. And when its indicator is off, neither mode is set. [RELATIVE] button: This button is used to set the Fader Edit mode. It works in unison with the FADER EDIT buttons on the Automix Main and Memory pages. When its indicator is off, Absolute mode is set. When its indicator is on, Relative mode is set. [TOUCH SENSE] button: This button is used to turn on and off Fader Touch Sense. It works in unison with the TOUCH SENSE buttons on the Fader Edit pages (see page 170). [FADER], [ON], [PAN], [SURROUND], [AUX], [AUX ON] & [EQ] buttons: These buttons determine which parameters can be recorded on the first pass, and rerecorded (i.e., overwritten) on subsequent passes. They work in unison with their counterparts on the Automix Main and Memory pages. Channel Strip [AUTO] Buttons The channel strip [AUTO] buttons are used to arm channels in Record-Ready mode, and to punch channels in and out during recording. AUTO The [AUTO] button indicators operate as follows: • Off: Automix playback disabled • Green: Automix stopped or playing • Orange: Record-Ready mode • Red: Recording (even for individual parameters, see page 175) • Flashing red: Takeover in progress • Flashing green: indicates that a fader is inactive, for example, when you continue touching a fader after actual punch out has occurred when using the Takeover Edit Out mode. Automix Memory Page Automixes can be stored and recalled on the Automix Memory page. The lower half of this page is identical to the Automix Main page. 1 Use the AUTOMIX [DISPLAY] button to locate the Automix Memory page. 2 Use the cursor buttons to select the parameters, and use the Parameter wheel, INC/DEC buttons, and [ENTER] button to set them. The Automix library functions are explained in "Automix Library" on page 147. The remaining items are the same as on the Main page and are explained on page 165. DM2000-Owner's Manual
-
 1
1 -
2
-
3
-
4
-
5
-
6
-
7
-
8
-
9
-
10
-
11
-
12
-
13
-
14
-
15
-
16
-
17
-
18
-
19
-
20
-
21
-
22
-
23
-
24
-
25
-
26
-
27
-
28
-
29
-
30
-
31
-
32
-
33
-
34
-
35
-
36
-
37
-
38
-
39
-
40
-
41
-
42
-
43
-
44
-
45
-
46
-
47
-
48
-
49
-
50
-
51
-
52
-
53
-
54
-
55
-
56
-
57
-
58
-
59
-
60
-
61
-
62
-
63
-
64
-
65
-
66
-
67
-
68
-
69
-
70
-
71
-
72
-
73
-
74
-
75
-
76
-
77
-
78
-
79
-
80
-
81
-
82
-
83
-
84
-
85
-
86
-
87
-
88
-
89
-
90
-
91
-
92
-
93
-
94
-
95
-
96
-
97
-
98
-
99
-
100
-
101
-
102
-
103
-
104
-
105
-
106
-
107
-
108
-
109
-
110
-
111
-
112
-
113
-
114
-
115
-
116
-
117
-
118
-
119
-
120
-
121
-
122
-
123
-
124
-
125
-
126
-
127
-
128
-
129
-
130
-
131
-
132
-
133
-
134
-
135
-
136
-
137
-
138
-
139
-
140
-
141
-
142
-
143
-
144
-
145
-
146
-
147
-
148
-
149
-
150
-
151
-
152
-
153
-
154
-
155
-
156
-
157
-
158
-
159
-
160
-
161
-
162
-
163
-
164
-
165
-
166
-
167
-
168
-
169
-
170
-
171
-
172
-
173
-
174
-
175
-
176
-
177
-
 178
178 -
 179
179 -
 180
180 -
 181
181 -
 182
182 -
 183
183 -
 184
184 -
 185
185 -
 186
186 -
 187
187 -
 188
188 -
189
-
190
-
191
-
192
-
193
-
194
-
195
-
196
-
197
-
198
-
199
-
200
-
201
-
202
-
203
-
204
-
205
-
206
-
207
-
208
-
209
-
210
-
211
-
212
-
213
-
214
-
215
-
216
-
217
-
218
-
219
-
220
-
221
-
222
-
223
-
224
-
225
-
226
-
227
-
228
-
229
-
230
-
231
-
232
-
233
-
234
-
235
-
236
-
237
-
238
-
239
-
240
-
241
-
242
-
243
-
244
-
245
-
246
-
247
-
248
-
249
-
250
-
251
-
252
-
253
-
254
-
255
-
256
-
257
-
258
-
259
-
260
-
261
-
262
-
263
-
264
-
265
-
266
-
267
-
268
-
269
-
270
-
271
-
272
-
273
-
274
-
275
-
276
-
277
-
278
-
279
-
280
-
281
-
282
-
283
-
284
-
285
-
286
-
287
-
288
-
289
-
290
-
291
-
292
-
293
-
294
-
295
-
296
-
297
-
298
-
299
-
300
-
301
-
302
-
303
-
304
-
305
-
306
-
307
-
308
-
309
-
310
-
311
-
312
-
313
-
314
-
315
-
316
-
317
-
318
-
319
-
320
-
321
-
322
-
323
-
324
-
325
-
326
-
327
-
328
-
329
-
330
-
331
-
332
-
333
-
334
-
335
-
336
-
337
-
338
-
339
-
340
-
341
-
342
-
343
-
344
-
345
-
346
-
347
-
348
-
349
-
350
-
351
-
352
-
353
-
354
-
355
-
356
-
357
-
358
-
359
-
360
-
361
-
362
 |
 |
