HP 8550dn HP Color LaserJet 8550, 8550N, 8550DN, 8550GN, 8550MFP Printer - Use - Page 119
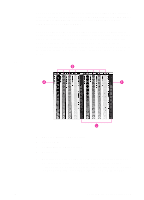
Adjusting the Color Balance - density sensor
 |
UPC - 088698946428
View all HP 8550dn manuals
Add to My Manuals
Save this manual to your list of manuals |
Page 119 highlights
Adjusting the Color Balance CAUTION Adjusting the color balance will change the printer's calibration. Because this procedure adjusts parameters within the printer hardware, it will affect all print jobs. Check with your system administrator before making any changes to the color balance. The printer automatically recalibrates the color settings. However, you can adjust the color manually from the default settings by changing the densities of the four toners (black, cyan, magenta, and yellow). Changing the Detail Halftone Adjust and Smooth Halftone Adjust allow you to independently adjust the color of objects on a page that use the smooth and detail halftones (such as text and graphics). Any settings you change remain in effect until you change them again or restore the factory defaults. Do not perform the color balance adjustment procedure until all of the following troubleshooting methods have been completed: z Experiment with the printer driver and application settings to adjust the color output. For more information on application settings, see the previous sections on printer driver settings in this chapter or the online help. z Clean the density sensor in the printer. For more information, see "Cleaning the Density Sensor" in chapter 8. z Complete the troubleshooting solutions in chapter 8 for the color printing problem you are experiencing. To adjust the color balance 1 Print the color adjust page. a Press MENU until COLOR ADJUST MENU appears on the printer control panel display. b Press ITEM until PRINT TEST PAGE appears on the display. c Press SELECT to print the color adjust page. d Press GO to exit the color adjust menu. 118 5 Using Color EN
-
 1
1 -
2
-
3
-
4
-
5
-
6
-
7
-
8
-
9
-
10
-
11
-
12
-
13
-
14
-
15
-
16
-
17
-
18
-
19
-
20
-
21
-
22
-
23
-
24
-
25
-
26
-
27
-
28
-
29
-
30
-
31
-
32
-
33
-
34
-
35
-
36
-
37
-
38
-
39
-
40
-
41
-
42
-
43
-
44
-
45
-
46
-
47
-
48
-
49
-
50
-
51
-
52
-
53
-
54
-
55
-
56
-
57
-
58
-
59
-
60
-
61
-
62
-
63
-
64
-
65
-
66
-
67
-
68
-
69
-
70
-
71
-
72
-
73
-
74
-
75
-
76
-
77
-
78
-
79
-
80
-
81
-
82
-
83
-
84
-
85
-
86
-
87
-
88
-
89
-
90
-
91
-
92
-
93
-
94
-
95
-
96
-
97
-
98
-
99
-
100
-
101
-
102
-
103
-
104
-
105
-
106
-
107
-
108
-
109
-
110
-
111
-
112
-
113
-
 114
114 -
 115
115 -
 116
116 -
 117
117 -
 118
118 -
 119
119 -
 120
120 -
 121
121 -
 122
122 -
 123
123 -
 124
124 -
125
-
126
-
127
-
128
-
129
-
130
-
131
-
132
-
133
-
134
-
135
-
136
-
137
-
138
-
139
-
140
-
141
-
142
-
143
-
144
-
145
-
146
-
147
-
148
-
149
-
150
-
151
-
152
-
153
-
154
-
155
-
156
-
157
-
158
-
159
-
160
-
161
-
162
-
163
-
164
-
165
-
166
-
167
-
168
-
169
-
170
-
171
-
172
-
173
-
174
-
175
-
176
-
177
-
178
-
179
-
180
-
181
-
182
-
183
-
184
-
185
-
186
-
187
-
188
-
189
-
190
-
191
-
192
-
193
-
194
-
195
-
196
-
197
-
198
-
199
-
200
-
201
-
202
-
203
-
204
-
205
-
206
-
207
-
208
-
209
-
210
-
211
-
212
-
213
-
214
-
215
-
216
-
217
-
218
-
219
-
220
-
221
-
222
-
223
-
224
-
225
-
226
-
227
-
228
-
229
-
230
-
231
-
232
-
233
-
234
-
235
-
236
-
237
-
238
-
239
-
240
-
241
-
242
 |
 |