HP 8550dn HP Color LaserJet 8550, 8550N, 8550DN, 8550GN, 8550MFP Printer - Use - Page 40
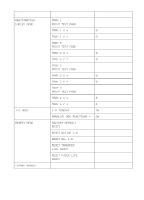
Auto Continue, Tray 1 Auto, If in the Configuration Menu
 |
UPC - 088698946428
View all HP 8550dn manuals
Add to My Manuals
Save this manual to your list of manuals |
Page 40 highlights
Note Auto Continue The Auto Continue feature allows the printer to continue printing when certain warnings or conditions occur (such as TONER LOW). The printer message will be displayed on the printer control panel, but the printer will continue printing. Auto Continue is always on, and most printer control panel messages that do not disable the printer will not stop subsequent jobs from printing. However, the job where the error occurred might not print correctly. If in the Configuration Menu CLEARABLE WARNINGS is set to ON, many printer control panel messages can be cleared by pressing GO. If CLEARABLE WARNINGS is set to JOB, the clearable messages will be cleared from the display automatically when the job where the error occurred finishes printing. Tray 1 Auto From the control panel, you can also set the media size and type for tray 1 to AUTO. The printer tries to match the media size and/or type specified for the current print job in the print driver to the settings in the control panel and prints from tray 1 if it can. For example, if you set the media size and type for tray 1 to AUTO in the control panel, load letter-size transparencies into tray 1, and send a job to the printer specifying plain Letter in the print driver, the printer prints from tray 1 even if other trays are configured for plain Letter. You can use the AUTO setting to override the printer's tray selection process, forcing the printer to print from tray 1 regardless of the media size and/or type specified in the print driver or loaded in tray 1. Although tray 1 does not fully sense the media size, the printer will not print on media that it senses is the wrong width. EN Changing Settings in the Printer Control Panel 39
-
 1
1 -
2
-
3
-
4
-
5
-
6
-
7
-
8
-
9
-
10
-
11
-
12
-
13
-
14
-
15
-
16
-
17
-
18
-
19
-
20
-
21
-
22
-
23
-
24
-
25
-
26
-
27
-
28
-
29
-
30
-
31
-
32
-
33
-
34
-
 35
35 -
 36
36 -
 37
37 -
 38
38 -
 39
39 -
 40
40 -
 41
41 -
 42
42 -
 43
43 -
 44
44 -
 45
45 -
46
-
47
-
48
-
49
-
50
-
51
-
52
-
53
-
54
-
55
-
56
-
57
-
58
-
59
-
60
-
61
-
62
-
63
-
64
-
65
-
66
-
67
-
68
-
69
-
70
-
71
-
72
-
73
-
74
-
75
-
76
-
77
-
78
-
79
-
80
-
81
-
82
-
83
-
84
-
85
-
86
-
87
-
88
-
89
-
90
-
91
-
92
-
93
-
94
-
95
-
96
-
97
-
98
-
99
-
100
-
101
-
102
-
103
-
104
-
105
-
106
-
107
-
108
-
109
-
110
-
111
-
112
-
113
-
114
-
115
-
116
-
117
-
118
-
119
-
120
-
121
-
122
-
123
-
124
-
125
-
126
-
127
-
128
-
129
-
130
-
131
-
132
-
133
-
134
-
135
-
136
-
137
-
138
-
139
-
140
-
141
-
142
-
143
-
144
-
145
-
146
-
147
-
148
-
149
-
150
-
151
-
152
-
153
-
154
-
155
-
156
-
157
-
158
-
159
-
160
-
161
-
162
-
163
-
164
-
165
-
166
-
167
-
168
-
169
-
170
-
171
-
172
-
173
-
174
-
175
-
176
-
177
-
178
-
179
-
180
-
181
-
182
-
183
-
184
-
185
-
186
-
187
-
188
-
189
-
190
-
191
-
192
-
193
-
194
-
195
-
196
-
197
-
198
-
199
-
200
-
201
-
202
-
203
-
204
-
205
-
206
-
207
-
208
-
209
-
210
-
211
-
212
-
213
-
214
-
215
-
216
-
217
-
218
-
219
-
220
-
221
-
222
-
223
-
224
-
225
-
226
-
227
-
228
-
229
-
230
-
231
-
232
-
233
-
234
-
235
-
236
-
237
-
238
-
239
-
240
-
241
-
242
 |
 |
