HP 8550dn HP Color LaserJet 8550, 8550N, 8550DN, 8550GN, 8550MFP Printer - Use - Page 196
Supported Media, Weights and Sizes for Input Trays, Cleaning the, Transfer Drum
 |
UPC - 088698946428
View all HP 8550dn manuals
Add to My Manuals
Save this manual to your list of manuals |
Page 196 highlights
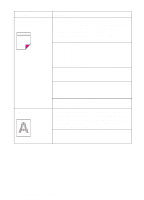
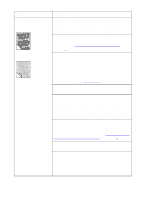
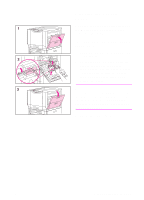
Problem Cause and Solution Smudges The printer recently had a media jam. Open and close the front door to complete a printer self-cleaning cycle. You recently changed to a different media size. Open and close the front door to complete a printer self-cleaning cycle. If the previous page printed was a prepunched media and there was an image in the location of the prepunched holes, then this toner is deposited on the back of the next page printed. Open and close the front door to complete a printer self-cleaning cycle. There might be an undetected jam in the printer. Open and close the front door to allow the printer to clear the jam. If the problem persists, remove the transfer drum. Look between the drum surface and the drum handles for a piece of media. Remove any media, and then reinstall the transfer drum. Uneven dark areas or lines in solid fill areas on transparencies You are using a transparency that is outside the specifications for this printer. Use HP brand transparencies to produce the best image quality for the printer. For media specifications, see "Supported Media Weights and Sizes for Input Trays" in chapter 3. Repetitive defects The printer should be cleaned. Open and shut the front door of the printer to complete a printer self-cleaning cycle. If the problem persists, see "Cleaning the Transfer Drum" later in this chapter. If the previous page printed was a prepunched media and there was an image in the location of the prepunched holes, then toner will be deposited on the back of the next page printed. Open and close the front door to complete a printer self-cleaning cycle. EN Print Quality Problems 195
-
 1
1 -
2
-
3
-
4
-
5
-
6
-
7
-
8
-
9
-
10
-
11
-
12
-
13
-
14
-
15
-
16
-
17
-
18
-
19
-
20
-
21
-
22
-
23
-
24
-
25
-
26
-
27
-
28
-
29
-
30
-
31
-
32
-
33
-
34
-
35
-
36
-
37
-
38
-
39
-
40
-
41
-
42
-
43
-
44
-
45
-
46
-
47
-
48
-
49
-
50
-
51
-
52
-
53
-
54
-
55
-
56
-
57
-
58
-
59
-
60
-
61
-
62
-
63
-
64
-
65
-
66
-
67
-
68
-
69
-
70
-
71
-
72
-
73
-
74
-
75
-
76
-
77
-
78
-
79
-
80
-
81
-
82
-
83
-
84
-
85
-
86
-
87
-
88
-
89
-
90
-
91
-
92
-
93
-
94
-
95
-
96
-
97
-
98
-
99
-
100
-
101
-
102
-
103
-
104
-
105
-
106
-
107
-
108
-
109
-
110
-
111
-
112
-
113
-
114
-
115
-
116
-
117
-
118
-
119
-
120
-
121
-
122
-
123
-
124
-
125
-
126
-
127
-
128
-
129
-
130
-
131
-
132
-
133
-
134
-
135
-
136
-
137
-
138
-
139
-
140
-
141
-
142
-
143
-
144
-
145
-
146
-
147
-
148
-
149
-
150
-
151
-
152
-
153
-
154
-
155
-
156
-
157
-
158
-
159
-
160
-
161
-
162
-
163
-
164
-
165
-
166
-
167
-
168
-
169
-
170
-
171
-
172
-
173
-
174
-
175
-
176
-
177
-
178
-
179
-
180
-
181
-
182
-
183
-
184
-
185
-
186
-
187
-
188
-
189
-
190
-
 191
191 -
 192
192 -
 193
193 -
 194
194 -
 195
195 -
 196
196 -
 197
197 -
 198
198 -
 199
199 -
 200
200 -
 201
201 -
202
-
203
-
204
-
205
-
206
-
207
-
208
-
209
-
210
-
211
-
212
-
213
-
214
-
215
-
216
-
217
-
218
-
219
-
220
-
221
-
222
-
223
-
224
-
225
-
226
-
227
-
228
-
229
-
230
-
231
-
232
-
233
-
234
-
235
-
236
-
237
-
238
-
239
-
240
-
241
-
242
 |
 |