Canon imagePROGRAF W8400 W8400 User's Guide - Page 302
Press the Online button twice to display MAIN MENU.
 |
View all Canon imagePROGRAF W8400 manuals
Add to My Manuals
Save this manual to your list of manuals |
Page 302 highlights
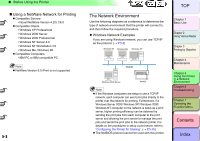
‹ TCP/IP Network Settings (Windows, Macintosh, UNIX) 2 Use a LAN cable to connect the computer LAN port to a port on the hub. Note z If you are using the printer connected to a network, check that the LINK lamp (a) lights up after you turn the printer on. If you are using a 100 Base-TX connection, the lamp will turn green, and if you are using a 10 Base-T connection, the lamp will turn yellow. z If the LINK lamp does not turn on, check the following points: • Is the hub turned on? (If the hub is off, turn the hub on.) • Is the LAN cable connector connected correctly? (Push in the connector until it locks with a click.) • Is the LAN cable defective? (Replace the LAN cable with another cable, and then check the lamp.) • Is the hub communication format compatible? (If the communication format (mode and speed) of the printer and hub do not match when network auto negotiation is used, follow the procedure below to manually configure the connection settings.) 1. Press the Online button twice to display MAIN MENU. 2. Press the [ ] or [ ] buttons to select Interface Setup, and then press the [ ] button. 3. Press the [ ] or [ ] buttons to select Ethernet Driver, and then press the [ ] button. 4. Press the [ ] or [ ] buttons to select Auto Detect, and then press the [ ] button. 5. Press the [ ] or [ ] buttons to select Off, and then press the OK button. 6. Press the [ ] or [ ] buttons to select Comm.Mode, and then press the [ ] button. 7. Press [ ] or [ ] to select Half Duplex or Full Duplex then press OK button. 8. Press the [ ] or [ ] buttons to select Ethernet Type, and then press the [ ] button. 9. Press [ ] or [ ] to select 10 Base-T or 100 Base-TX then press OK button. 10. Press the [ ] or [ ] buttons to select Spanning Tree, and then press the [ ] button. 11. Press [ ] or [ ] to select Use or Not Use then press OK button. 12. Press the Online button. 13. If Store Setting OK? is displayed, press the OK button. 5- 6 トTッOPプ Chapter 1 Basic Use Chapter 2 Using Various Media Chapter 3 Printing by Objective Chapter 4 Maintenance Chapter 5 Using the Printer in a Network Environment Chapter 6 Troubleshooting Chapter 7 Operating the Function Menu Contents Index
-
 1
1 -
2
-
3
-
4
-
5
-
6
-
7
-
8
-
9
-
10
-
11
-
12
-
13
-
14
-
15
-
16
-
17
-
18
-
19
-
20
-
21
-
22
-
23
-
24
-
25
-
26
-
27
-
28
-
29
-
30
-
31
-
32
-
33
-
34
-
35
-
36
-
37
-
38
-
39
-
40
-
41
-
42
-
43
-
44
-
45
-
46
-
47
-
48
-
49
-
50
-
51
-
52
-
53
-
54
-
55
-
56
-
57
-
58
-
59
-
60
-
61
-
62
-
63
-
64
-
65
-
66
-
67
-
68
-
69
-
70
-
71
-
72
-
73
-
74
-
75
-
76
-
77
-
78
-
79
-
80
-
81
-
82
-
83
-
84
-
85
-
86
-
87
-
88
-
89
-
90
-
91
-
92
-
93
-
94
-
95
-
96
-
97
-
98
-
99
-
100
-
101
-
102
-
103
-
104
-
105
-
106
-
107
-
108
-
109
-
110
-
111
-
112
-
113
-
114
-
115
-
116
-
117
-
118
-
119
-
120
-
121
-
122
-
123
-
124
-
125
-
126
-
127
-
128
-
129
-
130
-
131
-
132
-
133
-
134
-
135
-
136
-
137
-
138
-
139
-
140
-
141
-
142
-
143
-
144
-
145
-
146
-
147
-
148
-
149
-
150
-
151
-
152
-
153
-
154
-
155
-
156
-
157
-
158
-
159
-
160
-
161
-
162
-
163
-
164
-
165
-
166
-
167
-
168
-
169
-
170
-
171
-
172
-
173
-
174
-
175
-
176
-
177
-
178
-
179
-
180
-
181
-
182
-
183
-
184
-
185
-
186
-
187
-
188
-
189
-
190
-
191
-
192
-
193
-
194
-
195
-
196
-
197
-
198
-
199
-
200
-
201
-
202
-
203
-
204
-
205
-
206
-
207
-
208
-
209
-
210
-
211
-
212
-
213
-
214
-
215
-
216
-
217
-
218
-
219
-
220
-
221
-
222
-
223
-
224
-
225
-
226
-
227
-
228
-
229
-
230
-
231
-
232
-
233
-
234
-
235
-
236
-
237
-
238
-
239
-
240
-
241
-
242
-
243
-
244
-
245
-
246
-
247
-
248
-
249
-
250
-
251
-
252
-
253
-
254
-
255
-
256
-
257
-
258
-
259
-
260
-
261
-
262
-
263
-
264
-
265
-
266
-
267
-
268
-
269
-
270
-
271
-
272
-
273
-
274
-
275
-
276
-
277
-
278
-
279
-
280
-
281
-
282
-
283
-
284
-
285
-
286
-
287
-
288
-
289
-
290
-
291
-
292
-
293
-
294
-
295
-
296
-
 297
297 -
 298
298 -
 299
299 -
 300
300 -
 301
301 -
 302
302 -
 303
303 -
 304
304 -
 305
305 -
 306
306 -
 307
307 -
308
-
309
-
310
-
311
-
312
-
313
-
314
-
315
-
316
-
317
-
318
-
319
-
320
-
321
-
322
-
323
-
324
-
325
-
326
-
327
-
328
-
329
-
330
-
331
-
332
-
333
-
334
-
335
-
336
-
337
-
338
-
339
-
340
-
341
-
342
-
343
-
344
-
345
-
346
-
347
-
348
-
349
-
350
-
351
-
352
-
353
-
354
-
355
-
356
-
357
-
358
-
359
-
360
-
361
-
362
-
363
-
364
-
365
-
366
-
367
-
368
-
369
-
370
-
371
-
372
-
373
-
374
-
375
-
376
-
377
-
378
-
379
-
380
-
381
-
382
-
383
-
384
-
385
-
386
-
387
-
388
-
389
-
390
-
391
-
392
-
393
-
394
-
395
-
396
-
397
-
398
-
399
-
400
-
401
-
402
-
403
-
404
-
405
-
406
-
407
-
408
-
409
-
410
-
411
-
412
-
413
-
414
-
415
-
416
-
417
-
418
-
419
-
420
-
421
 |
 |
