HP Xw6600 HP xw6600 Workstation Service and Technical Reference Guide - Page 100
the inside of the side access panel.
 |
UPC - 883585731121
View all HP Xw6600 manuals
Add to My Manuals
Save this manual to your list of manuals |
Page 100 highlights
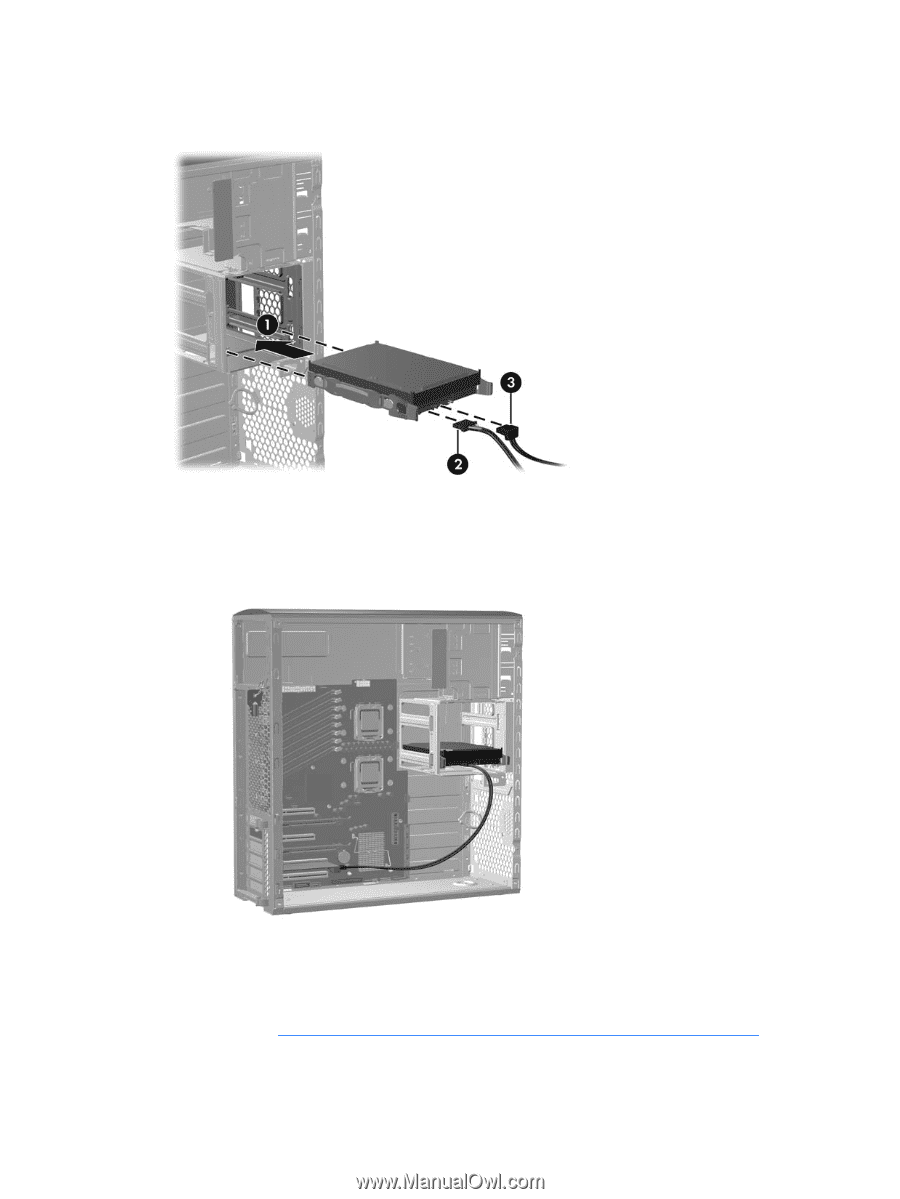
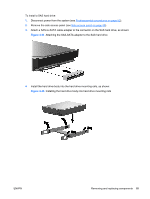
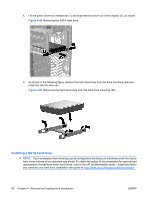
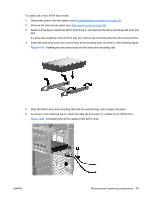
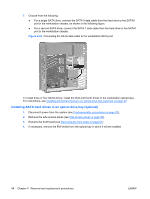
5. Push the drive into the selected bay until it snaps into place (1), as shown: Figure 4-46 Installing the SAS hard drive 6. Attach the power (2) and data (3) cables to the SAS drive, and then insert the SAS controller card into an available PCI slot in the workstation chassis. 7. As shown in the following figure, connect the data cable from the hard drive to the controller card. Figure 4-47 Connecting the SAS cable to SAS hard drive 8. If necessary, install the SAS card in an empty PCI Express slot, and then install the LED cable from the card to the system board. You can find the location of this connector on the service label on the inside of the side access panel. To install three or four SAS drives, install the third and fourth drives in the workstation optical drive bays. For instructions, see Installing SATA hard drives in an optical drive bay (optional) on page 94. 90 Chapter 4 Removal and replacement procedures ENWW
-
 1
1 -
2
-
3
-
4
-
5
-
6
-
7
-
8
-
9
-
10
-
11
-
12
-
13
-
14
-
15
-
16
-
17
-
18
-
19
-
20
-
21
-
22
-
23
-
24
-
25
-
26
-
27
-
28
-
29
-
30
-
31
-
32
-
33
-
34
-
35
-
36
-
37
-
38
-
39
-
40
-
41
-
42
-
43
-
44
-
45
-
46
-
47
-
48
-
49
-
50
-
51
-
52
-
53
-
54
-
55
-
56
-
57
-
58
-
59
-
60
-
61
-
62
-
63
-
64
-
65
-
66
-
67
-
68
-
69
-
70
-
71
-
72
-
73
-
74
-
75
-
76
-
77
-
78
-
79
-
80
-
81
-
82
-
83
-
84
-
85
-
86
-
87
-
88
-
89
-
90
-
91
-
92
-
93
-
94
-
 95
95 -
 96
96 -
 97
97 -
 98
98 -
 99
99 -
 100
100 -
 101
101 -
 102
102 -
 103
103 -
 104
104 -
 105
105 -
106
-
107
-
108
-
109
-
110
-
111
-
112
-
113
-
114
-
115
-
116
-
117
-
118
-
119
-
120
-
121
-
122
-
123
-
124
-
125
-
126
-
127
-
128
-
129
-
130
-
131
-
132
-
133
-
134
-
135
-
136
-
137
-
138
-
139
-
140
-
141
-
142
-
143
-
144
-
145
-
146
-
147
-
148
-
149
-
150
-
151
-
152
-
153
-
154
-
155
-
156
-
157
-
158
-
159
-
160
-
161
-
162
-
163
-
164
-
165
-
166
-
167
-
168
-
169
-
170
 |
 |