HP Xw6600 HP xw6600 Workstation Service and Technical Reference Guide - Page 153
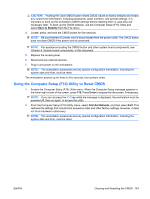
Using the Computer Setup (F10) Utility to Reset CMOS
 |
UPC - 883585731121
View all HP Xw6600 manuals
Add to My Manuals
Save this manual to your list of manuals |
Page 153 highlights
CAUTION: Pushing the Clear CMOS button resets CMOS values to factory defaults and erases any customized information, including passwords, asset numbers, and special settings. It is important to back up the workstation CMOS settings before resetting them in case they are necessary later. To back up the CMOS settings, use the Computer Setup (F10) Utility and select Save to Diskette from the File menu. 4. Locate, press, and hold the CMOS button for five seconds. NOTE: Be sure that the AC power cord is disconnected from the power outlet. The CMOS button does not clear CMOS if the power cord is connected. NOTE: For assistance locating the CMOS button and other system board components, see Chapter 4, System board components, in this document. 5. Replace the access panel. 6. Reconnect any external devices. 7. Plug in and power on the workstation. NOTE: The workstation passwords and any special configuration information, including the system date and time, must be reset. The workstation powers up for three to five seconds, then powers down. Using the Computer Setup (F10) Utility to Reset CMOS 1. Access the Computer Setup (F10) Utility menu. When the Computer Setup message appears in the lower-right corner of the screen, press F10. Press Enter to bypass the title screen, if necessary. NOTE: If you do not press the F10 key while the message is displayed, the workstation must be powered off, then on again, to access the utility. 2. From the Computer Setup (F10) Utility menu, select File>Set Defaults, and then select Exit. This restores the settings that include boot sequence order and other factory settings. However, it does not force hardware rediscovery. NOTE: The workstation passwords and any special configuration information, including the system date and time, must be reset. ENWW Clearing and Resetting the CMOS 143
-
 1
1 -
2
-
3
-
4
-
5
-
6
-
7
-
8
-
9
-
10
-
11
-
12
-
13
-
14
-
15
-
16
-
17
-
18
-
19
-
20
-
21
-
22
-
23
-
24
-
25
-
26
-
27
-
28
-
29
-
30
-
31
-
32
-
33
-
34
-
35
-
36
-
37
-
38
-
39
-
40
-
41
-
42
-
43
-
44
-
45
-
46
-
47
-
48
-
49
-
50
-
51
-
52
-
53
-
54
-
55
-
56
-
57
-
58
-
59
-
60
-
61
-
62
-
63
-
64
-
65
-
66
-
67
-
68
-
69
-
70
-
71
-
72
-
73
-
74
-
75
-
76
-
77
-
78
-
79
-
80
-
81
-
82
-
83
-
84
-
85
-
86
-
87
-
88
-
89
-
90
-
91
-
92
-
93
-
94
-
95
-
96
-
97
-
98
-
99
-
100
-
101
-
102
-
103
-
104
-
105
-
106
-
107
-
108
-
109
-
110
-
111
-
112
-
113
-
114
-
115
-
116
-
117
-
118
-
119
-
120
-
121
-
122
-
123
-
124
-
125
-
126
-
127
-
128
-
129
-
130
-
131
-
132
-
133
-
134
-
135
-
136
-
137
-
138
-
139
-
140
-
141
-
142
-
143
-
144
-
145
-
146
-
147
-
 148
148 -
 149
149 -
 150
150 -
 151
151 -
 152
152 -
 153
153 -
 154
154 -
 155
155 -
 156
156 -
 157
157 -
 158
158 -
159
-
160
-
161
-
162
-
163
-
164
-
165
-
166
-
167
-
168
-
169
-
170
 |
 |