HP Xw6600 HP xw6600 Workstation Service and Technical Reference Guide - Page 146
SAS RAID 0 configuration, the disk with the data you want to mirror.
 |
UPC - 883585731121
View all HP Xw6600 manuals
Add to My Manuals
Save this manual to your list of manuals |
Page 146 highlights
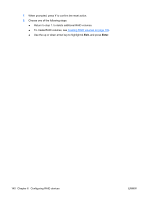
SAS RAID 0 configuration Follow the steps below to configure an Integrated Striped (IS) volume with the BIOS-based configuration utility. The configuration procedure assumes that the system already has the required disk and disk controllers. 1. On the Main menu screen of the BIOS-based configuration utility, use the arrow keys to select an adapter. 2. Press Enter to go to the Adapter Properties screen. 3. On the Adapter Properties screen, use the arrow keys to select RAID Properties. 4. Press Enter to go to the RAID Properties screen. 5. In the RAID Properties screen, use the arrow keys to select the first disk for the IS volume. Then use the arrow keys to move to the Array Disk column for this disk, and press the SPACE, +, or key to select Yes as the value for this column. If partitions are defined on the selected disk, a message appears warning you that data on the disk will be lost when the striped volume is created. Press the M key to migrate, or the D key to delete the data on the drive. 6. Repeat the previous step to select up to three more disks for the striped volume. 7. Press the C key to create the array once all drives have been chosen, then press Esc and select Save. SAS RAID 1 configuration Follow the steps below to configure an Integrated Mirroring (IM) volume with the BIOS-based configuration utility. The configuration procedure assumes that the system already has the required disk and disk controllers. 1. On the Main menu screen of the BIOS-based configuration utility, use the arrow keys to select an adapter. 2. Press Enter to go to the Adapter Properties screen. 3. On the Adapter Properties screen use the arrow keys to select RAID Properties. 4. Press Enter to go to the RAID Properties screen. . 5. Chose one of the following options: To configure a two-disk mirrored volume with an optional hot spare disk: ● In the RAID Properties screen, use the arrow keys to select the primary disk for the IM volume (the disk with the data you want to mirror.) ● Use the arrow keys to move to the Array Disk column for this disk and use the SPACE key to select Yes as the value. If partitions are defined on the selected disk, a message appears warning you that data on the disk will be lost when the striped volume is created. Press the M key to migrate, or the D key to delete the data on the drive. ● When the Keep Data/Erase Disk message appears, press F3 to keep the data currently on this disk. The value in the Array Disk column changes to Primary. ● Use the arrow keys to select the secondary (mirrored) disk for the IM volume. Select Yes as the value for the Array Disk column. If partitions are defined on this disk, a message warns you that data on the disk will be lost when the mirrored volume is created. Press Delete to confirm erasing data from the disk, or press any other key to deselect the disk. Continue with Step 6. 136 Chapter 6 Configuring RAID devices ENWW
-
 1
1 -
2
-
3
-
4
-
5
-
6
-
7
-
8
-
9
-
10
-
11
-
12
-
13
-
14
-
15
-
16
-
17
-
18
-
19
-
20
-
21
-
22
-
23
-
24
-
25
-
26
-
27
-
28
-
29
-
30
-
31
-
32
-
33
-
34
-
35
-
36
-
37
-
38
-
39
-
40
-
41
-
42
-
43
-
44
-
45
-
46
-
47
-
48
-
49
-
50
-
51
-
52
-
53
-
54
-
55
-
56
-
57
-
58
-
59
-
60
-
61
-
62
-
63
-
64
-
65
-
66
-
67
-
68
-
69
-
70
-
71
-
72
-
73
-
74
-
75
-
76
-
77
-
78
-
79
-
80
-
81
-
82
-
83
-
84
-
85
-
86
-
87
-
88
-
89
-
90
-
91
-
92
-
93
-
94
-
95
-
96
-
97
-
98
-
99
-
100
-
101
-
102
-
103
-
104
-
105
-
106
-
107
-
108
-
109
-
110
-
111
-
112
-
113
-
114
-
115
-
116
-
117
-
118
-
119
-
120
-
121
-
122
-
123
-
124
-
125
-
126
-
127
-
128
-
129
-
130
-
131
-
132
-
133
-
134
-
135
-
136
-
137
-
138
-
139
-
140
-
 141
141 -
 142
142 -
 143
143 -
 144
144 -
 145
145 -
 146
146 -
 147
147 -
 148
148 -
 149
149 -
 150
150 -
 151
151 -
152
-
153
-
154
-
155
-
156
-
157
-
158
-
159
-
160
-
161
-
162
-
163
-
164
-
165
-
166
-
167
-
168
-
169
-
170
 |
 |