HP LaserJet 9040/9050 Service Manual - Page 236
To initialize NVRAM or perform a skip disk, Drum-rotation functional check, High-voltage power-
 |
View all HP LaserJet 9040/9050 manuals
Add to My Manuals
Save this manual to your list of manuals |
Page 236 highlights
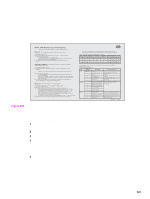
Note Note Note To initialize NVRAM or perform a skip disk The model number, the serial number, the usage data, and the error event log information is retained when performing a disk initialization. 1 Turn off the printer. 2 Turn on the printer. 3 Wait until the printer begins counting memory. 4 Press and hold (the 9 button on MFPs) until all three error lights illuminate. 5 Release (the 9 button on MFPs). 6 Press (the 3 button on MFPs). 7 Press MENU (START on MFPs). 8 Use (the 9 button on MFPs) or (the 3 button on MFPs) to scroll to the appropriate selection (NVRAM INIT or SKIP DISK). Additional functions are available in this menu but they are not applicable. 9 Press (the 6 button on MFPs). The printer boot sequence is complete when READY appears on the control-panel display. Drum-rotation functional check The photosensitive drum in the print cartridge must rotate in order for the print process to work. The photosensitive drum receives its drive from the main drive assembly. Use this procedure to test whether the drum is rotating: 1 Open the front cover. 2 Remove the print cartridge. 3 Mark the cartridge drive gear with a felt-tipped marker. Note the position of the mark. 4 Install the print cartridge, and close the front cover. The start-up sequence should rotate the drum enough to move the mark. 5 Open the printer, and inspect the gear that was marked in step 3. Verify that the mark moved. If the mark did not move, inspect the main drive assembly to make sure that it is meshing with the print cartridge gears. If the drive gears appear functional, and the drum does not move, replace the print cartridge. This test is especially important if refilled print cartridges are being used. High-voltage power-supply check The high-voltage power-supply PCA provides the necessary voltages for the electrophotographic processes. Use the following procedures to verify the operation of the high-voltage system. Print cartridge connection points Visually inspect the four connection points on the inside, right end of the print cartridge. If they are dirty or corroded, clean the connections. If they are damaged, replace the print cartridge. High-voltage contacts The high-voltage contact springs are mounted on the high-voltage power-supply PCA and protrude through the print cartridge cavity to contact the print cartridge. Verify that the contacts are not dirty or corroded and that the spring action is functional. If they are damaged, replace the high-voltage power-supply PCA. 220 Chapter 7 Troubleshooting
-
 1
1 -
2
-
3
-
4
-
5
-
6
-
7
-
8
-
9
-
10
-
11
-
12
-
13
-
14
-
15
-
16
-
17
-
18
-
19
-
20
-
21
-
22
-
23
-
24
-
25
-
26
-
27
-
28
-
29
-
30
-
31
-
32
-
33
-
34
-
35
-
36
-
37
-
38
-
39
-
40
-
41
-
42
-
43
-
44
-
45
-
46
-
47
-
48
-
49
-
50
-
51
-
52
-
53
-
54
-
55
-
56
-
57
-
58
-
59
-
60
-
61
-
62
-
63
-
64
-
65
-
66
-
67
-
68
-
69
-
70
-
71
-
72
-
73
-
74
-
75
-
76
-
77
-
78
-
79
-
80
-
81
-
82
-
83
-
84
-
85
-
86
-
87
-
88
-
89
-
90
-
91
-
92
-
93
-
94
-
95
-
96
-
97
-
98
-
99
-
100
-
101
-
102
-
103
-
104
-
105
-
106
-
107
-
108
-
109
-
110
-
111
-
112
-
113
-
114
-
115
-
116
-
117
-
118
-
119
-
120
-
121
-
122
-
123
-
124
-
125
-
126
-
127
-
128
-
129
-
130
-
131
-
132
-
133
-
134
-
135
-
136
-
137
-
138
-
139
-
140
-
141
-
142
-
143
-
144
-
145
-
146
-
147
-
148
-
149
-
150
-
151
-
152
-
153
-
154
-
155
-
156
-
157
-
158
-
159
-
160
-
161
-
162
-
163
-
164
-
165
-
166
-
167
-
168
-
169
-
170
-
171
-
172
-
173
-
174
-
175
-
176
-
177
-
178
-
179
-
180
-
181
-
182
-
183
-
184
-
185
-
186
-
187
-
188
-
189
-
190
-
191
-
192
-
193
-
194
-
195
-
196
-
197
-
198
-
199
-
200
-
201
-
202
-
203
-
204
-
205
-
206
-
207
-
208
-
209
-
210
-
211
-
212
-
213
-
214
-
215
-
216
-
217
-
218
-
219
-
220
-
221
-
222
-
223
-
224
-
225
-
226
-
227
-
228
-
229
-
230
-
 231
231 -
 232
232 -
 233
233 -
 234
234 -
 235
235 -
 236
236 -
 237
237 -
 238
238 -
 239
239 -
 240
240 -
 241
241 -
242
-
243
-
244
-
245
-
246
-
247
-
248
-
249
-
250
-
251
-
252
-
253
-
254
-
255
-
256
-
257
-
258
-
259
-
260
-
261
-
262
-
263
-
264
-
265
-
266
-
267
-
268
-
269
-
270
-
271
-
272
-
273
-
274
-
275
-
276
-
277
-
278
-
279
-
280
-
281
-
282
-
283
-
284
-
285
-
286
-
287
-
288
-
289
-
290
-
291
-
292
-
293
-
294
-
295
-
296
-
297
-
298
-
299
-
300
-
301
-
302
-
303
-
304
-
305
-
306
-
307
-
308
-
309
-
310
-
311
-
312
-
313
-
314
-
315
-
316
-
317
-
318
-
319
-
320
-
321
-
322
-
323
-
324
-
325
-
326
-
327
-
328
-
329
-
330
-
331
-
332
 |
 |