HP LaserJet 9040/9050 Service Manual - Page 266
Connectivity problems, Save + Restore, CAUTION, WARNING
 |
View all HP LaserJet 9040/9050 manuals
Add to My Manuals
Save this manual to your list of manuals |
Page 266 highlights
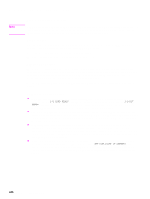
Connectivity problems Use the following procedure if the printer and the network configuration page are correct, but the network printer connectivity is not working. 1 Print a network configuration page. 2 Click Embedded Networking. 3 On the Diagnostics menu, click Loopback Test. 4 On the Loopback Test menu, click Execute. This begins a continuous diagnostic that can only be stopped by using a power-cycle. A failure is reported on a diagnostic page or with an error message. (If the test fails, a hardware problem exits. If the test succeeds, go to step 5.) 5 Turn off the printer. 6 Turn on the printer. 7 Reenter the network information. 8 Click Embedded Jetdirect. 9 On the Diagnostics menu, click Ping. 10 Specify the destination IP (the default is 127.0.0.1). 11 Specify the packet size (64 to 2,048, with a default of 64). 12 Specify the timeout (1 to 100 seconds, with a default of 1). 13 Specify the count (0 to 100, with a default of 4). Note Use different IP addresses to test the network connectivity. Results are obtained by opening the Ping Results menu and selecting the individual keys, or by configuring the printer to print the results at the end of the test. Click the Diagnostics menu and then click the View Ping Results sub-menu for more information. Note The embedded Jetdirect and EIO cards can work together simultaneously (just like two EIO cards in the same printer). Or, if necessary as a part of troubleshooting, the embedded Jetdirect can be disabled and an EIO card can be installed. Save + Restore CAUTION Do not replace the formatter, Compact Flash firmware, and/or the DC controller at the same time. The product will not work if the formatter, Compact Flash firmware, and/or the DC controller are replaced at the same time. After you replace the formatter, Compact Flash firmware, and/or the DC controller leave the product in the READY state for at least 10 minutes so that the formatter, Compact Flash firmware, and/or the DC controller update each other. Do not perform a cold reset. WARNING! The formatter has sharp edges. 250 Chapter 7 Troubleshooting
-
 1
1 -
2
-
3
-
4
-
5
-
6
-
7
-
8
-
9
-
10
-
11
-
12
-
13
-
14
-
15
-
16
-
17
-
18
-
19
-
20
-
21
-
22
-
23
-
24
-
25
-
26
-
27
-
28
-
29
-
30
-
31
-
32
-
33
-
34
-
35
-
36
-
37
-
38
-
39
-
40
-
41
-
42
-
43
-
44
-
45
-
46
-
47
-
48
-
49
-
50
-
51
-
52
-
53
-
54
-
55
-
56
-
57
-
58
-
59
-
60
-
61
-
62
-
63
-
64
-
65
-
66
-
67
-
68
-
69
-
70
-
71
-
72
-
73
-
74
-
75
-
76
-
77
-
78
-
79
-
80
-
81
-
82
-
83
-
84
-
85
-
86
-
87
-
88
-
89
-
90
-
91
-
92
-
93
-
94
-
95
-
96
-
97
-
98
-
99
-
100
-
101
-
102
-
103
-
104
-
105
-
106
-
107
-
108
-
109
-
110
-
111
-
112
-
113
-
114
-
115
-
116
-
117
-
118
-
119
-
120
-
121
-
122
-
123
-
124
-
125
-
126
-
127
-
128
-
129
-
130
-
131
-
132
-
133
-
134
-
135
-
136
-
137
-
138
-
139
-
140
-
141
-
142
-
143
-
144
-
145
-
146
-
147
-
148
-
149
-
150
-
151
-
152
-
153
-
154
-
155
-
156
-
157
-
158
-
159
-
160
-
161
-
162
-
163
-
164
-
165
-
166
-
167
-
168
-
169
-
170
-
171
-
172
-
173
-
174
-
175
-
176
-
177
-
178
-
179
-
180
-
181
-
182
-
183
-
184
-
185
-
186
-
187
-
188
-
189
-
190
-
191
-
192
-
193
-
194
-
195
-
196
-
197
-
198
-
199
-
200
-
201
-
202
-
203
-
204
-
205
-
206
-
207
-
208
-
209
-
210
-
211
-
212
-
213
-
214
-
215
-
216
-
217
-
218
-
219
-
220
-
221
-
222
-
223
-
224
-
225
-
226
-
227
-
228
-
229
-
230
-
231
-
232
-
233
-
234
-
235
-
236
-
237
-
238
-
239
-
240
-
241
-
242
-
243
-
244
-
245
-
246
-
247
-
248
-
249
-
250
-
251
-
252
-
253
-
254
-
255
-
256
-
257
-
258
-
259
-
260
-
 261
261 -
 262
262 -
 263
263 -
 264
264 -
 265
265 -
 266
266 -
 267
267 -
 268
268 -
 269
269 -
 270
270 -
 271
271 -
272
-
273
-
274
-
275
-
276
-
277
-
278
-
279
-
280
-
281
-
282
-
283
-
284
-
285
-
286
-
287
-
288
-
289
-
290
-
291
-
292
-
293
-
294
-
295
-
296
-
297
-
298
-
299
-
300
-
301
-
302
-
303
-
304
-
305
-
306
-
307
-
308
-
309
-
310
-
311
-
312
-
313
-
314
-
315
-
316
-
317
-
318
-
319
-
320
-
321
-
322
-
323
-
324
-
325
-
326
-
327
-
328
-
329
-
330
-
331
-
332
 |
 |
