Netgear GS724Tv4 Software Administration Manual - Page 41
Time, To manually con the time, System, Management, Time Configuration, Local, Apply
 |
View all Netgear GS724Tv4 manuals
Add to My Manuals
Save this manual to your list of manuals |
Page 41 highlights
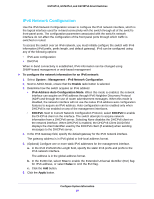
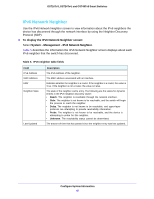
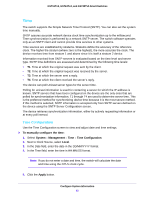
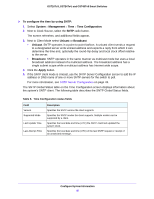
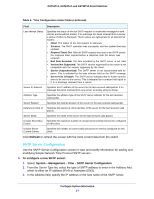
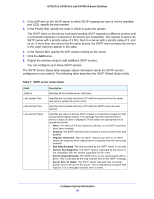
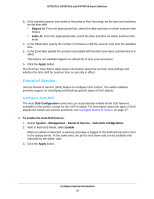
GS716Tv3, GS724Tv4, and GS748Tv5 Smart Switches Time The switch supports the Simple Network Time Protocol (SNTP). You can also set the system time manually. SNTP assures accurate network device clock time synchronization up to the millisecond. Time synchronization is performed by a network SNTP server. The switch software operates only as an SNTP client and cannot provide time services to other systems. Time sources are established by stratums. Stratums define the accuracy of the reference clock. The higher the stratum (where zero is the highest), the more accurate the clock. The device receives time from stratum 1 and above since it is itself a stratum 2 device. Information received from SNTP servers is evaluated based on the time level and server type. SNTP time definitions are assessed and determined by the following time levels: • T1. Time at which the original request was sent by the client. • T2. Time at which the original request was received by the server. • T3. Time at which the server sent a reply. • T4. Time at which the client received the server's reply. The device can poll Unicast server types for the server time. Polling for unicast information is used for contacting a server for which the IP address is known. SNTP servers that have been configured on the device are the only ones that are polled for synchronization information. T1 through T4 are used to determine server time. This is the preferred method for synchronizing device time because it is the most secure method. If this method is selected, SNTP information is accepted only from SNTP servers defined on the device using the SNTP Server Configuration screen. The device retrieves synchronization information, either by actively requesting information or at every poll interval. Time Configuration Use the Time Configuration screen to view and adjust date and time settings. To manually configure the time: 1. Select System > Management > Time > Time Configuration. 2. Next to Clock Source, select Local. 3. In the Date field, enter the date in the DD/MM/YYYY format. 4. In the Time field, enter the time in HH:MM:SS format. Note: If you do not enter a date and time, the switch will calculate the date and time using the CPU's clock cycle. 5. Click the Apply button. Configure System Information 41
-
 1
1 -
2
-
3
-
4
-
5
-
6
-
7
-
8
-
9
-
10
-
11
-
12
-
13
-
14
-
15
-
16
-
17
-
18
-
19
-
20
-
21
-
22
-
23
-
24
-
25
-
26
-
27
-
28
-
29
-
30
-
31
-
32
-
33
-
34
-
35
-
 36
36 -
 37
37 -
 38
38 -
 39
39 -
 40
40 -
 41
41 -
 42
42 -
 43
43 -
 44
44 -
 45
45 -
 46
46 -
47
-
48
-
49
-
50
-
51
-
52
-
53
-
54
-
55
-
56
-
57
-
58
-
59
-
60
-
61
-
62
-
63
-
64
-
65
-
66
-
67
-
68
-
69
-
70
-
71
-
72
-
73
-
74
-
75
-
76
-
77
-
78
-
79
-
80
-
81
-
82
-
83
-
84
-
85
-
86
-
87
-
88
-
89
-
90
-
91
-
92
-
93
-
94
-
95
-
96
-
97
-
98
-
99
-
100
-
101
-
102
-
103
-
104
-
105
-
106
-
107
-
108
-
109
-
110
-
111
-
112
-
113
-
114
-
115
-
116
-
117
-
118
-
119
-
120
-
121
-
122
-
123
-
124
-
125
-
126
-
127
-
128
-
129
-
130
-
131
-
132
-
133
-
134
-
135
-
136
-
137
-
138
-
139
-
140
-
141
-
142
-
143
-
144
-
145
-
146
-
147
-
148
-
149
-
150
-
151
-
152
-
153
-
154
-
155
-
156
-
157
-
158
-
159
-
160
-
161
-
162
-
163
-
164
-
165
-
166
-
167
-
168
-
169
-
170
-
171
-
172
-
173
-
174
-
175
-
176
-
177
-
178
-
179
-
180
-
181
-
182
-
183
-
184
-
185
-
186
-
187
-
188
-
189
-
190
-
191
-
192
-
193
-
194
-
195
-
196
-
197
-
198
-
199
-
200
-
201
-
202
-
203
-
204
-
205
-
206
-
207
-
208
-
209
-
210
-
211
-
212
-
213
-
214
-
215
-
216
-
217
-
218
-
219
-
220
-
221
-
222
-
223
-
224
-
225
-
226
-
227
-
228
-
229
-
230
-
231
-
232
-
233
-
234
-
235
-
236
-
237
-
238
-
239
-
240
-
241
-
242
-
243
-
244
-
245
-
246
-
247
-
248
-
249
-
250
-
251
-
252
-
253
-
254
-
255
-
256
-
257
-
258
-
259
-
260
-
261
-
262
-
263
-
264
-
265
-
266
-
267
-
268
-
269
-
270
-
271
-
272
-
273
-
274
-
275
-
276
-
277
-
278
-
279
-
280
-
281
-
282
-
283
-
284
-
285
-
286
-
287
-
288
-
289
-
290
 |
 |