Ricoh 3245 Fax Reference
Ricoh 3245 - Type Print Server Manual
 |
UPC - 026649128660
View all Ricoh 3245 manuals
Add to My Manuals
Save this manual to your list of manuals |
Ricoh 3245 manual content summary:
- Ricoh 3245 | Fax Reference - Page 1
and Canceling Transmission Files Communication Information Other Transmission Features Reception Features Fax via Computer Simplifying the Operation Facsimile Features Administrator Setting Solving Operation Problems Appendix Read this manual carefully before you use this machine and keep it handy - Ricoh 3245 | Fax Reference - Page 2
manual contains detailed instructions and notes on the operation and use of this machine. For your safety and benefit, read this manual carefully before using the machine. Keep this manual in a handy place for quick reference. Notes Some illustrations in this manual in the United States and/ - Ricoh 3245 | Fax Reference - Page 3
, see the relevant parts of the manual. Note ❒ Manuals provided are specific to machine type. ❒ Adobe Acrobat Reader/Adobe Reader is necessary to view the manuals as a PDF file. ❒ Two CD-ROMs are provided: • CD-ROM 1"Operating Instructions" • CD-ROM 2"Scanner Driver and Document Management Utility - Ricoh 3245 | Fax Reference - Page 4
) Describes operations, functions, and troubleshooting for the machine's scanner function. ❖ Manuals for DeskTopBinder Lite DeskTopBinder Lite is a utility included on the CD-ROM labeled "Scanner Driver and Document Management Utility". • DeskTopBinder Lite Setup Guide (PDF file - CD-ROM2) Describes - Ricoh 3245 | Fax Reference - Page 5
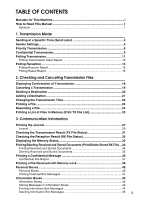
This Machine i How to Read This Manual 1 Symbols ...1 1. Transmission Mode Sending at a Specific Time (Send Later 3 Sender Settings...5 Time 22 Printing a File ...23 Resending a File 24 Printing a List of Files in Memory (Print TX File List 25 3. Communication Information Printing the Journal - Ricoh 3245 | Fax Reference - Page 6
55 On Hook Dial ...56 Manual Dial ...58 Changing the Line Port 59 Sub Transmission Mode 61 Book Fax ...61 Two-Sided Transmission ( Printing stored documents 70 Stamp ...72 Transmission Options 73 Fax Header Print 73 Label Insertion ...73 Reduced Image Transmission 73 Auto Reduce...74 Default - Ricoh 3245 | Fax Reference - Page 7
Documents with SUB Code 91 Transferring Received Documents 91 SMTP Reception Using Internet Fax 92 Routing E-mail Received via SMTP 93 JBIG Reception ...95 Auto Fax Reception Power-up 95 Printing Options 96 Print Completion Beep 96 Checkered Mark ...96 Centre Mark ...96 Reception Time ...97 - Ricoh 3245 | Fax Reference - Page 8
LAN-Fax Driver Properties 110 Setting Print Properties 110 Making Settings for Option Configuration 111 Basic Transmission 112 Specifying options 114 Confirming Transmission Results by E-mail 116 LAN-Fax Result Report 118 Printing and Saving 118 Editing Address Book 118 Editing Fax Cover - Ricoh 3245 | Fax Reference - Page 9
the forwarding function 164 Forwarding Mark 164 Memory Lock...165 ECM (Error Correction Mode 165 User Parameters ...166 Changing the User Parameters 170 Printing the User Parameter List 171 Special Senders to Treat Differently 171 Authorized Reception 172 Forwarding...173 Reception File - Ricoh 3245 | Fax Reference - Page 10
Problems When an Error Report is Printed 197 Turning Off the Main Power / When a Power Failure Occurs 198 When an Error Occurs Using Internet Fax 203 Expansion Memory (32MB: DIMM 203 Extra G3 Interface Unit 203 Specifications...204 Compatible Machines 206 Acceptable Types of Originals 207 - Ricoh 3245 | Fax Reference - Page 11
or serious injury when you misuse the machine without following the instructions under this symbol. Be sure to read the instructions, all of which are included in "Safety Information", General Settings Guide. R CAUTION: This symbol indicates a potentially hazardous situation that might result in - Ricoh 3245 | Fax Reference - Page 12
2 - Ricoh 3245 | Fax Reference - Page 13
at a Specific Time (Send Later) Using this function, you can instruct the machine to delay transmission of your fax message until "Timer Setting", General Settings Guide. ❒ If the document is sent before the specified time, the Communication Result Report is printed and the job is completed. - Ricoh 3245 | Fax Reference - Page 14
Transmission Mode C Press [Send Later]. D Enter the time (24 hour format) using the number keys, and then 1 press [OK]. The specified time is shown above the highlighted [Send Later]. Note ❒ Press [Economy Time] to specify the economy time. ❒ When entering numbers small- er than 10, add a zero - Ricoh 3245 | Fax Reference - Page 15
Sender]. See "Fax Destination", General Settings Guide. Note C Press [Sender Settings]. ❒ When user authentication is set, the user logged in is status by specified user. When user authentication is set, you can check usage by logged-in users. See p.162 "Printing Journal". When User ID is set to - Ricoh 3245 | Fax Reference - Page 16
ID, the Immediate TX Result Report is sent by e-mail to the logged-in user. A Select [Yes] or [No] for the Email TX Results function. Printing on the Receiver's Sheet If you enable this function, the sender's name (user name) appears on the receiver's sheet, lists, and report. A Select [On] for the - Ricoh 3245 | Fax Reference - Page 17
H Press [OK]. The standby display appears. Note ❒ To check the settings, press [Transmission Mode]. I Specify the destination, and then press the {Start} key. Note ❒ To cancel the Sender Settings, cancel the transmission. See p.19 "Canceling a Transmission". Sender Settings 1 7 - Ricoh 3245 | Fax Reference - Page 18
Transmission Mode Priority Transmission 1 Documents you send with Memory Transmission are sent in the order they are scanned. Therefore, if several B Press [Transmission Mode]. messages are queued in memory, the next document will not be sent imme- diately. However, by using this func- tion - Ricoh 3245 | Fax Reference - Page 19
will be stored in memory at the other end and not printed until an ID is entered. ❒ We recommend you program Default ID It is not necessary to enter an ID when transmitting. The other party can print receiver the ID that must be entered to print the message. C Press [Confidential TX]. Limitation - Ricoh 3245 | Fax Reference - Page 20
❒ To cancel Confidential Transmission, press [Cancel]. The display returns to that of step C. E Press [OK]. The standby display appears. Default ID A Check that [Default ID] has been selected, and then press [OK]. Note ❒ To cancel Confidential Trans- mission, press [Cancel]. The display returns - Ricoh 3245 | Fax Reference - Page 21
the ID stored in the machine. The user must supply this ID when they poll supports Polling Transmission and the SEP function, you can still carry out Polling Transmission with an ID. See p.42 "Information Boxes". ❒ This function is not available with Internet Fax. Note ❒ Free Polling and Default - Ricoh 3245 | Fax Reference - Page 22
A Check that [Free Polling TX] is selected. A Place the original, and then select the scan settings you require. Default ID Transmission A Select [Default ID TX]. Reference p.11 "Placing Originals", Facsimile Reference p.28 "Scan Settings", Facsimile Reference - Ricoh 3245 | Fax Reference - Page 23
the settings, press [Transmission Mode]. H Press the {Start} key. Note p.166 "User Parameters" (switch 03, bit 6). ❒ You can have a portion of the sent image printed on the report with the User Parameters. See p.166 "User Parameters" (switch 04, bit 7). ❒ You can cancel the transmission setup for - Ricoh 3245 | Fax Reference - Page 24
, if the other party's fax machine supports Polling Transmissions and the SEP function, and also has stored IDs, you can still perform Polling Reception. See p.50 "SEP Code". ❒ This function is not available with Internet Fax. Note ❒ To receive a message sent by Default ID Polling Transmission or ID - Ricoh 3245 | Fax Reference - Page 25
[F], and then press [OK]. B Press [Polling RX]. C Depending on which method you are using, select one of the following procedures: Default ID/Free Polling Reception A Check that [Default ID / Free Poll- ing RX] is selected, and then press [OK]. "ID Override: " and the entered Polling ID are shown - Ricoh 3245 | Fax Reference - Page 26
Key". Note ❒ You can also check the result of a Polling Reception with the Journal. See p.27 "Printing the Journal". ❒ You can turn this function on or off with the User Parameters. See p.166 "User Parameters" (switch 03, bit 4). ❒ To view the report without text disruption, select a font of even - Ricoh 3245 | Fax Reference - Page 27
a stored file, print a list of stored files, and resend a file which the machine failed to transmit. • Memory Transmission • Internet Fax Transmission • Send Later • Sender Settings • Priority Transmission • Confidential Transmission • Polling Reception • Polling Transmission • Transfer Request - Ricoh 3245 | Fax Reference - Page 28
Transmission A Press [Change / Stop TX File]. 2 B Press [Check / Change Settings]. C Select a file to check. Note ❒ If multiple destinations were spec- ified, only the destination selected first appears. ❒ If multiple destinations were specified, only the number of unsent messages appears. D Confirm - Ricoh 3245 | Fax Reference - Page 29
file is being sent, some pages of your file may have already been sent and will be received at the other end. ❒ If the transmission finishes while you are carrying out this procedure, transmission cannot be canceled. sent, press [Files under TX]. ❒ If multiple destinations were specified, only the - Ricoh 3245 | Fax Reference - Page 30
canceled. A Press [Change / Stop TX File]. B Press [Check / Change Settings]. Note ❒ Press to switch the destina- tion between fax number, Internet Fax address and IP-Fax address. E Press [Clear] to delete the destination. C Select the file from which you want to delete a destination. 20 Note - Ricoh 3245 | Fax Reference - Page 31
, Internet Fax address and IP-Fax address. E Specify the destination using the number keys or soft (on-screen) keys. C Select the file to which you want to add a destination. Note ❒ To add e-mail address, press [Manual Input], and then specify the destination. ❒ You can also program a SUB Code - Ricoh 3245 | Fax Reference - Page 32
and Canceling Transmission Files Changing the Transmission Time You can change the transmission time specified with Send Later. See p.3 "Sending at a Specific Time (Send Later)". E Press [Change TX Time]. 2 You can also delete the transmission time. If the transmission time is delet- ed - Ricoh 3245 | Fax Reference - Page 33
that have not been successfully transmitted. Note ❒ If multiple destinations were spec- ified, only the number of unsent messages appears. ❒ If you want two-sided printing, 2 press [Print 2 Sided]. ❒ To cancel printing, press [Cancel]. The display returns to that of step C. A Press [Change - Ricoh 3245 | Fax Reference - Page 34
not be sent. 2 messages. Preparation You should select "Store for 24 hours" for "Store a message that could not be transmitted" in User Parameters. See p.166 "User Pa- rameters" (switch 24, bit 0). Note ❒ Files that could not be transmitted will be kept for either 24 or 72 hours depending - Ricoh 3245 | Fax Reference - Page 35
to that of step B. D Press [Exit]. The standby display appears. with the User Parameters. See p.166 "User Parameters" (switch 04, bit 5). A Press [Change / Stop TX File]. B Press [Print List]. Note ❒ To cancel printing before press- ing the {Start} key, press [Cancel]. The display returns to - Ricoh 3245 | Fax Reference - Page 36
Checking and Canceling Transmission Files 2 26 - Ricoh 3245 | Fax Reference - Page 37
interface unit, you can print the Journal of each line type. Important ❒ The contents of a Journal printed automatically are deleted after printing. can be changed so that user codes will be printed instead of user names. For more information, contact your service representative. ❒ The sender name - Ricoh 3245 | Fax Reference - Page 38
name shown on the display. Note ❒ Press [Clear] to return to the previous screen if a wrong user name is selected. D Press the {Start} key. Note ❒ To cancel a file printing, press [Stop Printing]. The display returns to that of step B. E Press [Exit] twice. The standby display appears. Note ❒ If - Ricoh 3245 | Fax Reference - Page 39
the date and time when the report is printed. 2. Programmed Fax Header Shows the sender name programmed for printing. 3. Date Shows the transmission or reception date. 4. Time Shows the transmission or reception start time. ADJ008S 5. Other end ❖ For fax destinations • Shows the name (for display - Ricoh 3245 | Fax Reference - Page 40
• For fax transmissions and receptions After "T" for outgoing fax or "R" for ingoing fax, shows a communication mode. If the optional Extra G3 interface unit has been Power was disconnected during communication. Not all fax messages were transmitted. 10. User name Shows the sender's name. 11. - Ricoh 3245 | Fax Reference - Page 41
Checking the Transmission Result (TX File Status) C You can browse a part of the Immedi- ate TX Result Report on the display. Check the down, in groups of six. Note ❒ When a fax is sent, "Destina- tion:" shows the Own Fax Number or Fax Header information of a receiver. The e-mail address and - Ricoh 3245 | Fax Reference - Page 42
the Reception Result (RX File Status) C You can browse a part of the Recep- tion Result Report on the display. Check the groups of six. Note result, exit RX File Status, and then ❒ When a fax or IP-Fax is re- try again. ceived, Transmission Station ❒ You can program one of the Quick - Ricoh 3245 | Fax Reference - Page 43
Memory Status Use this function to display a summa- • When sending to the Person- ry of current memory usage. Items al Box. See p.41 "Printing shown are the percentage of free Personal Box Messages". memory space, the number of re- ❒ If you have made the machine ceived confidential messages - Ricoh 3245 | Fax Reference - Page 44
to 400 received documents on the hard disk. ❒ You can view, print received and stored documents using a Web Image Monitor or DeskTopBinder. See p.123 "Viewing Fax Information Using a Web Browser" or the DeskTopBinder's manuals and Help. B Press [Print / Delete Stored RX File]. C Select a file to be - Ricoh 3245 | Fax Reference - Page 45
, press [Cancel]. The display returns to that of step C. ❒ To delete the document after printing, press [Delete File after Printing]. ❒ To perform two-sided printing, press [Print on 2 Sides] before D Press [Yes]. 3 pressing the {Start} key. E Press [Exit] twice. Note ❒ To cancel a deletion - Ricoh 3245 | Fax Reference - Page 46
users from reading your messages. If someone sends you A Confirm that the Confidential File indicator is lit. a message using Confidential Trans- mission, it is stored in memory but not automatically printed. To print with Internet Fax. C Press [Print Confidential RX specifications. 36 - Ricoh 3245 | Fax Reference - Page 47
ID." appears. "User Parameters" (switch 04, bit Press [Exit] to cancel the opera- 4). tion, and then check the Confi- dential ID or Personal Confidential ID with the other party, and then try again. E Press [Exit]. The standby display appears. -If you cannot print confidential files even - Ricoh 3245 | Fax Reference - Page 48
with Memory Lock 3 38 This is a security function designed to prevent unauthorized users from reading your messages. If Memory Lock is switched on, all received messages are stored in memory and are not automatically printed. To print the messages, you have to enter the Memory Lock ID Code. When - Ricoh 3245 | Fax Reference - Page 49
D Enter a 4-digit Memory Lock ID with the number keys, and then press the {Start} key. Printing a File Received with Memory Lock 3 Note ❒ If the Memory Lock ID does not match, the message "Specified code does not correspond to programmed Memory Lock - Ricoh 3245 | Fax Reference - Page 50
lights and the Con- stead of being printed out immediately. fidential File Report is printed. See Each user must be assigned a SUB p.37 "Confidential the destination you specify. You can specify a fax number, e-mail address or IP-Fax destination as the receiver. See p.181 "Programming/ - Ricoh 3245 | Fax Reference - Page 51
[Clear] or the {Clear/Stop} key before pressing [OK], and then try again. ❒ To cancel entering a password, press [Cancel]. The display returns to that of step D. E Press the {Start} key. Note ❒ To stop printing, press [Stop Printing]. The display returns to that of step D. F Press [Exit]. Note ❒ To - Ricoh 3245 | Fax Reference - Page 52
• You can check the contents of Information Boxes with "Store / Delete / Print Information Box File". See p.44 "Printing Information Box Messages". • You can set a password for Information Boxes in advance. A password can be set in "Administrator Setting". See p.184 "Programming/changing Information - Ricoh 3245 | Fax Reference - Page 53
. 3 Note ❒ You can also select the follow- ing settings: • Book Fax • 2 Sided Original (The optional ADF is required.) • Stamp (The optional ADF is required.) When a password is required A Enter the password, and then press [OK]. Reference p.11 "Placing Originals", Facsimile Reference - Ricoh 3245 | Fax Reference - Page 54
Information Box Messages Follow these steps to print a message stored in an Information Box. A Press [Information]. When a password is required A Enter the password, and then press [OK]. 3 B Press [Store / Delete / Print Information Box File]. C Press [Print File]. D Select the box that contains - Ricoh 3245 | Fax Reference - Page 55
key before pressing [OK], and then try again. ❒ To cancel entering a password, press [Cancel]. The display returns to that of step D. E Press [Delete]. that of step D. F Press [Exit]. B Press [Store / Delete / Print Information Box File]. C Press [Delete File]. D Select the box that contains the - Ricoh 3245 | Fax Reference - Page 56
Communication Information 3 46 - Ricoh 3245 | Fax Reference - Page 57
use this function with Internet Fax transmission. Note ❒ The total number of digits that can be entered is up to 128 using destination keys and number keys. ❒ For Memory Transmission and Immediate Transmission, insert a pause between parts of a number. For On Hook Dial and Manual Dial, no pause is - Ricoh 3245 | Fax Reference - Page 58
Other Transmission Features A Place the original, and then select the scan settings you require. B Press the {Pause/Redial} key. 4 C Select the destination you want to redial to. Note ❒ Now that the date and time the original was read appears as a key, select by pressing it. ❒ When you press [ - Ricoh 3245 | Fax Reference - Page 59
supports a similar function called "SUB Code", you can send fax specification of the machine to which you are sending. ❒ You can store IDs in destination lists and Programs. See "Fax Destination", General Settings Guide To enter a password, press [Pass- word (SID)]. H Enter the password with the - Ricoh 3245 | Fax Reference - Page 60
See p.129 "Registering and Changing Keystroke Programs". See "Fax Destination", General Settings Guide. ❒ Messages you receive using this function are marked However, if a machine of another manufacturer supports Polling Reception, you can receive fax messages from the other party using this method - Ricoh 3245 | Fax Reference - Page 61
Enter a SEP Code, and then press [OK]. K Press [Default ID / Free Polling RX], and then press [OK]. "SEP Code *, #, and spaces as a password. J Press [Polling RX]. ❒ You can store IDs in destination lists and Programs. See "Fax Destination", General Settings Guide. See p.129 "Registering and - Ricoh 3245 | Fax Reference - Page 62
terminologies are used in this section: ❖ Requesting Party The machine where the message originates. • To send a Transfer Request by IP-Fax, the Transfer Station must be a fax machine that supports IP-Fax and made by the same manufacturer. • You cannot use Transfer Request without programming the - Ricoh 3245 | Fax Reference - Page 63
transfer the message nor send an error report back to the Requesting Party. To send Transfer Request by email, use a Transfer Station that supports Internet Fax and has the Transfer Station function. ❒ You can program one of the Quick Operation keys with operations for this function. Using the key - Ricoh 3245 | Fax Reference - Page 64
Other Transmission Features D Select [Transfer Req.]. E Press [Receiving Station]. F Specify a Receiving Station. Speed Dial A Select [qp Speed Dial]. B Enter the number of the Speed Dial code. For example, to select the number stored in Speed Dial 12 of the Transfer Station, enter: {1} {2}. - Ricoh 3245 | Fax Reference - Page 65
the System Settings. See "Registering the Transfer Request", General Settings Guide. A Place the original down, and then Program a Transfer Station Station. This function allows fax messages to be transferred via select the desired settings. multiple stations and makes fax mes- sage transfer more - Ricoh 3245 | Fax Reference - Page 66
❒ This function is not available for the optional extra G3 interface unit, Internet Fax and IP-Fax. Note 4 ❒ This function is unavailable in some countries. ❒ If an Immediate TX Result Report (Immediate Transmission) is printed, On Hook Dial transmission results are not mentioned on the report - Ricoh 3245 | Fax Reference - Page 67
If you have an external telephone on the fax machine, you can speak with the other party when you hear a voice. If you hear a voice before pressing the {Start} key, pick up the external telephone and tell the receiver you want to send a fax message (ask them to switch to facsimile mode - Ricoh 3245 | Fax Reference - Page 68
4 Limitation ❒ This function is not available for fax message. The transmission starts. the optional extra G3 interface unit, Internet Fax and IP-Fax. ❒ If Immediate TX Result Report (Immediate Transmission) is printed, the result of a transmission with Manual Dial is not mentioned in the report - Ricoh 3245 | Fax Reference - Page 69
to a maximum of three ports. Note ❒ When you install the extra G3 interface unit, you can specify the line port home position from "General Settings and Adjustment". See p.144 "General Settings/Adjustment". ❒ When sending a fax, you can select the line port if dialing with the number keys or Chain - Ricoh 3245 | Fax Reference - Page 70
Other Transmission Features B Select the line you want to use. When one optional extra G3 unit is installed. Note 4 ❒ If you select "G3 Auto", the ma- chine will use any available line. This increases efficiency. C Press [Exit]. The standby display appears. 60 - Ricoh 3245 | Fax Reference - Page 71
sizes available in the destination machine, the message may be reduced when printed at the other end. Note ❒ You can have bound originals machine scans first as default with the User Parameters. See p.166 "User Parameters" (switch 06, bit 6). ❒ When using the Internet Fax function, documents are - Ricoh 3245 | Fax Reference - Page 72
Originals placed on the exposure glass cannot be sent. The selected original size is shown above the highlighted [Book Fax]. ❒ The front and back of the scanned original will be printed in order on 4 Note separate sheets at the other end. ❒ Select [From First Page] to send a The orientation - Ricoh 3245 | Fax Reference - Page 73
Sub Transmission Mode B Press [Sub TX Mode]. GHPY030E C Press [2 Sided Original]. See p.78 "Transmission with Image Rotation" D Specify the original position. ❒ This function is only available with Memory Transmission. ❒ This function is only available with Check the orientation of the placed - Ricoh 3245 | Fax Reference - Page 74
and page opening orientation are ❒ While this function is in use, the third line of the Label Insertion is shown above the highlighted [2 not printed. See p.75 "Program- Sided Original]. ming the Label Insertion". Note ❒ To cancel this mode, press [Cancel]. The display returns to that of step - Ricoh 3245 | Fax Reference - Page 75
standard attachment, or a set of instructions), store that page in memory as an Auto Document. This send it. You can fax an Auto Document by itself, or attach it to a standard fax message. Preparation You need ❒ You can print an Auto Document currently stored in memory. See p.66 "Printing documents stored as - Ricoh 3245 | Fax Reference - Page 76
]. D Select an Auto Document file, and 4 then press [OK]. When you fax an Auto Document by itself, press [TX Stored File (AD) Only], and then [Auto Document]. C Select an Auto Document file to be printed, and then press [Print File]. The selected file name is shown above the highlighted [ - Ricoh 3245 | Fax Reference - Page 77
. You can program a password for this function. You can change the user names, file names, and passwords of stored documents. See Default ID Transmission • ID Override Transmission • Immediate Transmission • Parallel Memory Transmission • On Hook Dial • Manual Dial Note ❒ You can specify and print - Ricoh 3245 | Fax Reference - Page 78
in order of programmed date. 68 Note ❒ To search by user name, press [Non-programmed Name], and then enter the user name. Partial matching is used when searching for a user name. See p.172 "Using Partial matching". Reference "Entering Text", General Settings Guide C Select the file to be sent. - Ricoh 3245 | Fax Reference - Page 79
F. Note ❒ Partial matching is used when searching for a file name. C Select the file to be sent. D If you select a document with a password, enter the password, and then press [OK]. Note ❒ When [ROrigi. + Stored File] is pressed, the machine sends the originals and then stored files. When [Stored - Ricoh 3245 | Fax Reference - Page 80
documents stored using the facsimile function can be printed. ❒ You can print documents saved from the copy or the printer func- tion with the Document Server. You cannot print documents saved from the scanner function with this 4 mode. ❒ You can also print the first page only to check the - Ricoh 3245 | Fax Reference - Page 81
, enter the password, and then press [OK]. Note ❒ To search by user name, press [Non-programmed Name], and then enter the user name. C Select the file. Specifying a document from the file name A Press [Search by File Name]. B Enter the file name to be printed, and then press [OK]. Note ❒ Partial - Ricoh 3245 | Fax Reference - Page 82
even if stamping is performed. When sending a fax message using the ADF, the machine can cartridge. See "Replacing the Stamp Cartridge", General Settings Guide. ❒ If a page was not stamped even though use this function often, you can set the default in General Settings and Adjustment so that this - Ricoh 3245 | Fax Reference - Page 83
certain option configuration, you can change the default home position (on or off) of each option. Fax Header Print In some cases, you may want the fax header names, file numbers, or page numbers are printed by changing their respective User Parameters. (switch 18, bit 3, 2, 1, 0) See p.166 "User - Ricoh 3245 | Fax Reference - Page 84
Reduce Default ID ID". 4 Limitation ❒ This function is not available with Important Internet Fax. ❒ If you turn this function off, the Note scale of the of the Quick and some parts of the image may Operation keys with operations for be deleted when printed at the oth- this function - Ricoh 3245 | Fax Reference - Page 85
A Press [On] for Fax Header Print. Note ❒ Press [Off] if you do not want to print the sender name. Programming the Label Insertion A Press [Programmed Name] for Label Insertion. Note ❒ Press [Off] if you do not want to insert a destination. Programming the Default ID Transmission A Press [On] for - Ricoh 3245 | Fax Reference - Page 86
stored in the Document Server Note ❒ In default, scanned pages are sent. To change the settings to delete scanned pages, contact your service representative. Note ❒ You can turn this function on or off with the User Parameters. See p.166 "User Parameters" (switch 07, bit 2). Parallel Memory - Ricoh 3245 | Fax Reference - Page 87
You can either print or scroll through the Journal on the display. p.166 "User Parameters" (switch 14, bit 2). See p.31 "Checking the Transmis- ❒ The originals to be transmitted at a sion Result (TX File Status)". specific time will be sent at that time. Automatic Redial If a fax message could - Ricoh 3245 | Fax Reference - Page 88
during Immediate Transmission or when in User Tools mode, the machine cannot scan has A4, 81/2"×11" landscape paper (L), the message will be printed the same size as the original. Note ❒ This function is extra G3 interface unit is required. The Standard Broadcast function sends faxes one at a - Ricoh 3245 | Fax Reference - Page 89
name with the User Parameters. See p.166 "User Parameters" ( fax machine. See not appear. "File Transfer", Network Guide . Note ❒ If the administrator address is wrong, you may not be able to acquire Journal. ❒ If the Journal in e-mail format fails to be transmitted, the Journal is printed - Ricoh 3245 | Fax Reference - Page 90
and the fax message could not be successfully transmitted, a Communication Failure Report is printed. See p.81 "Communication Failure Report". ❒ You can turn this function on or off with the User Parameters. See p.166 "User Parameters" (switch 03, bit 0). ❒ You can select whether to include part of - Ricoh 3245 | Fax Reference - Page 91
print this report and the fax matically printed using the User message could not be successfully Parameters. See p.166 "User Pa- transmitted, the Error Report is print ❒ You can select whether to include part of the original image on the report. See p.166 "User Parameters" (switch 04, bit 7). ❒ - Ricoh 3245 | Fax Reference - Page 92
Other Transmission Features 4 82 - Ricoh 3245 | Fax Reference - Page 93
5. Reception Features Reception Immediate Reception Each page of a fax message is printed as soon as it is received. This method is used for standard fax messages. ❖ Reception resolution This machine supports Standard, Detail, and Super Fine resolutions for reception. If you do not have the - Ricoh 3245 | Fax Reference - Page 94
❒ When about one hour passes after power of the machine is turned off, all fax messages stored in memory will be lost. If any messages have been lost for this reason, a Power Failure Report is automatically printed when the operation switch is turned on. Use this report to identify lost messages - Ricoh 3245 | Fax Reference - Page 95
, the machine receives all fax messages using Substitute Reception. Problems x is lit. The machine is printing with other function. The message General Settings Guide. The machine is busy print- The message will be automatically ing with other function. printed after the current job finishes. The - Ricoh 3245 | Fax Reference - Page 96
General Settings Guide. Replace the toner cartridge. See "DAdding Toner", General Settings Guide. Call your service representative. You can specify the following conditions with the User Parameters. See p.166 5 "User Parameters" (switch 05, bit 2,1). ❖ When Own Name or Own Fax Number is received - Ricoh 3245 | Fax Reference - Page 97
the Transfer Station sends to. Receiving Stations must be programmed into a Quick Dial or Groups in the Transfer Station. • The Requesting Party's fax number must be programmed in the destination list of this machine (Transfer Station). The registration number must be between 00001 and 00100. • The - Ricoh 3245 | Fax Reference - Page 98
prints the report if it Transfer Stations. cannot be sent back to the Requesting For more information, contact your Party. service printed on the This machine compares the fax number of the Requesting Party with the Requesting Party's number pro- report with the User Parameters. See p.166 "User - Ricoh 3245 | Fax Reference - Page 99
column indicates the message could not be sent because the end receiver's address is incorrect or not programmed. ❒ -- column indicates the Internet Fax document was sent to the mail server programmed in this machine. ❒ When using multistep transfer, the Transfer Result Report e-mail is sent to - Ricoh 3245 | Fax Reference - Page 100
in memory based on Own Name, Own Fax Number or sender's e-mail address. A fax number, Internet Fax address, IP-Fax address, or folder address can be set as ❒ You can select whether the machine prints out the messages it forwards with User Parameters (switch 11, bit 6). For details, see p.166 - Ricoh 3245 | Fax Reference - Page 101
user code is specified. If the destination specified is an email address, the received document is routed to that destination as e-mail. In addition to SUB Codes, you can use the forward feature to send all received transmissions to a specific documents received from any fax machine, regardless of - Ricoh 3245 | Fax Reference - Page 102
You can route received e-mail to other Internet Fax machines as well. 5 ADJ011S Preparation Set this machine Initial Setting". See "Connection and Setup", Network Guide. Note ❒ Even if SMTP reception is enabled e-mail is deleted, and Error Report is printed. Also, the SMTP server will send an - Ricoh 3245 | Fax Reference - Page 103
Received via SMTP E-mail received via SMTP can be routed to other fax machines. It can also be routed to destinations programmed as Quick Dial from your e-mail software to e-mail addresses and G3 fax machines' destinations through this machine simultaneously. For details about specifying the destinations - Ricoh 3245 | Fax Reference - Page 104
number of 5 digits or less@host name of this machine.domain name Example: to transfer to the destination number 00001: fax=#[email protected] 5 ❖ Group Destination fax=#**registration number of 5 digits or less@host name of this machine.do- main name Example: to transfer to the destination - Ricoh 3245 | Fax Reference - Page 105
. Note ❒ You can set whether messages are printed as soon as they are received (Immediate Reception) with the User Parameters. See p.166 "User Parameters" (switch 14, bit 0). ❒ You can also have fax messages received by Memory Reception (Substitute Reception) printed after the machine is turned on - Ricoh 3245 | Fax Reference - Page 106
you to position a hole puncher correctly when you file received messages. 5 Checkered Mark When this function is turned on, a Checkered Mark is printed on the first page of fax messages to help you separate them. Note ❒ The Centre Mark may deviate a little from the exact centre of the edge. ❒ You - Ricoh 3245 | Fax Reference - Page 107
on two or more sheets, the date and time is printed on the last page. ❒ The date and time when the message was printed can also be recorded on the message. If you need this function, contact your service representative. will correctly receive in A3L, B4 JIS (Japanese Industrial Standard)L, A4KL - Ricoh 3245 | Fax Reference - Page 108
option. Multi-copy Reception If you switch this function on, multiple copies of each incoming fax message will be printed. You can also select to have multiple copies made of messages from particular senders. See p.171 "Special Senders to Treat Differently". See p.147 "Reception Settings". 5 - Ricoh 3245 | Fax Reference - Page 109
priority and Combine Two Originals is canceled. Note ❒ You can turn this function on or off with the User Parameters. See p.166 "User Parameters" (switch 10, bit 1). ❒ This function uses Memory Reception. • Two A5K messages are printed side by side on a sheet of A4L. • Two B5 JISK messages are - Ricoh 3245 | Fax Reference - Page 110
of the split area is 5 duplicated on the top of the second sheet. Note ❒ Your service representative can customize this function with the following settings: • Reduction • Print split mark • Overprinting • Overprinting length • Guideline for split ❒ You can adjust the overprinting and reduction - Ricoh 3245 | Fax Reference - Page 111
. See p.166 "User Parameters" (switch 10, bit 3). ❒ When this function is used, the printing quality may not be as good as usual. Reference p.100 "Page Separation and Length Reduction" TSI Print (Transmitting Subscriber Identification Print) Usually the sender's Fax Header is printed on received - Ricoh 3245 | Fax Reference - Page 112
"Page Reduction" "Tray Paper Settings", General Settings Guide Page reduction Disabled Reduction in Subscan Direction Enabled Page Separation making copies, and yellow A4 paper into tray 2 to use when printing received faxes. You can then easily identify for which purpose paper has been output. - Ricoh 3245 | Fax Reference - Page 113
from where it left off. • If any documents or reports were being printed manually, the printer does not resume printing. Perform the operation from the beginning again. Limitation ❒ When using this function, printed sheets cannot be delivered to the finisher output tray. Even if you specify the - Ricoh 3245 | Fax Reference - Page 114
may be shortened, or split across sheets. ❒ Paper longer than 600mm may be creased, not sent, or jam. ❒ Print area depends on optional expansion memory, resolution, and vertical length of originals. ❒ If you use this function, Image Rotation and 180-Degree Rotating Printing are not possible. 5 104 - Ricoh 3245 | Fax Reference - Page 115
. quired. When the optional finisher unit is se- You can specify the document feed- lected for fax output, you can use the ing tray for each port (telephone, In- Tray Shift function whenever a fax or ternet Fax, IP-Fax). For example, you report is printed. can specify documents received This - Ricoh 3245 | Fax Reference - Page 116
Reception Features 5 106 - Ricoh 3245 | Fax Reference - Page 117
created using Windows applications, to other fax machines over a telephone line. • To send a fax, simply select [Print] from the Windows application, then select LAN-Fax as the printer, and then specify a destination. • In addition to sending faxes, LAN-Fax Driver allows this machine to be used for - Ricoh 3245 | Fax Reference - Page 118
LAN): 6 See "Connection and Setup", Net- work Guide. Installing the Software You need to install LAN-Fax Driver on your computer before using the LAN-Fax functions. LAN-Fax Driver is on the CD-ROM included with the printer. Address Book and LAN-Fax Cover Sheet Editor are installed with LANFax - Ricoh 3245 | Fax Reference - Page 119
Driver] check box, and then click [Next]. G Confirm that the [Printer Name:] check box has been selected, and then click [Continue]. Note ❒ Select the desired port. H Click [Finish]. The installation completion dialog box appears. I Click [Finish]. J Click [Exit]. 6 Applications - Ricoh 3245 | Fax Reference - Page 120
Server 2003 Microsoft Windows NT 4.0 110 Setting LAN-Fax Driver Properties Note ❒ If your operating system is Printers and Faxes]. B Select to highlight [LAN-Fax M6], then click [Properties] on the [File] menu. Note ❒ With Windows NT, click [Docu- mentDefault] on the [File] menu. C Set the print - Ricoh 3245 | Fax Reference - Page 121
automatically performed. For details, see LAN-Fax Driver's Help. A Perform Steps A and B in "Setting Print Properties". B Make settings for the option con- figuration. ❖ Prohibit manual destination entry Check this option to inhibit direct destination specification. ❖ Enable E-mail Check this when - Ricoh 3245 | Fax Reference - Page 122
are using. In all cases, select [LAN-Fax M6] for the printer. D Specify the destination. Use one of the following procedures to specify a destination. For details, see LAN-Fax Driver's Help. Note ❒ When user authentication is used with this machine, click [User Settings]. ❒ You can specify up to - Ricoh 3245 | Fax Reference - Page 123
dropdown menu, proceed to Step E. D Select the type of fax from the [Type:] dropdown menu. Note ❒ Select the fax type as follows: • Send by standard fax: [Fax] • Send by Internet Fax: [Email] • Send by IP-Fax: [IP-Fax] Sending Fax Documents from Computers ❒ If you selected [Group] from the [Format - Ricoh 3245 | Fax Reference - Page 124
send. Specifying options You can specify the options listed below. For details, see LAN-Fax Driver's Help. • Sending at a Specific Time • Print Sender Stamp • Attach Cover Sheet • Two-Sided Printing • Display Preview • Save as File • Document Server A Click [Send Options]. The [Send Options] window - Ricoh 3245 | Fax Reference - Page 125
B Specify the options you want to use. To send a fax document at a specific time A Select the [Sending at specific time] check box, and then specify a transmission time. B Click [Send]. To print a Sender Stamp A Select the [Print Fax Header] check box. B Click [Send]. To attach a cover sheet A - Ricoh 3245 | Fax Reference - Page 126
[Hard Disk Unit] is not select- nication data from the LAN-Fax to ed in [Accessories] under this machine increases, the mes- [LAN-Fax Driver properties], sage by e-mail. When you have done [Send] or [Send Print] using the LAN-Fax, and when the communiction has been successful from the computer - Ricoh 3245 | Fax Reference - Page 127
result notification e-mail will not be transmitted, and the LANFax Result Report is printed out. See "Setting File Transfer", Network Guide for the e-mail settings, and see p.118 "LAN-Fax Result Report" for the LAN-Fax Result Report. A Click the [E-mail Settings] tab. B Select the [Notify] check box - Ricoh 3245 | Fax Reference - Page 128
You can select the time delay when problems such as paper runningout or paper jams are resolved. See p.166 "User Parameters" (switch 20 , bit 2/3/4/5). A On the [File] menu, click [Print...]. B Select [LAN-Fax M6] in [Printer Name], and then click [OK]. The [LAN-Fax] dialog box appears. Note ❒ The - Ricoh 3245 | Fax Reference - Page 129
number:], click [Cancel]. select the appropriate line type; G3, G3-2, G3-3, G3 Dir. Auto, G3 PABX Auto, or PABX. ❒ For [Protocol:] under [IP-Fax address:], select [H.323] or Note ❒ The confirmation dialog box does not appear when you have not made any changes after starting Address Book. [SIP - Ricoh 3245 | Fax Reference - Page 130
files can be inserted into the destination list of the LAN-Fax Driver using the Destination List Editing Tool. Tool, each person's , see Printer Reference. order of priority, if necessary): IPFax destination → Fax number → Mail address ❒ For details, see Network Guide and SmartDeviceMonitor - Ricoh 3245 | Fax Reference - Page 131
fax messages using LAN-Fax Driver. Creating a cover sheet Use the following procedure to create a fax cover sheet. You can edit the items below using LAN-Fax to a fax message. A On the [File] menu, click [Print...]. B Select "LAN-Fax M6" in "Printer Name", and then click [OK]. The [LAN-Fax] dialog - Ricoh 3245 | Fax Reference - Page 132
a destination. J Click the [Send Options] tab and then select the [Attach a Cover Sheet] check box. K Click [Send]. LAN-Fax Operation Messages Message Causes and Solutions Cannot access the print- Check the network connection. er. Click [retry] to send Check that the power is turned on. the data - Ricoh 3245 | Fax Reference - Page 133
Using Web Image Monitor", Network Guide A list of the received fax messages appears. Note ❒ If the programmed user code has been deleted using sired fax message. Note Use the following procedure to view and/or print received fax messages using a Web Image Monitor. ❒ To view a list of the fax - Ricoh 3245 | Fax Reference - Page 134
window to appear. Note ❒ The method for downloading differs depending on the selected format. For more information, see Help on the Web Image Monitor. Printing fax information using a Web browser 6 A Start a Web browser. B Enter the machine's IP address in the [Address] field. C Click - Ricoh 3245 | Fax Reference - Page 135
Administrator's name and password. D Click [Address Book] in the left pane. The Address Book is displayed. E Set the Internet Fax data format. To modify, and then click [Change]. The [Edit User] page appears. B Set the properties for Internet Fax data format other than the mode selection. Note ❒ - Ricoh 3245 | Fax Reference - Page 136
Fax via Computer Note ❒ If you change the mode to "Simple", you cannot set machine properties. E Click [OK] in the upper-right of the screen. The Address Book is displayed. Note ❒ To cancel the setting, click [Cancel] in the upper-right of the screen. F Close the Web browser. 6 126 - Ricoh 3245 | Fax Reference - Page 137
on your computer without printing them. Using the SUB Code, Own Name, or Own Fax Number are saved in the delivery User Tools of the machine. Settings must also be specified on the delivery server. See "File Transfer", General Settings Guide. ❒ See ScanRouter EX Professional Help or instructions - Ricoh 3245 | Fax Reference - Page 138
Fax via Computer 6 128 - Ricoh 3245 | Fax Reference - Page 139
automatic thickness, manual thickness, scan size, different-size original, file attachment, specification of twopage method of registering or changing programs for the copy function is different from that of the fax function. A Prepare for registering the pro- gram. Note ❒ The procedure for program- - Ricoh 3245 | Fax Reference - Page 140
[OK] to return to the standby mode. Reference p.3 "Sending at a Specific Time (Send Later)" B Make sure that the machine is in facsimile mode returns to that of step E. Reference "Entering Text", General Settings Guide Registering a priority function using a program You can select whether or not - Ricoh 3245 | Fax Reference - Page 141
Programs Changing a program name A Make sure that the machine is in facsimile mode and the standby display is shown. Note ❒ If the standby display is not shown, press the {Facsimile} key. B Press the {Program} key. Deleting a Program A Make sure that the machine is in facsimile mode and the - Ricoh 3245 | Fax Reference - Page 142
pre- vious settings to be cleared. ❒ If you have no programmed destinations or scan settings as programs, select the program number, and then enter the fax number of the destination and select the scan settings you require. A Make sure that the machine is in facsimile mode and the standby display is - Ricoh 3245 | Fax Reference - Page 143
time. Follow the instructions under [Select ❒ You can store approximately 9,000 pages (ITU-T No.4 chart) in the Document Server, using the copy, facsimile, printer, and scanner functions. Stored File] in [Sub TX Mode] when ❒ The Document Server has a memo- sending or printing stored docu- ry - Ricoh 3245 | Fax Reference - Page 144
is in facsimile mode and the standby display is shown. shown. E Press [File Info. Setting], and then set the user name, file name, and If the standby display is not password as necessary. shown, press the {Facsimile} key. B Place the original, and then select the scan settings you require - Ricoh 3245 | Fax Reference - Page 145
name, or password, proceed to step F. ❒ You cannot change multiple documents at once. Programming a user name Note ❒ Set a user name from those pro- grammed in the user code. User code is programmed in System Settings. See "Registering a New User Code", General Settings Guide. A Press [User Name - Ricoh 3245 | Fax Reference - Page 146
Changing Information of Stored Documents You can change the file name, user name, and password of stored documents. Note ❒ If you make a mistake, press [Clear] or the {Clear/Stop} key before pressing [OK], and then reenter your password. ❒ You can enter up to four to eight digits. C Enter the - Ricoh 3245 | Fax Reference - Page 147
-enter the file name. Changing a user name A Press [Change User Name]. B Press [Clear]. The user name is deleted. 7 Reference "Entering Text" General Settings Guide C Press [OK]. Changing the password A Press [Change Password]. B Press upper [Change]. C Enter the new user name, and then press [OK - Ricoh 3245 | Fax Reference - Page 148
A. See p.144 "General Settings/Adjustment". A Press [Sub TX Mode]. Note ❒ You can also delete multiple documents at once. With a programmed password A Enter a password using the number keys, and then press [OK]. B Press [Select Stored File]. 138 E Press [Delete File]. F Press [Delete]. Note ❒ If - Ricoh 3245 | Fax Reference - Page 149
Print from Document Server) • Exporting documents as files (Ex- port Document) • Importing documents into a com- puter (Import Document) For more information, see DeskTopBinder's manual . Note ❒ When you send a document using Fax, if the registration number in the Address Book registered to the - Ricoh 3245 | Fax Reference - Page 150
Simplifying the Operation 7 140 - Ricoh 3245 | Fax Reference - Page 151
quickly and easily find the desired User Tool. ❖ General Settings/Adjustment Description Reference Default Transmission Mode and scan set- Adjusting the Volume", Facsimile Reference • Program Fax Information p.73 "Initial Settings and Adjustments", Facsimile Reference - Ricoh 3245 | Fax Reference - Page 152
p.96 "Checkered Mark" • Centre Mark p.96 "Centre Mark" • Print Reception Time p.97 "Reception Time" ❖ E-mail Settings Description • Internet Fax Settings • Max. E-mail Size 8 • SMTP RX File Delivery Setttings ❖ IP-Fax Settings Reference p.148 "E-mail Settings" Description • Enable H.323 - Ricoh 3245 | Fax Reference - Page 153
/ Delete Auto Document • Program / Change / Delete Scan Size • Print Journal • Transmission Page Count • Forwarding • Memory Lock RX • ECM ID • Select Dial / Push Phone • Reception File Setting • Stored RX File User Setting • Menu Protection Settings -Displays 8 • Each menu appears in each tab. - Ricoh 3245 | Fax Reference - Page 154
" D Follow the displayed instructions to change the default, and then press [OK]. Note ❒ If you make User 8 Tools (System Settings)", General Settings Guide. A Press the {User Tools/Counter} key. The main menu display for default settings appears. Note ❒ You can also press the {User - Ricoh 3245 | Fax Reference - Page 155
Accessing User Tools ( "Adjusting the Volume", Facsimile Reference . • Default ID TX • At Transmission • At Reception ❖ Auto At Printing ❖ Program Fax Information See p.73 "Initial Settings and Adjustments", Facsimile Reference . ❖ Adjust Scan Density • Fax Header - Ricoh 3245 | Fax Reference - Page 156
when call charges are low. See p.3 "Sending at a Specific Time (Send Later)". Limitation ❒ You can program only one Print • Label Insertion • RX File Status (Reception File Status) • Forwarding • Transfer Request • Switch RX Mode (Reception Mode Switch) • Manual E-mail RX (when the Internet Fax - Ricoh 3245 | Fax Reference - Page 157
set. Reception Settings ❖ RX Reverse Printing (Reception Reverse Printing) Specify whether or not received fax messages are to be printed from the last page received. • On ❖ Switch Reception Mode Specify the method for receiving fax messages. • Manual Reception • Auto Reception ❖ Authorized RX - Ricoh 3245 | Fax Reference - Page 158
is set to on, transmission of e-mail that exceeds the set size is aborted. • On page of received fax messages. • Off • On • Off ❖ Centre Mark Specify whether or not a centre mark is to be printed halfway down the left side and at the top centre of each page received. • On • Off Note - Ricoh 3245 | Fax Reference - Page 159
A Press [On]. B Enter the maximum e-mail size using the number keys. Accessing User Tools (Facsimile Features) When the authorized e-mail address is set to "@aaa.abcd.com": [email protected] - accepted [email protected] - not accepted - Ricoh 3245 | Fax Reference - Page 160
can be used for registration of the SIP User Name in SIP Setting. Make sure you enter Fax transmission. • On • Off ❖ H.323 Settings Set the IP address and alias telephone number of the gatekeeper. Note ❒ If you select "On" using the User Parameters, you can use the gatekeeper server. See p.166 "User - Ricoh 3245 | Fax Reference - Page 161
telephone lines) on an IP network. C Enter the IP address and SIP user name, and then press [OK]. The screen returns to that of Step B. Gateway 8 Register, change, or delete the gateway used for transmission to IP-Fax. B Press [Change] for each property. • Registering or changing a gateway - Ricoh 3245 | Fax Reference - Page 162
Prefix using the number keys, and then press [OK]. 8 ❒ For documents sent using a gateway to G3 Fax, ID numbers can be used. If the first several digits of IP-Fax number and the gateway-specific ID number are identical, documents can be transmitted using the registered digits of the gateway. For - Ricoh 3245 | Fax Reference - Page 163
address, and then press [OK]. The screen returns to that of Step G. I Press [OK]. • Deleting a gateway A Press [Program / Change / Delete Gateway]. Accessing User Tools (Facsimile Features) Note ❒ If you do not want to de- lete the gateway you have selected, press [Do not Delete]. ❒ The screen - Ricoh 3245 | Fax Reference - Page 164
Facsimile Features 8 154 - Ricoh 3245 | Fax Reference - Page 165
for the machine connection, program various IDs (including a Polling ID), fax destinations, and many other items. In addition, you can check the part automatically. p.165 "ECM (Error Correction Mode)" Allows you to change and print the function settings to meet your needs. p.166 "User Parameters - Ricoh 3245 | Fax Reference - Page 166
received documents are saved on the hard disk to be printed later or printed immediately without being saved. p.193 "Storing or Printing Received Documents" Stored RX File User Setting Set the password to view re- p.195 "Setting a User for ceived and stored documents Viewing Received and Stored - Ricoh 3245 | Fax Reference - Page 167
to program standard messages to be printed at the top of the first to program and change your messages. A Press the {User Tools/Counter} key. B Press [Facsimile Features]. C Enter a new message. Reference "Entering Text", General Settings Guide D Press [OK]. Note ❒ To program another message, - Ricoh 3245 | Fax Reference - Page 168
all fax messages stored in memory are lost. If any messages have been lost for this reason, a Power Failure Report is automatically printed when the operation switch is turned on. Use this report to identify lost messages. A Press the {User Tools/Counter} key. - Ricoh 3245 | Fax Reference - Page 169
Scanning]. H Press [Exit]. Changing only a file name I Press the {User Tools/Counter} key. The standby display appears. A Press [Change Name]. file name, and then press [OK]. Reference "Entering Text", General Settings Guide Proceed to step H. Note ❒ You cannot delete an Auto Document waiting - Ricoh 3245 | Fax Reference - Page 170
Note ❒ You can program up to two sizes. ❒ You can specify a horizontal length from 128 to 1,200mm, or from 5.5 to 47 inches. A Press the {User Tools/Counter} key. F Press [Delete]. Note ❒ To cancel deleting, press [Do not Delete]. The display returns to that of step E. G Press [Exit]. H Press the - Ricoh 3245 | Fax Reference - Page 171
A Press the {User Tools/Counter} key. B Press [Facsimile Features]. C Press [Administrator Tools]. D Press [Program / Change / Delete Scan Size]. E Press [Delete], and then select [Program Size 1] or [Program Size 2]. Note ❒ A displayed vertical size differs depending on the selected unit. When [mm - Ricoh 3245 | Fax Reference - Page 172
Exit]. F Press the {User Tools/Counter} key. The standby display appears. 162 Forwarding This function allows you to have messages printed on the machine, and transfer stations as end receivers. Note ❒ A fax number, e-mail address, IP- Fax destination, and folder can be set as the forwarding - Ricoh 3245 | Fax Reference - Page 173
Tools/Counter} key. B Press [Facsimile Features]. C Press [Administrator Tools]. ❒ You can specify whether or not to print forwarded messages. See p.166 "User Parameters" (switch 11, bit 6). D Press [Forwarding]. E Press [On]. ❒ Deleting a destination specified as a forward destination from the - Ricoh 3245 | Fax Reference - Page 174
fax number, email address, IP-Fax Guide. ❒ If you have specified a folder for F Press the {User Tools/Counter} key. The standby display appears. forwarding, you can specify the 9 file format used for forwarding. See p.166 "User Parameters" Forwarding Mark (switch 21, bit 3). You can print - Ricoh 3245 | Fax Reference - Page 175
Internet Fax. Note ❒ To store incoming documents from Special Senders only in Memory Lock, program each sender with "Special Senders to Treat Differently". See p.171 "Special Senders to Treat Differently". ECM (Error Correction Mode) If part of a transmission fails because of a line problem, the - Ricoh 3245 | Fax Reference - Page 176
D Press [ECM]. Note ❒ To cancel this setting, press [Cancel]. The display returns to that of step D. F Press the {User Tools/Counter} key. The standby display appears. User Parameters User Parameters allow you to customize various settings to suit your needs. To change function settings, set the - Ricoh 3245 | Fax Reference - Page 177
Settings ❖ User Parameter List User Parameter Switches are outlined below. Switch Bit Item 0 02 0 Forwarding Mark Off 3 TSI Print Off 03 0 Automatic printing of the Off Communication Result Re- port 2 Automatic printing of the Off Memory Storage Report 3 Automatic printing of the - Ricoh 3245 | Fax Reference - Page 178
Call (SC) Possible Not possible Condition (Substitute Recep- (Substitute RX) (Reception off) tion during service call) 2, 1 Substitute the reception when the machine cannot print (because all paper trays have run out of paper, toner is empty, or all paper trays are out of order) 00: Enabled - Ricoh 3245 | Fax Reference - Page 179
) 1 Sort Journal by line type Off On 20 0 Automatic printing of the Off On LAN-Fax Result Report. 5, 4, 3, 2 Reprinting time of stored documents in memory that could not be printed using LAN-Fax Driver 0000: 0 minute / 0001: 1 minute / 0010: 2 minutes / 0011: 3 minutes / 0100: 4 minutes - Ricoh 3245 | Fax Reference - Page 180
4. Fax number On On Changing the User Parameters Preparation Access to some User Parameter Settings requires installation of optional equipment, or that other settings be made beforehand. E Select the switch number you want to change. Important ❒ We recommend you print and keep a User Parameter - Ricoh 3245 | Fax Reference - Page 181
finished, press [Exit]. J Press the {User Tools/Counter} key. The standby display appears. Printing the User Parameter List Print this list to see the current User Reception File Print Qty • Print 2 Sided • Memory Lock • RX Reverse Printing • Paper Tray Use the Own Name or Own Fax Number to - Ricoh 3245 | Fax Reference - Page 182
following functions with Internet Fax receptions. • Authorized RX • Reception File Print Qty 172 • Memory Lock • RX Reverse Printing Note ❒ You can with "Reception Settings". See p.147 "Reception Settings". See p.166 "User Parameters" (switch 08, bit 2). ❒ Without programming Special Senders, the - Ricoh 3245 | Fax Reference - Page 183
select [Same as Basic Settings], the fax message will be forwarded to the other ends Guide. ❒ If you have specified a folder for forwarding, you can specify the file format used for forwarding. See p.166 "User Parameters" (switch 21, bit 3). Reception File Print Quantity Use this function to print - Ricoh 3245 | Fax Reference - Page 184
default paper tray. Limitation ❒ For Polling Reception, you cannot select the paper tray. Note ❒ If the machine receives a message that has a different size from the paper in the specified tray, the machine prints {User Tools/Counter} key. der Printing". Paper Tray Use this function to print - Ricoh 3245 | Fax Reference - Page 185
Not Programed]. G Enter a destination name, and then press [OK]. Enter a destination name using Own Name or Own Fax Number. Reference "Entering Text", General Settings Guide H Press [Full Agreement] or [Partial Agreement]. Using Administrator Settings Note ❒ You must select only the item you want - Ricoh 3245 | Fax Reference - Page 186
switch the destination between fax number, e-mail address, Folders", General Settings Guide. ❒ When certain destination to be priority quoted. See p.166 "User Parameters" (switch 32, bit 0). D Press "Reception Settings". Reception File Print Qty A Select [Reception File Print Qty]. B Press [Number - Ricoh 3245 | Fax Reference - Page 187
"Paper Tray" of "Reception Settings". See p.147 "Reception setting made for "2 Sided Settings". Print" of "Reception Settings". See p.147 "Reception Settings". J Press [OK]. A Special Sender Tools". See p.165 "Memory Lock". L Press the {User Tools/Counter} key. The standby display appears. 177 - Ricoh 3245 | Fax Reference - Page 188
Sender Use this function to program "Initial Set Up" of a Special Sender. You can also specify the Bypass Tray Paper Size. A Press the {User Tools/Counter} key. Programming Authorized RX and Special RX Function A Select [Authorized RX] or [Special RX Function]. B Select [On] or [Off], and then - Ricoh 3245 | Fax Reference - Page 189
the units by pressing [mm] or [inch], it is converted automatically (fractions are rounded off). Note G Press [OK]. ❒ You can specify a vertical size from 210mm (8.3 inch) to 305mm (12.0 inch). You cannot enter a size smaller than 210mm or larger than 305mm. G Press [Exit]. H Press the {User - Ricoh 3245 | Fax Reference - Page 190
]. The display returns to that of step D. E Press the {Start} key. Note ❒ To cancel printing after press- ing the {Start} key, press [Stop Printing]. The display returns to that of step D. F Press the {User Tools/Counter} key. The standby display appears. Box Settings The following functions are for - Ricoh 3245 | Fax Reference - Page 191
cannot be a space). • Password (optional) Up to 20 printing is completed. ❒ The Fax Header is not printed on delivered messages. ❒ If a message cannot be delivered, a Communication Failure Report is printed User Parameters" (switch 32, bit 0). Reference p.40 "Personal Boxes" A Press the {User - Ricoh 3245 | Fax Reference - Page 192
a box name, and then press [OK]. Reference "Entering Text", General Settings Guide I Enter a SUB Code. 9 Note ❒ If you make a mistake, press [Clear] or the {Clear/Stop} key before pressing [OK], and then try again. C Re-enter the password, and then press [OK]. Note ❒ To change the SUB Code, press - Ricoh 3245 | Fax Reference - Page 193
number, Internet Fax address and IP-Fax address. With a programmed password A Enter a password using the number keys, and then press [OK]. K Press [OK]. L Press [Exit]. M Press the {User Tools/Counter} key. The standby display appears. Note 9 Deleting Personal Boxes ❒ If you make a mistake - Ricoh 3245 | Fax Reference - Page 194
User first character cannot be a space). • Password (optional) Up to 20 characters long cannot be a space). When programming a password, a mark is displayed before the a password and the settings of the deleted. Also, the password, press [OK], priority quoted. See p.166 "User H Enter a box name, - Ricoh 3245 | Fax Reference - Page 195
Clear/Stop} key before pressing [OK], and then try again. ❒ To change the password after pressing [OK], press [Change] and repeat steps K and L, or press [OK]. N Press [OK]. O Press [Exit]. P Press the {User Tools/Counter} key. The standby display appears. 9 Deleting Information Boxes Note - Ricoh 3245 | Fax Reference - Page 196
This function turns your machine into a fax relay station. Documents sent with a SUB a mistake, press and specifying this SUB Code. If a password has also been programmed, inform them of this too, [Clear can be G Press [Exit]. H Press the {User Tools/Counter} key. composed of digits 0-9, "#", - Ricoh 3245 | Fax Reference - Page 197
Password the Internet fax destination and IP-Fax destination as prints out the received messages it transfers and a Transfer Result Report after the transfer has finished. If you want to turn this function off, please contact your service "User Parameters" (switch 32, bit 0). A Press the {User Tools - Ricoh 3245 | Fax Reference - Page 198
]. Reference "Entering Text", General Settings Guide I Enter a SUB Code. Note You can change the display to the fax destination, Internet fax destination, and IPFax destination using the a password If you do not want to program a password, proceed to step K. A Press [Password]. B Enter a password, - Ricoh 3245 | Fax Reference - Page 199
B and C, or press [Cancel] and repeat the procedure from step A. With a programmed password A Enter a password using the number keys, and then press [OK]. D Press [OK]. K Press [OK]. L Press [Exit]. M Press the {User Tools/Counter} key. The standby display appears. Note ❒ If you make a mistake - Ricoh 3245 | Fax Reference - Page 200
United States and your fax number is 2121234567, program the following: C Press [Administrator Tools]. D Press [Print List] next to "Box Set- • 1212-1234567 You can program the fax Printing]. The display re- A Press the {User Tools/Counter} key. turns to that of step D. F Press the {User Tools - Ricoh 3245 | Fax Reference - Page 201
Programming a Confidential ID Program a Confidential ID to print a Confidential Reception. See p.36 "Printing a Confidential Message". Note ❒ If you do not program a Confiden- tial ID, you cannot receive a Confidential Transmission. A Press the {User Tools/Counter} key. B Press [Facsimile Features - Ricoh 3245 | Fax Reference - Page 202
ID to use the Transfer Request, Transfer Station, Default ID Polling Transmission, and Default ID Polling Reception functions. When you use ID Memory Lock ID to be entered before printing documents when the Memory Lock function is activated. A Press the {User Tools/Counter} key. B Press [ - Ricoh 3245 | Fax Reference - Page 203
available for selection. Reference p.202 "Selecting the Line Type" F Press the {User Tools/Counter} key. The standby display appears. Note Storing or Printing Received ❒ When the optional G3 expansion Documents unit is installed, "G3-2" appears. ❒ This function is not available in some areas - Ricoh 3245 | Fax Reference - Page 204
stored in memory. Use the Print Confidential RX File function to print them. Note ❒ To specific e-mail address. To notify of reception, press [Notify Dest.] and select an e-mail address from the Internet Fax the Document Server display. A Press the {User Tools/Counter} key. Reception Report e-mail - Ricoh 3245 | Fax Reference - Page 205
the machine after fax messages are received. To specify the administrator, enter the administrator user code for managing documents user Guide code, press [Off] and proceed to Note ❒ This function is only available when received documents are saved on the hard disk. See p.193 "Storing or Printing - Ricoh 3245 | Fax Reference - Page 206
"Deleted from Address Book" is displayed. Re-enter the user. H Press [OK]. I Press the {User Tools/Counter} key. The standby display appears. Menu Protection Settings You can set up user access rights for functions that users other than administrators can set. For details description, ask the - Ricoh 3245 | Fax Reference - Page 207
When an Error Report is Printed An Error Report is printed if a message cannot be successfully sent or received. Possible causes include a problem with your machine or noise on the telephone line. If an error occurs during transmission, resend the original. If an error occurs during reception - Ricoh 3245 | Fax Reference - Page 208
after the power loss. -RDS (Remote Diagnostic System) If your machine has a problem, a service representative can perform various settings over the telephone line from the service station. If you want to use this function, change the User Parameter. See p.166 "User Parameters" (switch 25, bit 4). - Ricoh 3245 | Fax Reference - Page 209
an Error Occurs Using Internet Fax When an Error Occurs Using Internet Fax Error Mail Notification The machine Mail Notification with User Parameters. See p.166 "User Parameters" (switch 21, bit 7). ❒ If Error Mail Notification cannot be sent, the Error Report (E-Mail) is printed by the machine. - Ricoh 3245 | Fax Reference - Page 210
Solving Operation Problems 10 200 - Ricoh 3245 | Fax Reference - Page 211
a snap-in modular type connector. Important ❒ Make sure the connector is the correct type before you start. ❖ Where to connect the machine AAG010S 1. G3 interface unit connector 2. External telephone connector 3. Extra G3 interface - Ricoh 3245 | Fax Reference - Page 212
Appendix Selecting the Line Type Select the line type to which the machine is connected. There are two types: tone and pulse dial. Note ❒ This function is not available in some areas. Select the line type using "Administrator Settings". See p.193 "Selecting Dial/Push Phone". 11 202 - Ricoh 3245 | Fax Reference - Page 213
at high resolution (Super Fine). This also allows you to receive fax messages at high resolution (Fine or Super Fine). If you require this option, consult your service representative. See p.211 "Maximum Values". Extra G3 Interface Unit This option provides one extra G3 line connection. A maximum of - Ricoh 3245 | Fax Reference - Page 214
Appendix Specifications ❖ Fax Transmission and Reception Standard Resolution Transmission time Data compression method Maximum original size Maximum scanning size Print process Transmission speed G3 G3: 8 × 3.85/mm·200 × 100dpi (Standard character), 8 × 7.7/mm·200 × 200dpi (Detail character), 8 × - Ricoh 3245 | Fax Reference - Page 215
Specifications ❖ Internet Fax Transmission • Reception POP3, SMTP, IMAP4, TCP/IP E-mail format Single/Multi-part, MIME Conversion Attached file forms: TIFF-F (MH, MR *1 , MMR transmission only. E-mail receive functions Automatic detection and printing of appended TIFF-F (MH) files and ASCII text - Ricoh 3245 | Fax Reference - Page 216
a VoIP gateway. Receive a fax sent from an IP-Fax compatible fax through a network. Also capable of receiving fax from a G3 fax connected to telephone lines via a VoIP gateway. Compatible Machines This machine is compatible to machines having the following specifications. Communication protocols - Ricoh 3245 | Fax Reference - Page 217
Specifications Acceptable Types of Originals Make sure your originals are completely dry before setting original size Maximum number of sheets Up to A3 (297 × 420mm), 1 11" × 17" (279 × 432mm) Fax transmission: A5 L to A3 L 80 sheets (up to 1,200mm long) 8" × 51/2" L (80 g/m2, 20 lb) to 11" - Ricoh 3245 | Fax Reference - Page 218
be a difference in the size of the image when it is printed at the des- tination. ❒ If you place an original larger the exposure glass. Because the machine scans non-standard size documents in a standard size, part of the image may be truncated depending on the length of the document. For details - Ricoh 3245 | Fax Reference - Page 219
Specifications ❖ Inch Version -approx. 9.6" approx. 9.6" - ap- prox. (When this happens, the receiving machine may not select print paper of the correct size.) 11 • documents placed • originals with index tabs, tags, or protruding parts • transparent originals, such as OHP transparencies or - Ricoh 3245 | Fax Reference - Page 220
Appendix The following paper sizes are automatically detected in facsimile mode. ❖ Metric Version Paper size where original is placed A3L Exposure b glass ADF b 8 1/2"×13" B4 JIS L (F4) A4KL B5 JISKL A5KL b b b b × b b b b b b- Auto detect × - Unable to auto detect ❖ Inch - Ricoh 3245 | Fax Reference - Page 221
per file 1,000 1,000 The number of pages for all files 1,000 3,000 The number of destinations you can spec- 500 500 ify for one file The number of destinations you can spec- 500 500 ify for all files The number of Quick Dials you can program 2,000 2,000 The number of - Ricoh 3245 | Fax Reference - Page 222
Transmission, 9 Counters, 155, 162 D Default ID/Free Polling Reception, 14 Default ID Transmission, 11, 12, 74 Deleting Information , 203 Extra G3 Interface Unit, 203 F Fax Header Print, 73 Fax via Computer, 107 File Printing, 23 Printing a List of Files in Memory (Print TX File List), 25 - Ricoh 3245 | Fax Reference - Page 223
by E-mail, 79 Journal by E-mail, Transmitting, 79 Just size printing, 103 K Keystroke Program, 129 L Label Insertion, 73 LAN-Fax Operation Messages, 122 LAN-Fax Properties, Setting, 110 Line Type Changing, 59 Selecting, 202 M Manual Dial, 58 Maximum Value, 211 Memory Lock, 38, 165, 174 Memory - Ricoh 3245 | Fax Reference - Page 224
Print Quantity, 173 Reception Functions, 87 Reception Reverse Printing 52, 87 Reverse Order Printing, 83, 100 RX File to Treat Differently, 171 Specifications, 204 Stamp, 72 Standard Changing, 186 Deleting, 189 Printing, 190 Programming, 186 Transfer Print, 101 Two-Sided Printing, 97 Two-Sided Transmission, 62 - Ricoh 3245 | Fax Reference - Page 225
MEMO 215 - Ricoh 3245 | Fax Reference - Page 226
MEMO 216 AE AE B712-8521 - Ricoh 3245 | Fax Reference - Page 227
Copyright © 2005 - Ricoh 3245 | Fax Reference - Page 228
FAX Option Type 3245 Operating Instructions Facsimile Reference B7128521 Printed in Japan AE AE B712-8521
-
 1
1 -
 2
2 -
 3
3 -
 4
4 -
 5
5 -
 6
6 -
 7
7 -
8
-
9
-
10
-
11
-
12
-
13
-
14
-
15
-
16
-
17
-
18
-
19
-
20
-
21
-
22
-
23
-
24
-
25
-
26
-
27
-
28
-
29
-
30
-
31
-
32
-
33
-
34
-
35
-
36
-
37
-
38
-
39
-
40
-
41
-
42
-
43
-
44
-
45
-
46
-
47
-
48
-
49
-
50
-
51
-
52
-
53
-
54
-
55
-
56
-
57
-
58
-
59
-
60
-
61
-
62
-
63
-
64
-
65
-
66
-
67
-
68
-
69
-
70
-
71
-
72
-
73
-
74
-
75
-
76
-
77
-
78
-
79
-
80
-
81
-
82
-
83
-
84
-
85
-
86
-
87
-
88
-
89
-
90
-
91
-
92
-
93
-
94
-
95
-
96
-
97
-
98
-
99
-
100
-
101
-
102
-
103
-
104
-
105
-
106
-
107
-
108
-
109
-
110
-
111
-
112
-
113
-
114
-
115
-
116
-
117
-
118
-
119
-
120
-
121
-
122
-
123
-
124
-
125
-
126
-
127
-
128
-
129
-
130
-
131
-
132
-
133
-
134
-
135
-
136
-
137
-
138
-
139
-
140
-
141
-
142
-
143
-
144
-
145
-
146
-
147
-
148
-
149
-
150
-
151
-
152
-
153
-
154
-
155
-
156
-
157
-
158
-
159
-
160
-
161
-
162
-
163
-
164
-
165
-
166
-
167
-
168
-
169
-
170
-
171
-
172
-
173
-
174
-
175
-
176
-
177
-
178
-
179
-
180
-
181
-
182
-
183
-
184
-
185
-
186
-
187
-
188
-
189
-
190
-
191
-
192
-
193
-
194
-
195
-
196
-
197
-
198
-
199
-
200
-
201
-
202
-
203
-
204
-
205
-
206
-
207
-
208
-
209
-
210
-
211
-
212
-
213
-
214
-
215
-
216
-
217
-
218
-
219
-
220
-
221
-
222
-
223
-
224
-
225
-
226
-
227
-
228
 |
 |
FAX Option Type 3245
Operating Instructions
Facsimile Reference
<Advanced Features>
Read this manual carefully before you use this machine and keep it handy for future reference. For safe and correct use, be sure to read the Safety
Information in the “General Settings Guide” before using the machine.
Transmission Mode
Checking and Canceling Transmission Files
Communication Information
Other Transmission Features
Reception Features
Fax via Computer
Simplifying the Operation
Facsimile Features
Administrator Setting
Solving Operation Problems
Appendix