Ricoh 3245 Fax Reference - Page 134
Multi- TIFF, Address, Fax Received File, Thumbnails, Details, Icons, Print, Start Print, Delete
 |
UPC - 026649128660
View all Ricoh 3245 manuals
Add to My Manuals
Save this manual to your list of manuals |
Page 134 highlights
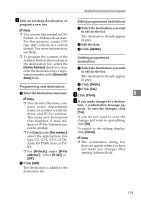
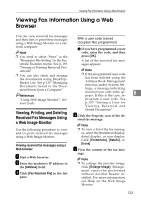
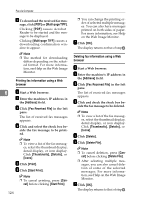
Fax via Computer F To download the received fax mes- sage, click [PDF] or [Multi-page TIFF]. Clicking [PDF] causes Acrobat Reader to be started and the message to be displayed. Clicking [Multi-page TIFF] causes a downloading confirmation window to appear. Note ❒ The method for downloading differs depending on the selected format. For more information, see Help on the Web Image Monitor. Printing fax information using a Web browser 6 A Start a Web browser. B Enter the machine's IP address in the [Address] field. C Click [Fax Received File] in the left pane. The list of received fax messages appears. D Click and select the check box be- side the fax message to be print- ed. Note ❒ To view a list of the fax messag- es, select the thumbnail display, detail display, or icon display. Click [Thumbnails], [Details], or [Icons]. E Click [Print]. F Click [Start Print]. Note ❒ To cancel printing, press [Cancel] before clicking [Start Print]. 124 ❒ You can change the printing order of selected multiple messages. You can also have messages printed on both sides of paper. For more information, see Help on the Web Image Monitor. G Click [OK]. The display returns to that of step D. Deleting fax information using a Web browser A Start a Web browser. B Enter the machine's IP address in the [Address] field. C Click [Fax Received File] in the left pane. The list of received fax messages appears. D Click and check the check box be- side the fax message to be deleted. Note ❒ To view a list of the fax messag- es, select the thumbnail display, detail display, or icon display. Click [Thumbnails], [Details], or [Icons]. E Click [Delete]. F Click [Delete File]. Note ❒ To cancel deletion, press [Can- cel] before clicking [Delete File]. ❒ After selecting multiple mes- sages, you can also cancel deletion of some of the selected messages. For more information, see Help on the Web Image Monitor. G Click [OK]. The display returns to that of step D.
-
 1
1 -
2
-
3
-
4
-
5
-
6
-
7
-
8
-
9
-
10
-
11
-
12
-
13
-
14
-
15
-
16
-
17
-
18
-
19
-
20
-
21
-
22
-
23
-
24
-
25
-
26
-
27
-
28
-
29
-
30
-
31
-
32
-
33
-
34
-
35
-
36
-
37
-
38
-
39
-
40
-
41
-
42
-
43
-
44
-
45
-
46
-
47
-
48
-
49
-
50
-
51
-
52
-
53
-
54
-
55
-
56
-
57
-
58
-
59
-
60
-
61
-
62
-
63
-
64
-
65
-
66
-
67
-
68
-
69
-
70
-
71
-
72
-
73
-
74
-
75
-
76
-
77
-
78
-
79
-
80
-
81
-
82
-
83
-
84
-
85
-
86
-
87
-
88
-
89
-
90
-
91
-
92
-
93
-
94
-
95
-
96
-
97
-
98
-
99
-
100
-
101
-
102
-
103
-
104
-
105
-
106
-
107
-
108
-
109
-
110
-
111
-
112
-
113
-
114
-
115
-
116
-
117
-
118
-
119
-
120
-
121
-
122
-
123
-
124
-
125
-
126
-
127
-
128
-
 129
129 -
 130
130 -
 131
131 -
 132
132 -
 133
133 -
 134
134 -
 135
135 -
 136
136 -
 137
137 -
 138
138 -
 139
139 -
140
-
141
-
142
-
143
-
144
-
145
-
146
-
147
-
148
-
149
-
150
-
151
-
152
-
153
-
154
-
155
-
156
-
157
-
158
-
159
-
160
-
161
-
162
-
163
-
164
-
165
-
166
-
167
-
168
-
169
-
170
-
171
-
172
-
173
-
174
-
175
-
176
-
177
-
178
-
179
-
180
-
181
-
182
-
183
-
184
-
185
-
186
-
187
-
188
-
189
-
190
-
191
-
192
-
193
-
194
-
195
-
196
-
197
-
198
-
199
-
200
-
201
-
202
-
203
-
204
-
205
-
206
-
207
-
208
-
209
-
210
-
211
-
212
-
213
-
214
-
215
-
216
-
217
-
218
-
219
-
220
-
221
-
222
-
223
-
224
-
225
-
226
-
227
-
228
 |
 |
