HP HD Pro 2 User Guide - Page 10
glass plate, white background platen/white rollers
 |
View all HP HD Pro 2 manuals
Add to My Manuals
Save this manual to your list of manuals |
Page 10 highlights
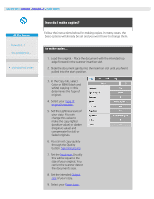
you are here: welcome how do I...? maintenance procedures HP Pro Scanner how do I...? the problem is... alphabetical index how do I... maintenance procedures Maintenance procedures should all be performed in a single maintenance session, starting with Cleaning the scan area and ending with Camera alignment and calibration. It is recommended to perform the scanner maintenance procedures at least once per month. cleaning the scan area 1. Turn the scanner power off and disconnect the scanner power cable. 2. Open the scanner cover. Press the two release buttons to disengage the locks and open the lid. The release buttons are found near the insertion slot on each side of the scanning area lid, or at the back of the lid depending on the scanner model. The scanning area is now exposed for cleaning. 3. Gently wipe the glass plate Clean the glass with a lint-free cloth and a mild, streak-free, glass cleaner. Caution: do not use abrasives, acetone, benzene, or fluids that contain these chemicals. Do not spray liquids directly onto the scanner's glass plate or anywhere else in the scanner. Caution: the lifespan of the glass plate depends on the paper types that pass across it. Abrasive papers such as mylar may cause premature deterioration, in which case the replacement of the plate is the customer's responsibility. 4. Dry the glass completely using a separate clean, dry lint-free cloth like the one provided with the maintenance kit. 5. Clean the white background platen/white rollers
-
 1
1 -
2
-
3
-
4
-
 5
5 -
 6
6 -
 7
7 -
 8
8 -
 9
9 -
 10
10 -
 11
11 -
 12
12 -
 13
13 -
 14
14 -
 15
15 -
16
-
17
-
18
-
19
-
20
-
21
-
22
-
23
-
24
-
25
-
26
-
27
-
28
-
29
-
30
-
31
-
32
-
33
-
34
-
35
-
36
-
37
-
38
-
39
-
40
-
41
-
42
-
43
-
44
-
45
-
46
-
47
-
48
-
49
-
50
-
51
-
52
-
53
-
54
-
55
-
56
-
57
-
58
-
59
-
60
-
61
-
62
-
63
-
64
-
65
-
66
-
67
-
68
-
69
-
70
-
71
-
72
-
73
-
74
-
75
-
76
-
77
-
78
-
79
-
80
-
81
-
82
-
83
-
84
-
85
-
86
-
87
-
88
-
89
-
90
-
91
-
92
-
93
-
94
-
95
-
96
-
97
-
98
-
99
-
100
-
101
-
102
-
103
-
104
-
105
-
106
-
107
-
108
-
109
-
110
-
111
-
112
-
113
-
114
-
115
-
116
-
117
-
118
-
119
-
120
-
121
-
122
-
123
-
124
-
125
-
126
-
127
-
128
-
129
-
130
-
131
-
132
-
133
-
134
-
135
-
136
-
137
-
138
-
139
-
140
-
141
-
142
-
143
-
144
-
145
-
146
-
147
-
148
-
149
-
150
-
151
-
152
-
153
-
154
-
155
-
156
-
157
-
158
-
159
-
160
-
161
-
162
-
163
-
164
-
165
-
166
-
167
-
168
-
169
-
170
-
171
-
172
-
173
-
174
-
175
-
176
-
177
-
178
-
179
-
180
-
181
-
182
-
183
-
184
-
185
-
186
-
187
-
188
-
189
-
190
-
191
-
192
-
193
-
194
-
195
-
196
-
197
-
198
-
199
-
200
-
201
-
202
 |
 |
