HP HD Pro 2 User Guide - Page 17
HP HD Pro 2 Scanner
 |
View all HP HD Pro 2 manuals
Add to My Manuals
Save this manual to your list of manuals |
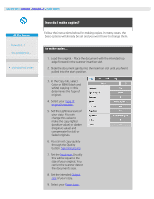
Page 17 highlights
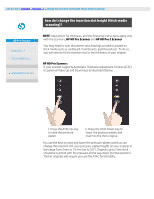
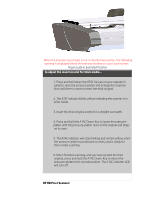
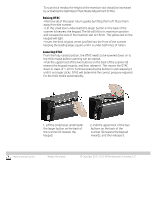
When the insertion slot height is not in the Normal position, the following warning is displayed below the preview window on your touch screen: Paper Guide in Extended Position to adjust the insertion slot for thick media... 1. Press and hold down the ATAC Up-key on your operator's panel to raise the pressure platen and enlarge the insertion slot until there is room to insert the thick original. 2. The ATAC Indicator blinks yellow indicating the scanner is in ATAC mode. 3. Insert the thick original evenly for a straight scan path. 4. Press and hold the ATAC Down-Key to lower the pressureplaten until the pressure-platen rests on the original and stops on its own. 5. The ATAC indicator will stop blinking and remain yellow when the pressure-platen is positioned correctly and is ready for thick media scanning. 6. When finished scanning, and you have ejected the thick original, press and hold the ATAC Down-Key to return the pressure-platen to its normal position. The ATAC indicator LED will turn off. HP HD Pro 2 Scanner:
-
 1
1 -
2
-
3
-
4
-
5
-
6
-
7
-
8
-
9
-
10
-
11
-
 12
12 -
 13
13 -
 14
14 -
 15
15 -
 16
16 -
 17
17 -
 18
18 -
 19
19 -
 20
20 -
 21
21 -
 22
22 -
23
-
24
-
25
-
26
-
27
-
28
-
29
-
30
-
31
-
32
-
33
-
34
-
35
-
36
-
37
-
38
-
39
-
40
-
41
-
42
-
43
-
44
-
45
-
46
-
47
-
48
-
49
-
50
-
51
-
52
-
53
-
54
-
55
-
56
-
57
-
58
-
59
-
60
-
61
-
62
-
63
-
64
-
65
-
66
-
67
-
68
-
69
-
70
-
71
-
72
-
73
-
74
-
75
-
76
-
77
-
78
-
79
-
80
-
81
-
82
-
83
-
84
-
85
-
86
-
87
-
88
-
89
-
90
-
91
-
92
-
93
-
94
-
95
-
96
-
97
-
98
-
99
-
100
-
101
-
102
-
103
-
104
-
105
-
106
-
107
-
108
-
109
-
110
-
111
-
112
-
113
-
114
-
115
-
116
-
117
-
118
-
119
-
120
-
121
-
122
-
123
-
124
-
125
-
126
-
127
-
128
-
129
-
130
-
131
-
132
-
133
-
134
-
135
-
136
-
137
-
138
-
139
-
140
-
141
-
142
-
143
-
144
-
145
-
146
-
147
-
148
-
149
-
150
-
151
-
152
-
153
-
154
-
155
-
156
-
157
-
158
-
159
-
160
-
161
-
162
-
163
-
164
-
165
-
166
-
167
-
168
-
169
-
170
-
171
-
172
-
173
-
174
-
175
-
176
-
177
-
178
-
179
-
180
-
181
-
182
-
183
-
184
-
185
-
186
-
187
-
188
-
189
-
190
-
191
-
192
-
193
-
194
-
195
-
196
-
197
-
198
-
199
-
200
-
201
-
202
 |
 |
