HP HD Pro 2 User Guide - Page 32
crooked in the preview window. Correcting this does not mean
 |
View all HP HD Pro 2 manuals
Add to My Manuals
Save this manual to your list of manuals |
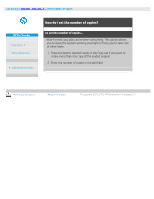
Page 32 highlights
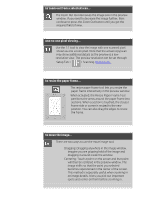
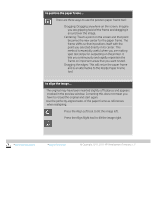
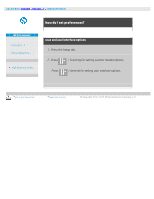
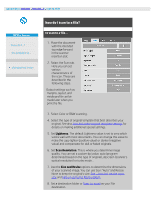
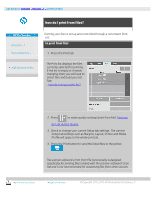
to position the paper frame... There are three ways to use the position paper frame tool: Dragging: Dragging anywhere on the screen. Imagine you are gripping hold of the frame and dragging it around over the image. Centering: Touch a point on the screen and that point becomes the new center for the paper frame. The frame shifts so that it positions itself with the point you selected directly in its center. This method is especially useful when you are making spot test strips for outputting on the printer. It lets you continuously and rapidly reposition the frame on important areas that you want tested. Dragging the edges: This will resize the paper frame and is an alternative to the Resize Paper Frame tool. to align the image... The original may have been inserted slightly off balance and appears crooked in the preview window. Correcting this does not mean you have to reload the original and start again. Use the perfectly aligned sides of the paper frame as references when realigning. Press the Align Left tool to tilt the image left. Press the Align Right tool to tilt the image right. printing instructions legal information © Copyright 2012, 2015 HP Development Company, L.P
-
 1
1 -
2
-
3
-
4
-
5
-
6
-
7
-
8
-
9
-
10
-
11
-
12
-
13
-
14
-
15
-
16
-
17
-
18
-
19
-
20
-
21
-
22
-
23
-
24
-
25
-
26
-
 27
27 -
 28
28 -
 29
29 -
 30
30 -
 31
31 -
 32
32 -
 33
33 -
 34
34 -
 35
35 -
 36
36 -
 37
37 -
38
-
39
-
40
-
41
-
42
-
43
-
44
-
45
-
46
-
47
-
48
-
49
-
50
-
51
-
52
-
53
-
54
-
55
-
56
-
57
-
58
-
59
-
60
-
61
-
62
-
63
-
64
-
65
-
66
-
67
-
68
-
69
-
70
-
71
-
72
-
73
-
74
-
75
-
76
-
77
-
78
-
79
-
80
-
81
-
82
-
83
-
84
-
85
-
86
-
87
-
88
-
89
-
90
-
91
-
92
-
93
-
94
-
95
-
96
-
97
-
98
-
99
-
100
-
101
-
102
-
103
-
104
-
105
-
106
-
107
-
108
-
109
-
110
-
111
-
112
-
113
-
114
-
115
-
116
-
117
-
118
-
119
-
120
-
121
-
122
-
123
-
124
-
125
-
126
-
127
-
128
-
129
-
130
-
131
-
132
-
133
-
134
-
135
-
136
-
137
-
138
-
139
-
140
-
141
-
142
-
143
-
144
-
145
-
146
-
147
-
148
-
149
-
150
-
151
-
152
-
153
-
154
-
155
-
156
-
157
-
158
-
159
-
160
-
161
-
162
-
163
-
164
-
165
-
166
-
167
-
168
-
169
-
170
-
171
-
172
-
173
-
174
-
175
-
176
-
177
-
178
-
179
-
180
-
181
-
182
-
183
-
184
-
185
-
186
-
187
-
188
-
189
-
190
-
191
-
192
-
193
-
194
-
195
-
196
-
197
-
198
-
199
-
200
-
201
-
202
 |
 |
