HP HD Pro 2 User Guide - Page 151
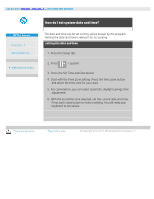
To scan to the network folder, To access files on the network folder
 |
View all HP HD Pro 2 manuals
Add to My Manuals
Save this manual to your list of manuals |
Page 151 highlights
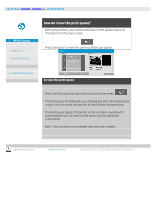
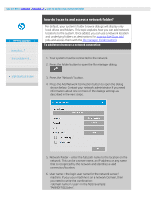
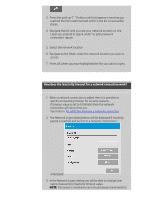
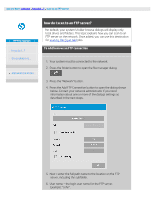
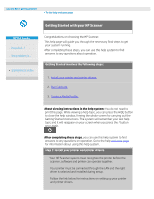
(see above) it will be deleted automatically when you shut down the panel PC. Stored connections must be removed manually. You may for example wish to remove a stored network connection that fails at system startup because the server status or permissions have changed. To scan to the network folder 1. Complete the steps above under "To add a network connection". 2. Select the Scan tab and make your settings as with any scanto-file job. 3. Press the "File destination" button. 4. Press the path up ("..") button until it disappears meaning you reached the list's topmost level which is the list of accessible drives. 5. Navigate the list until you see your network location i.e. the Label you entered in step 8 under "to add a network connection" above. 6. Select the network location. 7. Once connected, you can navigate to a folder under the network location to select it as the destination. 8. Press OK when you have highlighted the destination folder you want to use. To access files on the network folder 1. Complete the steps above under "To add a network connection". 2. Press the folder button to open the file manager dialog.
-
 1
1 -
2
-
3
-
4
-
5
-
6
-
7
-
8
-
9
-
10
-
11
-
12
-
13
-
14
-
15
-
16
-
17
-
18
-
19
-
20
-
21
-
22
-
23
-
24
-
25
-
26
-
27
-
28
-
29
-
30
-
31
-
32
-
33
-
34
-
35
-
36
-
37
-
38
-
39
-
40
-
41
-
42
-
43
-
44
-
45
-
46
-
47
-
48
-
49
-
50
-
51
-
52
-
53
-
54
-
55
-
56
-
57
-
58
-
59
-
60
-
61
-
62
-
63
-
64
-
65
-
66
-
67
-
68
-
69
-
70
-
71
-
72
-
73
-
74
-
75
-
76
-
77
-
78
-
79
-
80
-
81
-
82
-
83
-
84
-
85
-
86
-
87
-
88
-
89
-
90
-
91
-
92
-
93
-
94
-
95
-
96
-
97
-
98
-
99
-
100
-
101
-
102
-
103
-
104
-
105
-
106
-
107
-
108
-
109
-
110
-
111
-
112
-
113
-
114
-
115
-
116
-
117
-
118
-
119
-
120
-
121
-
122
-
123
-
124
-
125
-
126
-
127
-
128
-
129
-
130
-
131
-
132
-
133
-
134
-
135
-
136
-
137
-
138
-
139
-
140
-
141
-
142
-
143
-
144
-
145
-
 146
146 -
 147
147 -
 148
148 -
 149
149 -
 150
150 -
 151
151 -
 152
152 -
 153
153 -
 154
154 -
 155
155 -
 156
156 -
157
-
158
-
159
-
160
-
161
-
162
-
163
-
164
-
165
-
166
-
167
-
168
-
169
-
170
-
171
-
172
-
173
-
174
-
175
-
176
-
177
-
178
-
179
-
180
-
181
-
182
-
183
-
184
-
185
-
186
-
187
-
188
-
189
-
190
-
191
-
192
-
193
-
194
-
195
-
196
-
197
-
198
-
199
-
200
-
201
-
202
 |
 |
