HP HD Pro 2 User Guide - Page 114
how do I make network settings?
 |
View all HP HD Pro 2 manuals
Add to My Manuals
Save this manual to your list of manuals |
Page 114 highlights
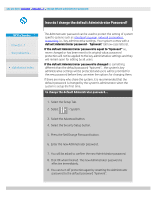
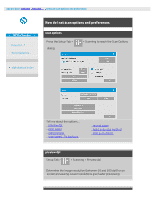
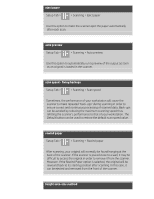
you are here: welcome how do I...? make network settings HP Pro Scanner how do I...? the problem is... alphabetical index how do I make network settings? These actions will make your system recognizable to others on the network. NOTE: If the Administrator password has been setup and activated, you will be prompted for it before being able to make the network settings. to make your system's network settings... 1. Select the Setup Tab. 2. Select > System. 3. Select the Advanced button. 4. Enter the Administrator password if prompted by the system. 5. Press the Network Settings button. 6. Select the DHCP option if you know that your network has a DHCP server. This will let the system find the network connection information automatically. 7. Select the Manually option for manual connection. Obtain the IP address, and other relevant network connection information from your system administrator. 8. Click OK for each setting. 9. You can protect your system's shared folders from unwelcome network access by applying a login and password under the FTP and WebDAV option area. Click the Login and Password buttons to enter strings and apply them. Note that the string "@scanner" is always appended to the entered login name. Pressing the Reset button will remove login/password protection for FTP/WebDAV access and thereby bring the system back to its default mode (unprotected access to the system's shared folders).
-
 1
1 -
2
-
3
-
4
-
5
-
6
-
7
-
8
-
9
-
10
-
11
-
12
-
13
-
14
-
15
-
16
-
17
-
18
-
19
-
20
-
21
-
22
-
23
-
24
-
25
-
26
-
27
-
28
-
29
-
30
-
31
-
32
-
33
-
34
-
35
-
36
-
37
-
38
-
39
-
40
-
41
-
42
-
43
-
44
-
45
-
46
-
47
-
48
-
49
-
50
-
51
-
52
-
53
-
54
-
55
-
56
-
57
-
58
-
59
-
60
-
61
-
62
-
63
-
64
-
65
-
66
-
67
-
68
-
69
-
70
-
71
-
72
-
73
-
74
-
75
-
76
-
77
-
78
-
79
-
80
-
81
-
82
-
83
-
84
-
85
-
86
-
87
-
88
-
89
-
90
-
91
-
92
-
93
-
94
-
95
-
96
-
97
-
98
-
99
-
100
-
101
-
102
-
103
-
104
-
105
-
106
-
107
-
108
-
 109
109 -
 110
110 -
 111
111 -
 112
112 -
 113
113 -
 114
114 -
 115
115 -
 116
116 -
 117
117 -
 118
118 -
 119
119 -
120
-
121
-
122
-
123
-
124
-
125
-
126
-
127
-
128
-
129
-
130
-
131
-
132
-
133
-
134
-
135
-
136
-
137
-
138
-
139
-
140
-
141
-
142
-
143
-
144
-
145
-
146
-
147
-
148
-
149
-
150
-
151
-
152
-
153
-
154
-
155
-
156
-
157
-
158
-
159
-
160
-
161
-
162
-
163
-
164
-
165
-
166
-
167
-
168
-
169
-
170
-
171
-
172
-
173
-
174
-
175
-
176
-
177
-
178
-
179
-
180
-
181
-
182
-
183
-
184
-
185
-
186
-
187
-
188
-
189
-
190
-
191
-
192
-
193
-
194
-
195
-
196
-
197
-
198
-
199
-
200
-
201
-
202
 |
 |
