Netgear AC1600-WiFi User Manual - Page 168
admin, password, ADVANCED > Advanced Setup > Port Forwarding / Port Triggering, Port Forwarding
 |
View all Netgear AC1600-WiFi manuals
Add to My Manuals
Save this manual to your list of manuals |
Page 168 highlights
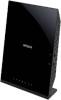
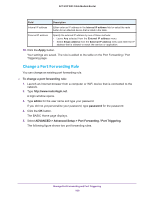
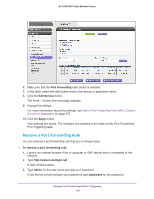
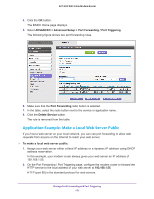
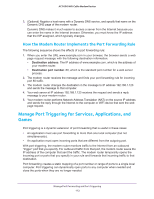
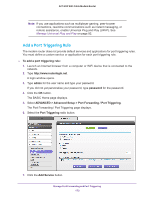
AC1600 WiFi Cable Modem Router A login window opens. 4. Type admin for the user name and type your password. If you did not yet personalize your password, type password for the password. 5. Click the OK button. The BASIC Home page displays. 6. Select ADVANCED > Advanced Setup > Port Forwarding / Port Triggering. The Port Forwarding / Port Triggering page displays. 7. Make sure that the Port Forwarding radio button is selected. 8. Click the Add Custom Service button. 9. Specify a new port forwarding rule with a custom service or application as described in the following table. Field Description Service Name Enter the name of the custom service or application. Service Type Select the protocol (TCP or UDP) that is associated with the service or application. If you are unsure, select TCP/UDP. External Starting Port Enter the external start port number that the service or application uses. External Ending Port Enter the external end port number that the service or application uses. Internal Starting Port Specify the internal start port by one of these methods: • Leave the Use the same port range for Internal port check box selected. • Clear the Use the same port range for Internal port check box and enter the internal start port number that the service or application uses. Internal Ending Port Specify the internal end port by one of these methods: • Leave the Use the same port range for Internal port check box selected. • Clear the Use the same port range for Internal port check box and enter the internal end port number that the service or application uses. Manage Port Forwarding and Port Triggering 168
-
 1
1 -
2
-
3
-
4
-
5
-
6
-
7
-
8
-
9
-
10
-
11
-
12
-
13
-
14
-
15
-
16
-
17
-
18
-
19
-
20
-
21
-
22
-
23
-
24
-
25
-
26
-
27
-
28
-
29
-
30
-
31
-
32
-
33
-
34
-
35
-
36
-
37
-
38
-
39
-
40
-
41
-
42
-
43
-
44
-
45
-
46
-
47
-
48
-
49
-
50
-
51
-
52
-
53
-
54
-
55
-
56
-
57
-
58
-
59
-
60
-
61
-
62
-
63
-
64
-
65
-
66
-
67
-
68
-
69
-
70
-
71
-
72
-
73
-
74
-
75
-
76
-
77
-
78
-
79
-
80
-
81
-
82
-
83
-
84
-
85
-
86
-
87
-
88
-
89
-
90
-
91
-
92
-
93
-
94
-
95
-
96
-
97
-
98
-
99
-
100
-
101
-
102
-
103
-
104
-
105
-
106
-
107
-
108
-
109
-
110
-
111
-
112
-
113
-
114
-
115
-
116
-
117
-
118
-
119
-
120
-
121
-
122
-
123
-
124
-
125
-
126
-
127
-
128
-
129
-
130
-
131
-
132
-
133
-
134
-
135
-
136
-
137
-
138
-
139
-
140
-
141
-
142
-
143
-
144
-
145
-
146
-
147
-
148
-
149
-
150
-
151
-
152
-
153
-
154
-
155
-
156
-
157
-
158
-
159
-
160
-
161
-
162
-
 163
163 -
 164
164 -
 165
165 -
 166
166 -
 167
167 -
 168
168 -
 169
169 -
 170
170 -
 171
171 -
 172
172 -
 173
173 -
174
-
175
-
176
-
177
-
178
-
179
-
180
-
181
-
182
-
183
-
184
-
185
-
186
-
187
-
188
-
189
-
190
-
191
-
192
-
193
-
194
-
195
-
196
-
197
-
198
 |
 |