HP LaserJet 3200 HP LaserJet 3200 Series Product - (English) User Guide - Page 102
Customizing your own fax cover sheet, To customize your own fax cover sheet Windows
 |
View all HP LaserJet 3200 manuals
Add to My Manuals
Save this manual to your list of manuals |
Page 102 highlights
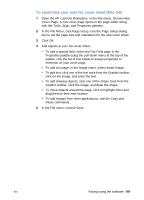
Note Once the Stop Receive to PC setting has been selected, any faxes still in the product's memory are printed. Customizing your own fax cover sheet Note You can use the HP LaserJet Cover Page Editor to customize a fax cover sheet for all your outgoing fax transmissions. With the HP LaserJet Cover Page Editor, you can add text and images along with special fields that define such attributes as who the fax is for, who it is from, the date, and how many pages are in the fax. See the software Help for more information about fax cover sheets. To customize your own fax cover sheet (Windows) 1 Click Start, point to Programs, point to HP LaserJet 3200, and then click HP LaserJet Cover Page Editor. 1 From the File menu, select New. 2 Select a standard page dimension. 3 Select the page orientation, either Portrait or Landscape. 4 Click OK. 5 Add objects to your fax cover sheet: • To add a special field, select one from the Special Fields list and click Add to Page. • To add an image, from the Image menu, select Insert Image. • To add text, click one of the text tools from the Graphic toolbar, click on the image, and enter the text. • To add drawing objects, click one of the shape tools from the Graphic toolbar, click the image, and draw the shape. • To move objects around the page, click to highlight them and drag them to their new location. • To add images from other applications, use the Copy and Paste commands. 6 On the File menu, click Save. 100 Chapter 4 - Faxing EN
-
 1
1 -
2
-
3
-
4
-
5
-
6
-
7
-
8
-
9
-
10
-
11
-
12
-
13
-
14
-
15
-
16
-
17
-
18
-
19
-
20
-
21
-
22
-
23
-
24
-
25
-
26
-
27
-
28
-
29
-
30
-
31
-
32
-
33
-
34
-
35
-
36
-
37
-
38
-
39
-
40
-
41
-
42
-
43
-
44
-
45
-
46
-
47
-
48
-
49
-
50
-
51
-
52
-
53
-
54
-
55
-
56
-
57
-
58
-
59
-
60
-
61
-
62
-
63
-
64
-
65
-
66
-
67
-
68
-
69
-
70
-
71
-
72
-
73
-
74
-
75
-
76
-
77
-
78
-
79
-
80
-
81
-
82
-
83
-
84
-
85
-
86
-
87
-
88
-
89
-
90
-
91
-
92
-
93
-
94
-
95
-
96
-
 97
97 -
 98
98 -
 99
99 -
 100
100 -
 101
101 -
 102
102 -
 103
103 -
 104
104 -
 105
105 -
 106
106 -
 107
107 -
108
-
109
-
110
-
111
-
112
-
113
-
114
-
115
-
116
-
117
-
118
-
119
-
120
-
121
-
122
-
123
-
124
-
125
-
126
-
127
-
128
-
129
-
130
-
131
-
132
-
133
-
134
-
135
-
136
-
137
-
138
-
139
-
140
-
141
-
142
-
143
-
144
-
145
-
146
-
147
-
148
-
149
-
150
-
151
-
152
-
153
-
154
-
155
-
156
-
157
-
158
-
159
-
160
-
161
-
162
-
163
-
164
-
165
-
166
-
167
-
168
-
169
-
170
-
171
-
172
-
173
-
174
-
175
-
176
-
177
-
178
-
179
-
180
-
181
-
182
-
183
-
184
-
185
-
186
-
187
-
188
-
189
-
190
-
191
-
192
-
193
-
194
-
195
-
196
-
197
-
198
-
199
-
200
-
201
-
202
-
203
-
204
-
205
-
206
-
207
-
208
-
209
-
210
-
211
-
212
-
213
-
214
-
215
-
216
-
217
-
218
-
219
-
220
-
221
-
222
-
223
-
224
-
225
-
226
-
227
-
228
-
229
-
230
-
231
-
232
-
233
-
234
-
235
-
236
-
237
-
238
-
239
-
240
-
241
-
242
-
243
-
244
-
245
-
246
-
247
-
248
-
249
-
250
-
251
-
252
-
253
-
254
-
255
-
256
-
257
-
258
-
259
-
260
-
261
-
262
-
263
-
264
-
265
-
266
-
267
-
268
-
269
-
270
-
271
-
272
-
273
-
274
-
275
-
276
-
277
-
278
-
279
-
280
-
281
-
282
-
283
-
284
-
285
-
286
-
287
-
288
 |
 |