Panasonic WJ-ND400K Operating Instructions - Page 175
Time table, Time table setup
 |
View all Panasonic WJ-ND400K manuals
Add to My Manuals
Save this manual to your list of manuals |
Page 175 highlights
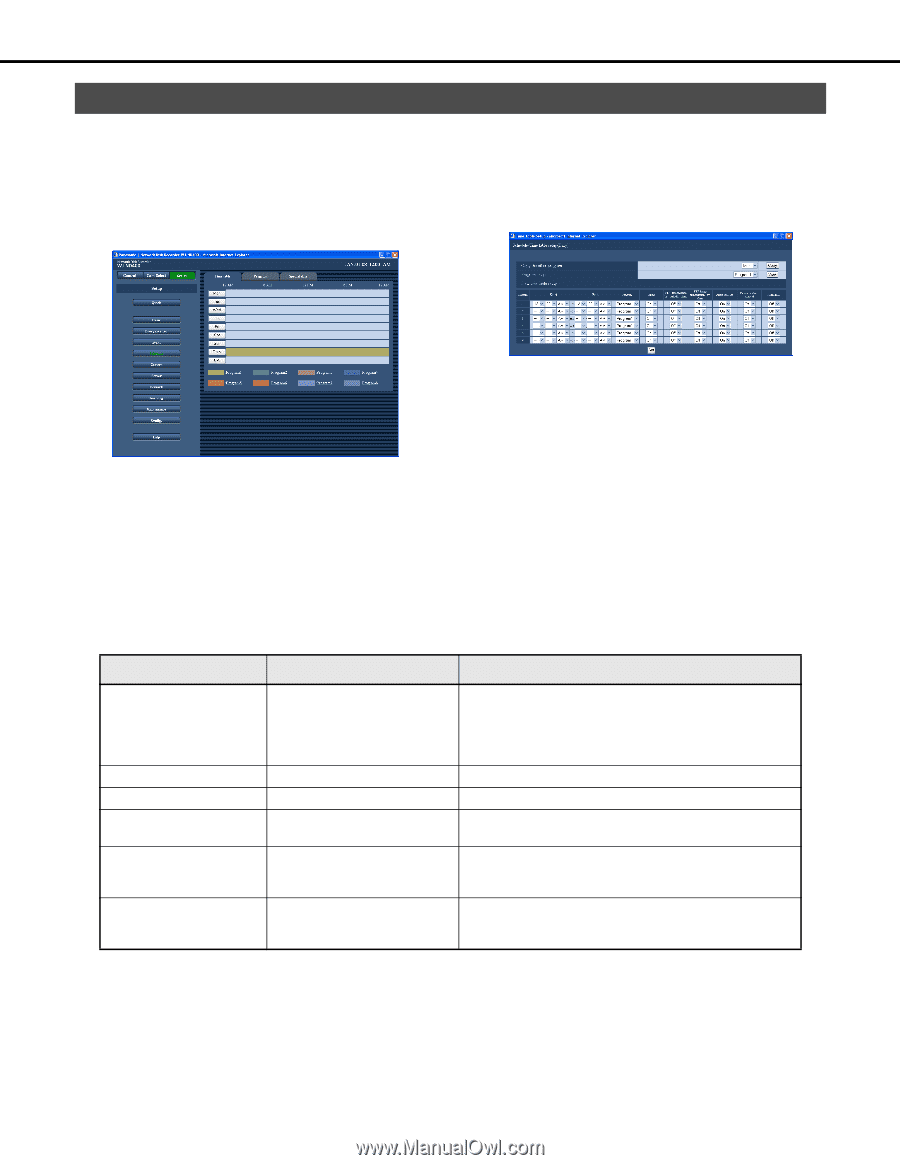
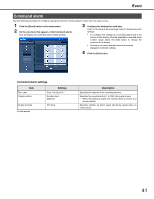
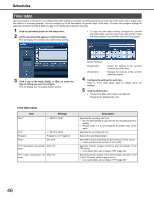
Schedules Time table Use the procedure in this section to configure time table settings to schedule recording operations for each day of the week, and to assign each time table to a recording program. You can configure up to six time tables, for specific days of the week. You also can configure settings for externally controlled recording. Refer to page 47 for details about external recording. 1 Click the [Schedule] button on the setup menu. 2 On the sub-menu that appears, click [Time table]. This will display the schedule time table setting window. • To copy the time table currently configured for another day of the week, select the day of the week with the "Copy the other program" box and then click the [Copy] button. 3 Click a day of the week, [Daily], or [Ext.] to select the type of setting you want to configure. This will display the "Time table Setup" window. Button Functions [Copy] button [View] button : Copies the settings of the currently selected day of the week. : Displays the contents of the currently selected program. 4 Configure the settings for each item. Refer to "Time table setup" table for details about the settings. 5 Click the [Set] button. • The set time table and program are reflected. Programs are displayed by color. Time table setup Start*1 Item Settings -- / 00:00 to 23:45 End*1 Program Event -- / 00:15 to 24:00 Program 1♦ to Program 8 Off / On♦ FTP transmission by periodic Off♦ / On timer FTP image transmission by Off♦ / On alarm Description Specifies the recording start time. • No time after [23:46] is supported for the recording start time setting. • Repeat steps 1-5 to set programs of another day of the week. Specifies the recording end time. Selects the recording program. Set whether event operations are done when an event occurs. • Event operations are not done if set to [Off]. Specifies whether images should be sent periodically to the FTP server. • If you select [On], also configure "FTP (page 56)". Specifies whether images of the alarm location should be sent to the FTP server when an event occurs. • If you select [On], also configure "FTP (page 56)". 46
-
 1
1 -
2
-
3
-
4
-
5
-
6
-
7
-
8
-
9
-
10
-
11
-
12
-
13
-
14
-
15
-
16
-
17
-
18
-
19
-
20
-
21
-
22
-
23
-
24
-
25
-
26
-
27
-
28
-
29
-
30
-
31
-
32
-
33
-
34
-
35
-
36
-
37
-
38
-
39
-
40
-
41
-
42
-
43
-
44
-
45
-
46
-
47
-
48
-
49
-
50
-
51
-
52
-
53
-
54
-
55
-
56
-
57
-
58
-
59
-
60
-
61
-
62
-
63
-
64
-
65
-
66
-
67
-
68
-
69
-
70
-
71
-
72
-
73
-
74
-
75
-
76
-
77
-
78
-
79
-
80
-
81
-
82
-
83
-
84
-
85
-
86
-
87
-
88
-
89
-
90
-
91
-
92
-
93
-
94
-
95
-
96
-
97
-
98
-
99
-
100
-
101
-
102
-
103
-
104
-
105
-
106
-
107
-
108
-
109
-
110
-
111
-
112
-
113
-
114
-
115
-
116
-
117
-
118
-
119
-
120
-
121
-
122
-
123
-
124
-
125
-
126
-
127
-
128
-
129
-
130
-
131
-
132
-
133
-
134
-
135
-
136
-
137
-
138
-
139
-
140
-
141
-
142
-
143
-
144
-
145
-
146
-
147
-
148
-
149
-
150
-
151
-
152
-
153
-
154
-
155
-
156
-
157
-
158
-
159
-
160
-
161
-
162
-
163
-
164
-
165
-
166
-
167
-
168
-
169
-
 170
170 -
 171
171 -
 172
172 -
 173
173 -
 174
174 -
 175
175 -
 176
176 -
 177
177 -
 178
178 -
 179
179 -
 180
180 -
181
-
182
-
183
-
184
-
185
-
186
-
187
-
188
-
189
-
190
-
191
-
192
-
193
-
194
-
195
-
196
-
197
-
198
-
199
-
200
-
201
-
202
-
203
-
204
-
205
-
206
-
207
-
208
-
209
-
210
-
211
-
212
-
213
-
214
-
215
-
216
-
217
-
218
-
219
-
220
-
221
-
222
-
223
-
224
-
225
-
226
-
227
-
228
-
229
-
230
-
231
-
232
-
233
 |
 |