Panasonic WJ-ND400K Operating Instructions - Page 215
Formatting disks, Format
 |
View all Panasonic WJ-ND400K manuals
Add to My Manuals
Save this manual to your list of manuals |
Page 215 highlights
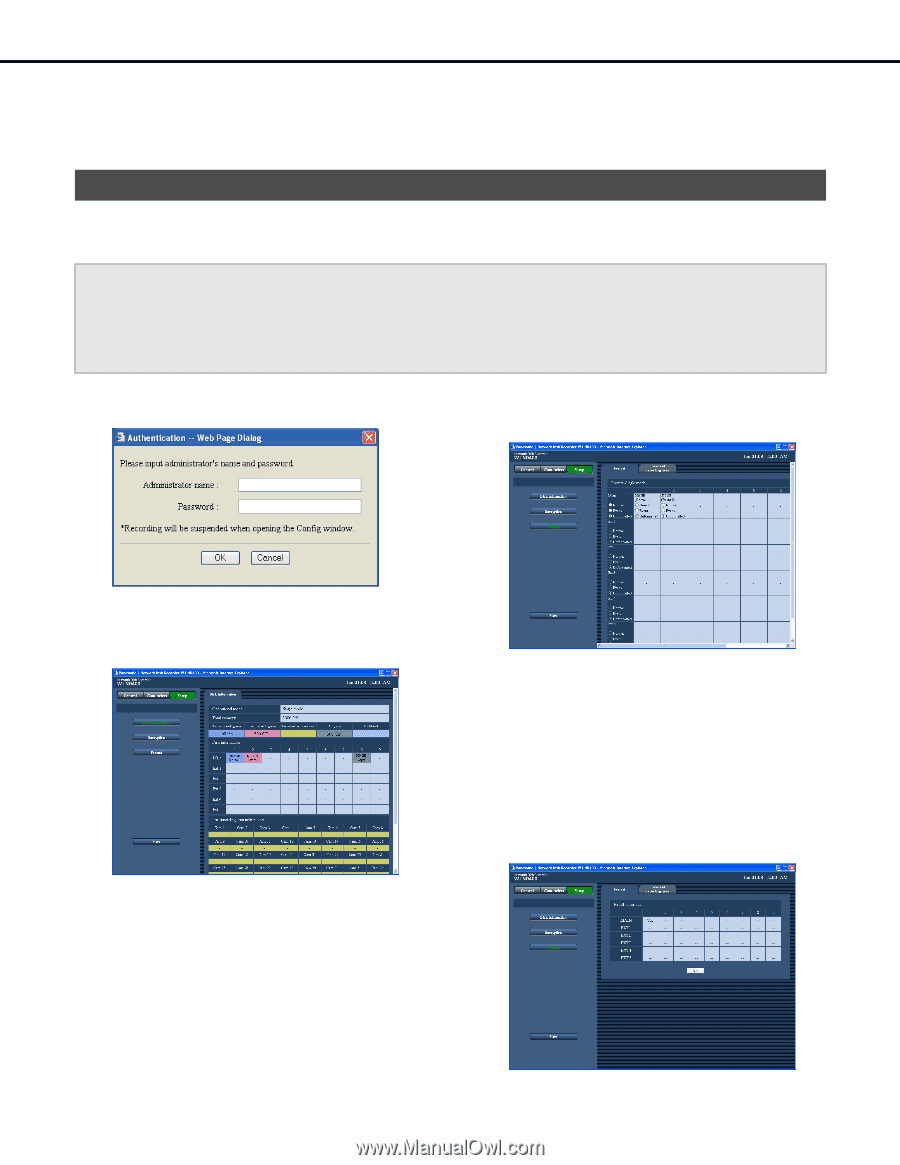
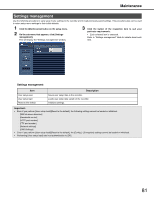
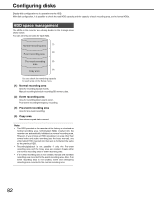
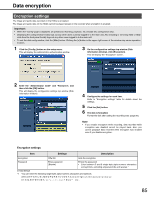
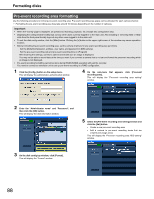
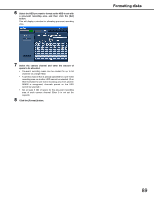
Formatting disks When necessary, format HDDs when using them for the first time after replacing or adding HDDs, or when connecting an extension unit. HDDs can be formatted as a group or individually (select units when running RAID5 or RAID6). You must also divide the HDD into the normal recording area, event recording area, copy area and the play recording area. When an HDD is formatted, all the data on it is destroyed. Format Use the following procedure to allocate an event recording area and copy area to an HDD, and to re-format an HDD. • Unformatted HDDs in the recorder and internal HDDs when shipped are automatically formatted as Normal recording areas when recognized. • Formatting one HDD takes about 30 seconds. Important: • When the "Config" page is displayed, all operations (recording, playback, etc.) except disc configuration stop. • Displaying the config window forcibly logs out any other users currently logged in to the main unit. Also installing or removing HDD or HDD units from the front panel forcibly logs out any other users logged in to the main unit. • To exit the disk config window, click the [Main] button. Clicking the [x] button in the upper right corner of the window may cause operation troubles. 1 Click the [Config.] button on the setup menu. This will display the administrator authentication window. 3 On the configuration settings top window (Disk Information window), click [Format]. This will display the "Format" window. 2 Enter the "Administrator name" and "Password", and then click the [OK] button. This will display the configuration settings top window (Disk Information window). 4 Select the HDD to be formatted and select the check boxes of the recording areas to be allocated. Selection of multiple HDDs is supported. • Normal : Formatted as normal recording area • Event : Formatted as event recording area • Copy : Formatted as copy area • Unformatted : Do not format 5 Click the [Format] button. A "Format result" window will appear after formatting is complete. 86
-
 1
1 -
2
-
3
-
4
-
5
-
6
-
7
-
8
-
9
-
10
-
11
-
12
-
13
-
14
-
15
-
16
-
17
-
18
-
19
-
20
-
21
-
22
-
23
-
24
-
25
-
26
-
27
-
28
-
29
-
30
-
31
-
32
-
33
-
34
-
35
-
36
-
37
-
38
-
39
-
40
-
41
-
42
-
43
-
44
-
45
-
46
-
47
-
48
-
49
-
50
-
51
-
52
-
53
-
54
-
55
-
56
-
57
-
58
-
59
-
60
-
61
-
62
-
63
-
64
-
65
-
66
-
67
-
68
-
69
-
70
-
71
-
72
-
73
-
74
-
75
-
76
-
77
-
78
-
79
-
80
-
81
-
82
-
83
-
84
-
85
-
86
-
87
-
88
-
89
-
90
-
91
-
92
-
93
-
94
-
95
-
96
-
97
-
98
-
99
-
100
-
101
-
102
-
103
-
104
-
105
-
106
-
107
-
108
-
109
-
110
-
111
-
112
-
113
-
114
-
115
-
116
-
117
-
118
-
119
-
120
-
121
-
122
-
123
-
124
-
125
-
126
-
127
-
128
-
129
-
130
-
131
-
132
-
133
-
134
-
135
-
136
-
137
-
138
-
139
-
140
-
141
-
142
-
143
-
144
-
145
-
146
-
147
-
148
-
149
-
150
-
151
-
152
-
153
-
154
-
155
-
156
-
157
-
158
-
159
-
160
-
161
-
162
-
163
-
164
-
165
-
166
-
167
-
168
-
169
-
170
-
171
-
172
-
173
-
174
-
175
-
176
-
177
-
178
-
179
-
180
-
181
-
182
-
183
-
184
-
185
-
186
-
187
-
188
-
189
-
190
-
191
-
192
-
193
-
194
-
195
-
196
-
197
-
198
-
199
-
200
-
201
-
202
-
203
-
204
-
205
-
206
-
207
-
208
-
209
-
 210
210 -
 211
211 -
 212
212 -
 213
213 -
 214
214 -
 215
215 -
 216
216 -
 217
217 -
 218
218 -
 219
219 -
 220
220 -
221
-
222
-
223
-
224
-
225
-
226
-
227
-
228
-
229
-
230
-
231
-
232
-
233
 |
 |