Panasonic WJ-ND400K Operating Instructions - Page 75

About Connectors, Power Supply, the Front Panel for Operations, Troubleshootin, Specifications

Page 75 highlights

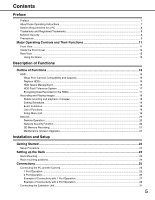
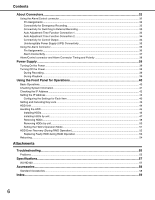
Contents About Connectors...32 Using the Alarm/Control connector ...32 Pin Assignments ...32 Connectivity for Emergency Recording...33 Connectivity for Switching to External Recording 33 Auto Adjustment Time Function Connection 1 33 Auto Adjustment Time Function Connection 2 34 Connectivity for Control Output...34 Uninterruptible Power Supply (UPS) Connectivity 35 Using the Alarm Connector...36 Pin Assignments ...36 Alarm Connectivity ...37 Alarm/Control connector and Alarm Connector Timing and Polarity 38 Power Supply ...39 Turning On the Power...39 Turning Off the Power...39 During Recording ...39 During Playback...39 Using the Front Panel for Operations 40 Basic Operations...40 Checking System Information ...41 Checking the IP Address ...42 Setting the IP Address ...43 Configuring the Settings for Each Item ...43 Setting and Canceling Key Lock ...43 HDD Unit...44 Handling the HDD ...45 Installing HDDs ...46 Installing HDDs by unit...47 Removing HDDs ...48 Removing HDDs by unit...50 Setting the HDD's Operation Mode...51 HDD Error Recovery (During RAID Operation 52 Replacing Faulty HDD during RAID Operation 53 Rebooting...54 Attachments Troubleshooting...55 Problems...55 Specifications...57 WJ-ND400 ...57 Accessories ...58 Standard Accessories ...58 Index...59 6

  • 1
  • 2
  • 3
  • 4
  • 5
  • 6
  • 7
  • 8
  • 9
  • 10
  • 11
  • 12
  • 13
  • 14
  • 15
  • 16
  • 17
  • 18
  • 19
  • 20
  • 21
  • 22
  • 23
  • 24
  • 25
  • 26
  • 27
  • 28
  • 29
  • 30
  • 31
  • 32
  • 33
  • 34
  • 35
  • 36
  • 37
  • 38
  • 39
  • 40
  • 41
  • 42
  • 43
  • 44
  • 45
  • 46
  • 47
  • 48
  • 49
  • 50
  • 51
  • 52
  • 53
  • 54
  • 55
  • 56
  • 57
  • 58
  • 59
  • 60
  • 61
  • 62
  • 63
  • 64
  • 65
  • 66
  • 67
  • 68
  • 69
  • 70
  • 71
  • 72
  • 73
  • 74
  • 75
  • 76
  • 77
  • 78
  • 79
  • 80
  • 81
  • 82
  • 83
  • 84
  • 85
  • 86
  • 87
  • 88
  • 89
  • 90
  • 91
  • 92
  • 93
  • 94
  • 95
  • 96
  • 97
  • 98
  • 99
  • 100
  • 101
  • 102
  • 103
  • 104
  • 105
  • 106
  • 107
  • 108
  • 109
  • 110
  • 111
  • 112
  • 113
  • 114
  • 115
  • 116
  • 117
  • 118
  • 119
  • 120
  • 121
  • 122
  • 123
  • 124
  • 125
  • 126
  • 127
  • 128
  • 129
  • 130
  • 131
  • 132
  • 133
  • 134
  • 135
  • 136
  • 137
  • 138
  • 139
  • 140
  • 141
  • 142
  • 143
  • 144
  • 145
  • 146
  • 147
  • 148
  • 149
  • 150
  • 151
  • 152
  • 153
  • 154
  • 155
  • 156
  • 157
  • 158
  • 159
  • 160
  • 161
  • 162
  • 163
  • 164
  • 165
  • 166
  • 167
  • 168
  • 169
  • 170
  • 171
  • 172
  • 173
  • 174
  • 175
  • 176
  • 177
  • 178
  • 179
  • 180
  • 181
  • 182
  • 183
  • 184
  • 185
  • 186
  • 187
  • 188
  • 189
  • 190
  • 191
  • 192
  • 193
  • 194
  • 195
  • 196
  • 197
  • 198
  • 199
  • 200
  • 201
  • 202
  • 203
  • 204
  • 205
  • 206
  • 207
  • 208
  • 209
  • 210
  • 211
  • 212
  • 213
  • 214
  • 215
  • 216
  • 217
  • 218
  • 219
  • 220
  • 221
  • 222
  • 223
  • 224
  • 225
  • 226
  • 227
  • 228
  • 229
  • 230
  • 231
  • 232
  • 233

Contents
6
About Connectors
.................................................................................................................
32
Using the Alarm/Control connector
.................................................................................................................
32
Pin Assignments
........................................................................................................................................
32
Connectivity for Emergency Recording
......................................................................................................
33
Connectivity for S
w
itching to External Recording
......................................................................................
33
Auto Adjustment Time Function Connection 1
...........................................................................................
33
Auto Adjustment Time Function Connection 2
...........................................................................................
34
Connectivity for Control Output
..................................................................................................................
34
Uninterrupti
b
le Po
w
er Supply (UPS) Connectivity
.....................................................................................
35
Using the Alarm Connector
.............................................................................................................................
36
Pin Assignments
........................................................................................................................................
36
Alarm Connectivity
.....................................................................................................................................
37
Alarm/Control connector and Alarm Connector Timing and Polarity
..............................................................
3
8
Power Supply
........................................................................................................................
39
Turning On the Po
w
er
.....................................................................................................................................
39
Turning Off the Po
w
er
.....................................................................................................................................
39
During Recording
.......................................................................................................................................
39
During Play
b
ack
.........................................................................................................................................
39
Usin
g
the Front Panel for Operations
.................................................................................
40
Basic Operations
.............................................................................................................................................
40
Checking System Information
.........................................................................................................................
41
Checking the IP Address
................................................................................................................................
42
Setting the IP Address
....................................................................................................................................
43
Configuring the Settings for Each Item
......................................................................................................
43
Setting and Canceling Key Lock
.....................................................................................................................
43
HDD Unit
.........................................................................................................................................................
44
Handling the HDD
...........................................................................................................................................
45
Installing HDDs
..........................................................................................................................................
46
Installing HDDs
b
y unit
...............................................................................................................................
47
Removing HDDs
........................................................................................................................................
4
8
Removing HDDs
b
y unit
.............................................................................................................................
50
Setting the HDD
'
s Operation Mode
............................................................................................................
51
HDD Error Recovery (During RAID Operation)
...............................................................................................
52
Replacing Faulty HDD during RAID Operation
..........................................................................................
53
Re
b
ooting
........................................................................................................................................................
54
Attachments
Troubleshootin
g
....................................................................................................................
55
Pro
b
lems
.........................................................................................................................................................
55
Specifications
........................................................................................................................
57
W
J-ND400
......................................................................................................................................................
57
Accessories
...........................................................................................................................
58
Standard Accessories
.....................................................................................................................................
5
8
Index
.......................................................................................................................................
59