Canon EOS C700 FF PL EOS C700 EOS C700 PL EOS C700 GS PL EOS C700 FF EOS C700 - Page 11
Introduction, About this Manual, Conventions Used in this Manual
 |
View all Canon EOS C700 FF PL manuals
Add to My Manuals
Save this manual to your list of manuals |
Page 11 highlights
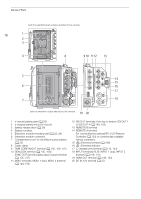
1 Introduction 11 About this Manual Thank you for purchasing the Canon EOS C700 / EOS C700 PL / EOS C700 GS PL / EOS C700 FF / EOS C700 FF PL. Please read this manual carefully before you use the camera and retain it for future reference. Should the camera fail to operate correctly, refer to Troubleshooting (A 219). Conventions Used in this Manual • IMPORTANT: Precautions related to the camera's operation. • NOTES: Additional topics that complement the basic operating procedures. • A: Reference page number. • []qr: Text that applies only to the model shown in the icon. • The following terms are used in this manual. "Monitoring screen" refers to the screen of a monitoring device (either the optional EVF-V70 OLED Electronic Viewfinder or an external monitor connected to one of the camera's MON. terminals or HDMI OUT terminal). "SD card" refers to an SD, SDHC or SDXC memory card. "Recording media" refers to CFast cards, SD cards and Codex Capture Drive 2.0 media. • "The optional viewfinder" refers to the optional EVF-V70 OLED Electronic Viewfinder. • "CDX-36150 Recorder" refers to the commercially available CDX-36150 Codex Recorder for Canon EOS C700. • Photographs in the manual are simulated pictures taken with a still camera. Screenshots in the manual are from the C700 or C700 FF. Furthermore, some screenshots have been altered to make them easier to read. • Illustrations in the manual show the Canon EOS C700 camera with a Canon EF50mm f/1.4 USM lens attached. • The following style is used to represent menu selections. The first word (in the thick, bold typeface) indicates the button you need to press on the camera (in the case of "EVF", on an optional EVF-V70 OLED Electronic Viewfinder connected to the camera) to open the required menu. For a detailed explanation on how to use the menus, refer to Using the Menus (A 32). For a summary of all available menu options and settings, refer to the appendix Setup Screens and Menu Options (A 187). This indicates to press the MENU button on the camera or EVF button on the optional viewfinder. Selecting the Main Recording Format 1 Open the [Main Rec Format] submenu. [Rec/Media Setup] (3) > [Main Rec Format] • Alternatively, from the camera menu: [S&F FPS] > [OPTIONS] > [Main Rec Format]. 2 Select [XF-AVC (CFast)] or [ProRes (CFast)] and then press SET. Brackets [ ] indicate text as it appears on the camera's control display or on the screen of a monitoring device. This arrow indicates a deeper level in the menu hierarchy or the next step in a procedure.
-
 1
1 -
2
-
3
-
4
-
5
-
 6
6 -
 7
7 -
 8
8 -
 9
9 -
 10
10 -
 11
11 -
 12
12 -
 13
13 -
 14
14 -
 15
15 -
 16
16 -
17
-
18
-
19
-
20
-
21
-
22
-
23
-
24
-
25
-
26
-
27
-
28
-
29
-
30
-
31
-
32
-
33
-
34
-
35
-
36
-
37
-
38
-
39
-
40
-
41
-
42
-
43
-
44
-
45
-
46
-
47
-
48
-
49
-
50
-
51
-
52
-
53
-
54
-
55
-
56
-
57
-
58
-
59
-
60
-
61
-
62
-
63
-
64
-
65
-
66
-
67
-
68
-
69
-
70
-
71
-
72
-
73
-
74
-
75
-
76
-
77
-
78
-
79
-
80
-
81
-
82
-
83
-
84
-
85
-
86
-
87
-
88
-
89
-
90
-
91
-
92
-
93
-
94
-
95
-
96
-
97
-
98
-
99
-
100
-
101
-
102
-
103
-
104
-
105
-
106
-
107
-
108
-
109
-
110
-
111
-
112
-
113
-
114
-
115
-
116
-
117
-
118
-
119
-
120
-
121
-
122
-
123
-
124
-
125
-
126
-
127
-
128
-
129
-
130
-
131
-
132
-
133
-
134
-
135
-
136
-
137
-
138
-
139
-
140
-
141
-
142
-
143
-
144
-
145
-
146
-
147
-
148
-
149
-
150
-
151
-
152
-
153
-
154
-
155
-
156
-
157
-
158
-
159
-
160
-
161
-
162
-
163
-
164
-
165
-
166
-
167
-
168
-
169
-
170
-
171
-
172
-
173
-
174
-
175
-
176
-
177
-
178
-
179
-
180
-
181
-
182
-
183
-
184
-
185
-
186
-
187
-
188
-
189
-
190
-
191
-
192
-
193
-
194
-
195
-
196
-
197
-
198
-
199
-
200
-
201
-
202
-
203
-
204
-
205
-
206
-
207
-
208
-
209
-
210
-
211
-
212
-
213
-
214
-
215
-
216
-
217
-
218
-
219
-
220
-
221
-
222
-
223
-
224
-
225
-
226
-
227
-
228
-
229
-
230
-
231
-
232
-
233
-
234
-
235
-
236
-
237
-
238
-
239
-
240
-
241
-
242
-
243
-
244
-
245
-
246
-
247
-
248
-
249
-
250
-
251
-
252
-
253
-
254
-
255
 |
 |