Canon EOS C700 FF PL EOS C700 EOS C700 PL EOS C700 GS PL EOS C700 FF EOS C700 - Page 31
About the control display and optional viewfinder, Camera] or [Remote OU-700]
 |
View all Canon EOS C700 FF PL manuals
Add to My Manuals
Save this manual to your list of manuals |
Page 31 highlights
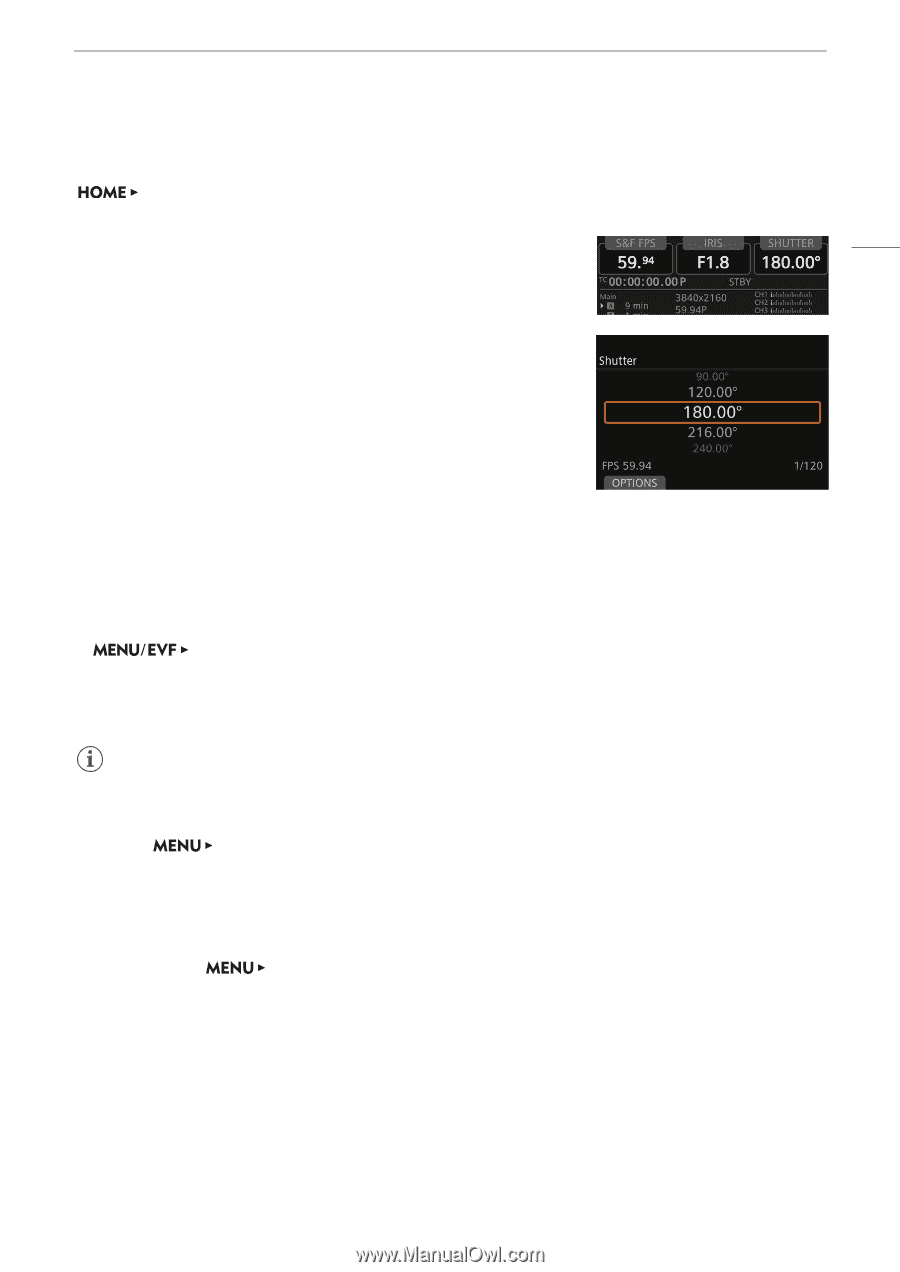
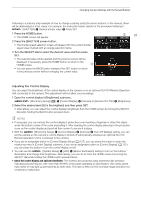
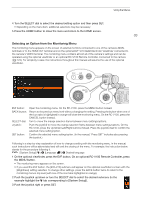
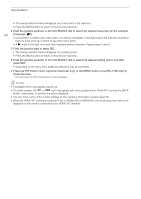
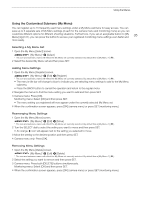
Changing Camera Settings with the Screen Buttons Following is a step-by-step example of how to change a setting using the screen buttons. In the manual, these will be abbreviated in most cases. For example, the instruction below stands for the procedure following it. [SHUTTER] > Desired shutter value > Press SET 1 Press the HOME button. • The HOME screen will appear. ባ 31 2 Press the [SHUTTER] screen button. • The shutter speed selection screen will appear with the current shutter speed value marked with an orange selection frame. 3 Turn the SELECT dial to select the desired value and then press SET. • The selected value will be applied and the previous screen will be displayed. If necessary, press the HOME button to return to the HOME screen. ቤ • You can press the BACK button instead of the SET button to return to the previous screen without changing the current value. Adjusting the Control Display You can adjust the brightness of the control display on the camera or on an optional OU-700 Remote Operation Unit connected to the camera. This adjustment will not affect your recordings. 1 Open the control display's [Brightness] submenu. [Monitoring Setup] (¢) > [Control Display] > [Camera] or [Remote OU-700] > [Brightness] 2 Select the desired level ([5] is the brightest) and then press SET. • Alternatively, you can adjust the control display's brightness from the HOME screen by turning the SELECT dial while holding the BACK button pressed down. NOTES • If necessary, you can remove the control display's protective cover inserting a fingernail or other thin object under the bottom center of the cover and pulling it. After cleaning the control display place back the protective cover on the control display and push all four corners to secure it in place. • With the [Monitoring Setup] > [Control Display] > [Camera] > [Turn Off Display] setting, you can set the camera so the camera's control display is turned off automatically whenever an optional OU-700 Remote Operation Unit is connected to the camera. • If you set an assignable button to [Control Display Setup] (A 127), you can press the button to open the monitoring menu's [Control Display] submenu. If you set an assignable button to [Control Display] (A 127), you can press the button to turn the control display on/off. • You can use the [System Setup] > [LED] > [Button Illumination] setting to turn on the buttons' illumination and change their brightness. Alternatively, you can do so from the HOME screen by turning the SELECT dial while holding the HOME button pressed down. • About the control display and optional viewfinder: The screens are produced using extremely high-precision manufacturing techniques, with more than 99.99% of the pixels operating to specification. Very rarely, pixels may misfire or may light up permanently as white dots. This has no effect on the recorded image and does not constitute a malfunction.
-
 1
1 -
2
-
3
-
4
-
5
-
6
-
7
-
8
-
9
-
10
-
11
-
12
-
13
-
14
-
15
-
16
-
17
-
18
-
19
-
20
-
21
-
22
-
23
-
24
-
25
-
 26
26 -
 27
27 -
 28
28 -
 29
29 -
 30
30 -
 31
31 -
 32
32 -
 33
33 -
 34
34 -
 35
35 -
 36
36 -
37
-
38
-
39
-
40
-
41
-
42
-
43
-
44
-
45
-
46
-
47
-
48
-
49
-
50
-
51
-
52
-
53
-
54
-
55
-
56
-
57
-
58
-
59
-
60
-
61
-
62
-
63
-
64
-
65
-
66
-
67
-
68
-
69
-
70
-
71
-
72
-
73
-
74
-
75
-
76
-
77
-
78
-
79
-
80
-
81
-
82
-
83
-
84
-
85
-
86
-
87
-
88
-
89
-
90
-
91
-
92
-
93
-
94
-
95
-
96
-
97
-
98
-
99
-
100
-
101
-
102
-
103
-
104
-
105
-
106
-
107
-
108
-
109
-
110
-
111
-
112
-
113
-
114
-
115
-
116
-
117
-
118
-
119
-
120
-
121
-
122
-
123
-
124
-
125
-
126
-
127
-
128
-
129
-
130
-
131
-
132
-
133
-
134
-
135
-
136
-
137
-
138
-
139
-
140
-
141
-
142
-
143
-
144
-
145
-
146
-
147
-
148
-
149
-
150
-
151
-
152
-
153
-
154
-
155
-
156
-
157
-
158
-
159
-
160
-
161
-
162
-
163
-
164
-
165
-
166
-
167
-
168
-
169
-
170
-
171
-
172
-
173
-
174
-
175
-
176
-
177
-
178
-
179
-
180
-
181
-
182
-
183
-
184
-
185
-
186
-
187
-
188
-
189
-
190
-
191
-
192
-
193
-
194
-
195
-
196
-
197
-
198
-
199
-
200
-
201
-
202
-
203
-
204
-
205
-
206
-
207
-
208
-
209
-
210
-
211
-
212
-
213
-
214
-
215
-
216
-
217
-
218
-
219
-
220
-
221
-
222
-
223
-
224
-
225
-
226
-
227
-
228
-
229
-
230
-
231
-
232
-
233
-
234
-
235
-
236
-
237
-
238
-
239
-
240
-
241
-
242
-
243
-
244
-
245
-
246
-
247
-
248
-
249
-
250
-
251
-
252
-
253
-
254
-
255
 |
 |