Canon EOS C700 FF PL EOS C700 EOS C700 PL EOS C700 GS PL EOS C700 FF EOS C700 - Page 50
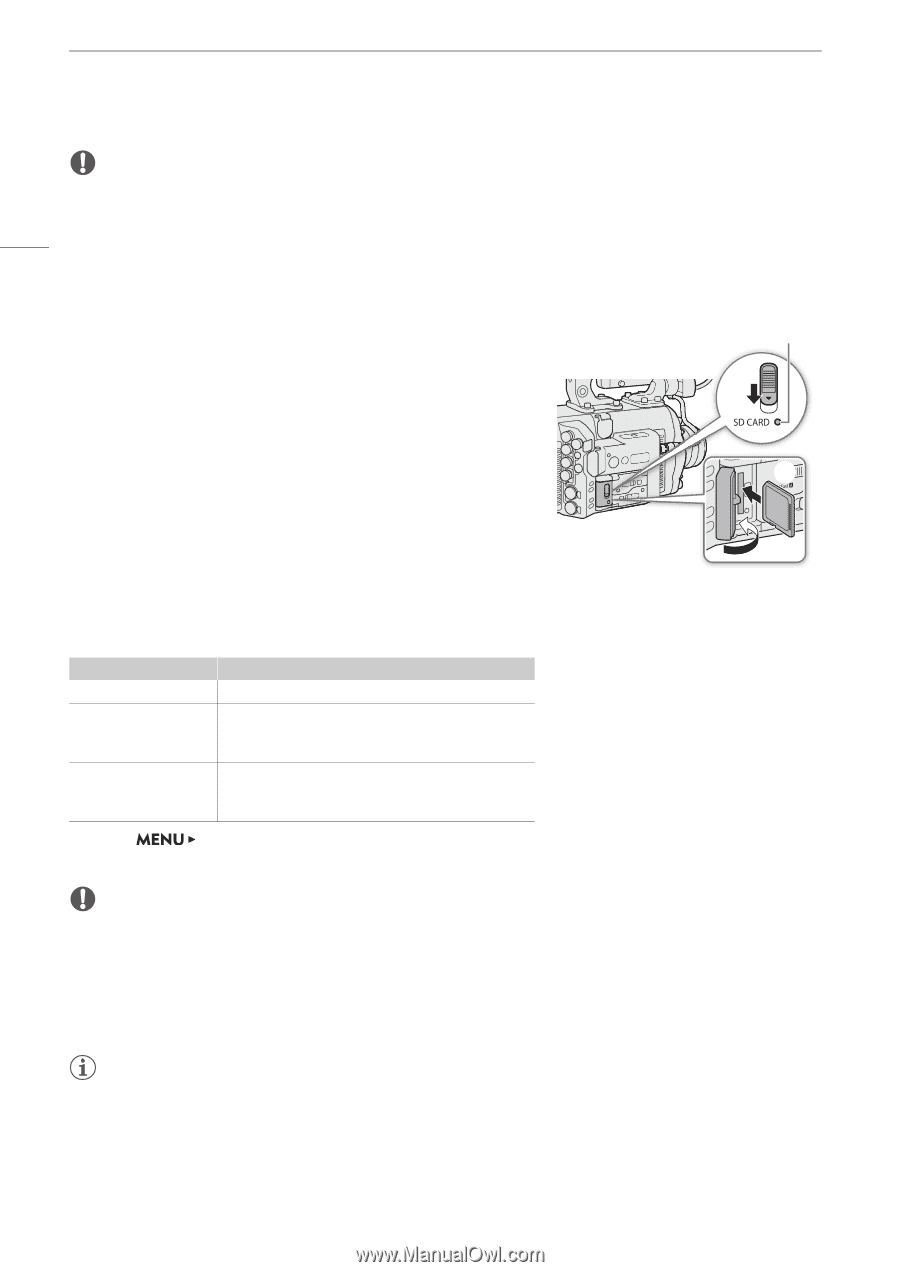
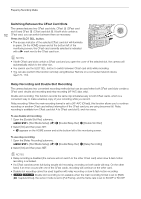
Inserting and Removing an SD Card, Slide the SD card slot cover switch in the direction of the arrow.
 |
View all Canon EOS C700 FF PL manuals
Add to My Manuals
Save this manual to your list of manuals |
Page 50 highlights
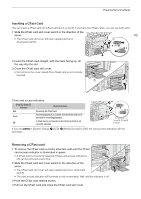
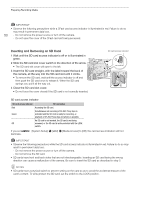
Preparing Recording Media IMPORTANT • Observe the following precautions while a CFast card access indicator is illuminated in red. Failure to do so may result in permanent data loss. 50 - Do not remove the power source or turn off the camera. - Do not open the cover of the CFast card slot being accessed. Inserting and Removing an SD Card 1 Wait until the SD card access indicator is off or is illuminated in green. 2 Slide the SD card slot cover switch in the direction of the arrow. • The SD card slot cover will open to the left. 3 Insert the SD card straight, with the label toward the back of the camera, all the way into the SD card slot until it clicks. • To remove the SD card, wait until the access indicator is off and then push the SD card once to release it. When the SD card springs out, pull it all the way out. 4 Close the SD card slot cover. • Do not force the cover closed if the SD card is not correctly inserted. SD card access indicator ባ ቤ ብ SD card access indicator SD card access indicator Red Green Off SD card status Accessing the SD card. Simultaneous sub recording of XF-AVC Proxy clips is activated and the SD card is ready for recording, or playback of XF-AVC Proxy clips and photos is possible. An SD card is not inserted, the SD card is not being accessed, or the SD card is write-protected with the LOCK switch. If you set illuminate. [System Setup] > [LED] > [Media Access] to [Off], the card access indicators will not IMPORTANT • Observe the following precautions while the SD card access indicator is illuminated in red. Failure to do so may result in permanent data loss. - Do not remove the power source or turn off the camera. - Do not remove the SD card. • SD cards have front and back sides that are not interchangeable. Inserting an SD card facing the wrong direction can cause a malfunction of the camera. Be sure to insert the SD card as described in step 3. NOTES • SD cards have a physical switch to prevent writing on the card so as to avoid the accidental erasure of the card's content. To write-protect the SD card, set the switch to the LOCK position.
-
 1
1 -
2
-
3
-
4
-
5
-
6
-
7
-
8
-
9
-
10
-
11
-
12
-
13
-
14
-
15
-
16
-
17
-
18
-
19
-
20
-
21
-
22
-
23
-
24
-
25
-
26
-
27
-
28
-
29
-
30
-
31
-
32
-
33
-
34
-
35
-
36
-
37
-
38
-
39
-
40
-
41
-
42
-
43
-
44
-
 45
45 -
 46
46 -
 47
47 -
 48
48 -
 49
49 -
 50
50 -
 51
51 -
 52
52 -
 53
53 -
 54
54 -
 55
55 -
56
-
57
-
58
-
59
-
60
-
61
-
62
-
63
-
64
-
65
-
66
-
67
-
68
-
69
-
70
-
71
-
72
-
73
-
74
-
75
-
76
-
77
-
78
-
79
-
80
-
81
-
82
-
83
-
84
-
85
-
86
-
87
-
88
-
89
-
90
-
91
-
92
-
93
-
94
-
95
-
96
-
97
-
98
-
99
-
100
-
101
-
102
-
103
-
104
-
105
-
106
-
107
-
108
-
109
-
110
-
111
-
112
-
113
-
114
-
115
-
116
-
117
-
118
-
119
-
120
-
121
-
122
-
123
-
124
-
125
-
126
-
127
-
128
-
129
-
130
-
131
-
132
-
133
-
134
-
135
-
136
-
137
-
138
-
139
-
140
-
141
-
142
-
143
-
144
-
145
-
146
-
147
-
148
-
149
-
150
-
151
-
152
-
153
-
154
-
155
-
156
-
157
-
158
-
159
-
160
-
161
-
162
-
163
-
164
-
165
-
166
-
167
-
168
-
169
-
170
-
171
-
172
-
173
-
174
-
175
-
176
-
177
-
178
-
179
-
180
-
181
-
182
-
183
-
184
-
185
-
186
-
187
-
188
-
189
-
190
-
191
-
192
-
193
-
194
-
195
-
196
-
197
-
198
-
199
-
200
-
201
-
202
-
203
-
204
-
205
-
206
-
207
-
208
-
209
-
210
-
211
-
212
-
213
-
214
-
215
-
216
-
217
-
218
-
219
-
220
-
221
-
222
-
223
-
224
-
225
-
226
-
227
-
228
-
229
-
230
-
231
-
232
-
233
-
234
-
235
-
236
-
237
-
238
-
239
-
240
-
241
-
242
-
243
-
244
-
245
-
246
-
247
-
248
-
249
-
250
-
251
-
252
-
253
-
254
-
255
 |
 |