Canon EOS C700 FF PL EOS C700 EOS C700 PL EOS C700 GS PL EOS C700 FF EOS C700 - Page 24
Inserting the Lithium Button Battery, Installing an Extension Module, position and remove the cover.
 |
View all Canon EOS C700 FF PL manuals
Add to My Manuals
Save this manual to your list of manuals |
Page 24 highlights
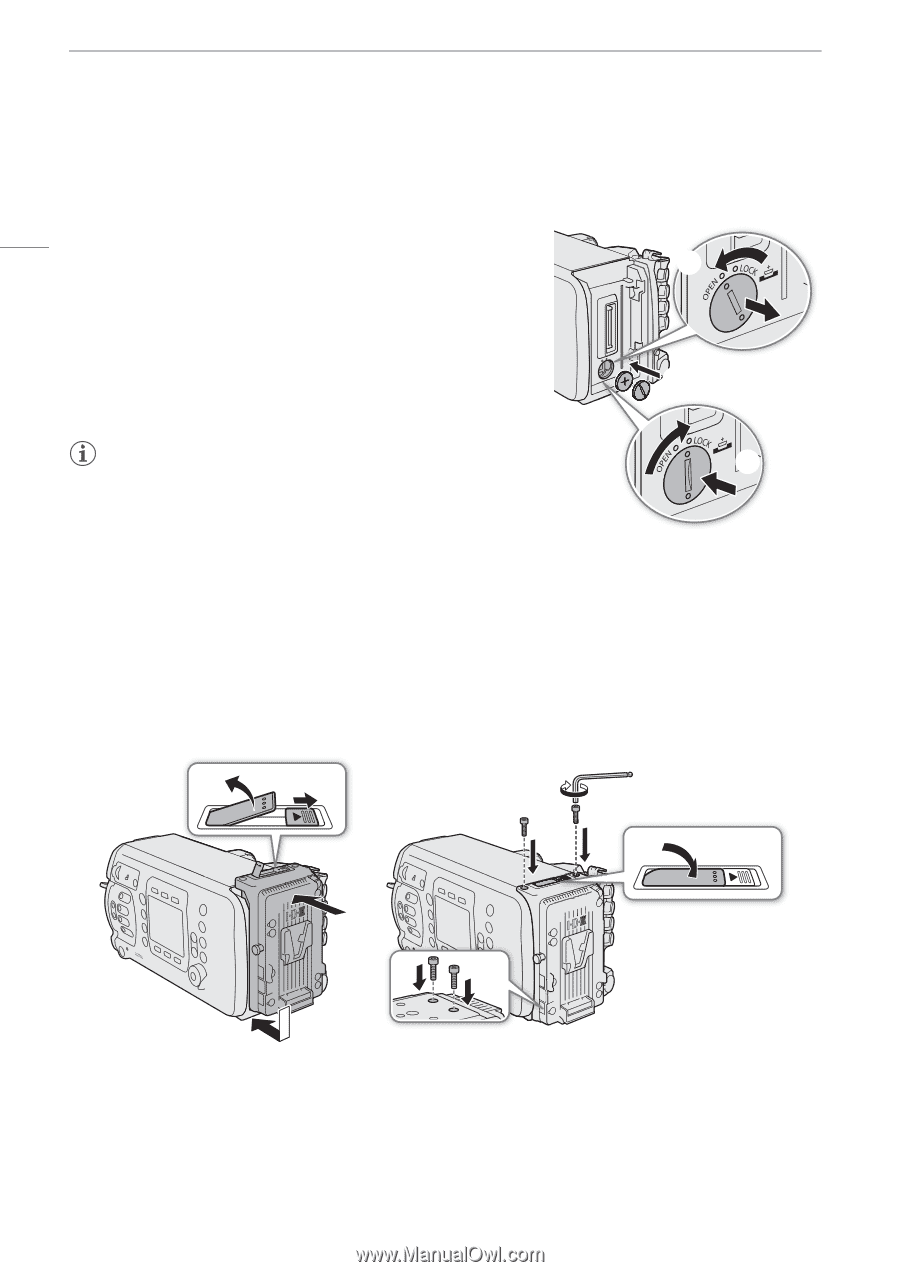
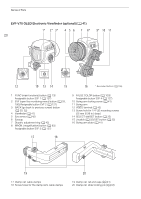
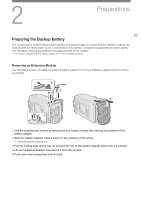
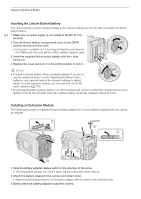
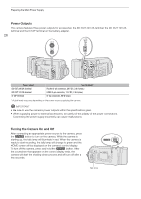
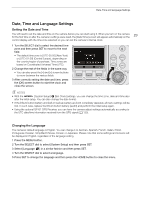
Preparing the Backup Battery Inserting the Lithium Button Battery The camera features a built-in backup battery so the camera settings are not lost while you replace the lithium button battery. 24 1 Make sure no power supply is connected to the DC IN 12V terminal. ባ 2 Turn the lithium battery compartment cover to the OPEN position and remove the cover. • Use a coin or a similar tool. If you keep turning the cover beyond the OPEN point, the cover will rise a little, making it easier to grab. 3 Insert the supplied lithium button battery with the + side facing out. ቤ 4 Replace the cover and turn it to the LOCK position to lock it. NOTES ብ • The built-in backup battery will be completely depleted if you do not use the camera for about 1 month. Replacing the lithium button battery in such case will reset all the camera's settings to default values. To avoid losing the settings, you can save them on an SD card in advance (A 140). • To recharge the built-in backup battery, turn off the camera and connect a sufficiently charged power source (battery or DC IN 12V terminal). The built-in backup battery will be fully charged in about 24 hours. Installing an Extension Module The following procedure is explained using the battery adapter for V-mount batteries supplied with the camera as example. ቢ ቦ ብ ባ ቦ ቤ 1 Slide the battery adapter release switch in the direction of the arrow. • The locking lever will pop out. Once it does, pull the locking lever all the way up. 2 Attach the battery adapter to the camera and slide it down. • Align the positioning protrusions on the battery adapter with the holes on the camera's body. 3 Gently press the battery adapter toward the camera.
-
 1
1 -
2
-
3
-
4
-
5
-
6
-
7
-
8
-
9
-
10
-
11
-
12
-
13
-
14
-
15
-
16
-
17
-
18
-
 19
19 -
 20
20 -
 21
21 -
 22
22 -
 23
23 -
 24
24 -
 25
25 -
 26
26 -
 27
27 -
 28
28 -
 29
29 -
30
-
31
-
32
-
33
-
34
-
35
-
36
-
37
-
38
-
39
-
40
-
41
-
42
-
43
-
44
-
45
-
46
-
47
-
48
-
49
-
50
-
51
-
52
-
53
-
54
-
55
-
56
-
57
-
58
-
59
-
60
-
61
-
62
-
63
-
64
-
65
-
66
-
67
-
68
-
69
-
70
-
71
-
72
-
73
-
74
-
75
-
76
-
77
-
78
-
79
-
80
-
81
-
82
-
83
-
84
-
85
-
86
-
87
-
88
-
89
-
90
-
91
-
92
-
93
-
94
-
95
-
96
-
97
-
98
-
99
-
100
-
101
-
102
-
103
-
104
-
105
-
106
-
107
-
108
-
109
-
110
-
111
-
112
-
113
-
114
-
115
-
116
-
117
-
118
-
119
-
120
-
121
-
122
-
123
-
124
-
125
-
126
-
127
-
128
-
129
-
130
-
131
-
132
-
133
-
134
-
135
-
136
-
137
-
138
-
139
-
140
-
141
-
142
-
143
-
144
-
145
-
146
-
147
-
148
-
149
-
150
-
151
-
152
-
153
-
154
-
155
-
156
-
157
-
158
-
159
-
160
-
161
-
162
-
163
-
164
-
165
-
166
-
167
-
168
-
169
-
170
-
171
-
172
-
173
-
174
-
175
-
176
-
177
-
178
-
179
-
180
-
181
-
182
-
183
-
184
-
185
-
186
-
187
-
188
-
189
-
190
-
191
-
192
-
193
-
194
-
195
-
196
-
197
-
198
-
199
-
200
-
201
-
202
-
203
-
204
-
205
-
206
-
207
-
208
-
209
-
210
-
211
-
212
-
213
-
214
-
215
-
216
-
217
-
218
-
219
-
220
-
221
-
222
-
223
-
224
-
225
-
226
-
227
-
228
-
229
-
230
-
231
-
232
-
233
-
234
-
235
-
236
-
237
-
238
-
239
-
240
-
241
-
242
-
243
-
244
-
245
-
246
-
247
-
248
-
249
-
250
-
251
-
252
-
253
-
254
-
255
 |
 |