Canon EOS C700 FF PL EOS C700 EOS C700 PL EOS C700 GS PL EOS C700 FF EOS C700 - Page 131
Custom Picture Settings, Selecting Custom Picture Files
 |
View all Canon EOS C700 FF PL manuals
Add to My Manuals
Save this manual to your list of manuals |
Page 131 highlights
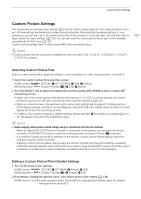
Custom Picture Settings Custom Picture Settings The camera lets you change many settings (A 134) that control various aspects of the image produced. As a set, all these settings are treated as a single custom picture file. After adjusting the desired settings to your preference, you can save up to 20 custom picture files (in the camera or on an SD card), and load them later to apply exactly the same settings (A 133). You can also save the custom picture file as part of the metadata recorded with XF-AVC clips (A 133). Custom picture settings have no effect during RAW video recording/output. 131 NOTES • Custom picture files are exclusively compatible for use only with C700 / C700 PL / C700 GS PL / C700 FF / C700 FF PL cameras. Selecting Custom Picture Files Select a custom picture file to apply its settings to your recordings or to edit, rename, protect, or transfer it. 1 Open the custom picture file's selection screen. HOME screen: Monitoring menu: [COLOR] > [CP OTHERS] > [File] > [Select] [Custom Picture] (/) > [File] > [Select] 2 Turn the SELECT dial to select the desired file and then press [OK] (HOME screen) or press SET (monitoring menu). • Select one of the custom picture files saved in the camera (C1 to C20). To use the settings of a custom picture file saved on an SD card, copy the file to the camera in advance (A 133). • When you close the menu, the selected custom picture file's settings will be applied. The [Gamma] and [Color Space] settings currently in use are displayed under [COLOR] in the HOME screen and their icons will appear at the left of the monitoring screen. • If editing of the custom picture file's detailed settings ([Other Settings] > [Activate]) was enabled (A 131), will appear at the left of the monitoring screen. NOTES • About changing custom picture related settings using the optional RC-V100 Remote Controller - When an optional RC-V100 Remote Controller is connected to the camera, you can press the remote controller's CUSTOM PICT. button to open the monitoring menu's [Custom Picture] (/) submenu. - If a protected custom picture file is selected on the camera, custom picture related settings cannot be changed using the remote controller. - Adjusting custom picture related settings using the remote controller will change the settings registered under the currently selected custom picture file. If you want to keep an important custom picture file, copy it in advance to an SD card or select in advance a custom picture file you do not mind changing. Editing a Custom Picture File's Detailed Settings 1 Turn off the preset color settings. HOME screen: Monitoring menu: [COLOR] > [CP MAIN] > [Preset] > [Off] [Custom Picture] (/) > [Preset] > [Off] 2 If necessary, change the gamma curve, color space and/or color matrix (A 134). HOME screen: From the same submenu select [Gamma]/[Color Space]/[Color Matrix]; select the desired setting and then press SET.
-
 1
1 -
2
-
3
-
4
-
5
-
6
-
7
-
8
-
9
-
10
-
11
-
12
-
13
-
14
-
15
-
16
-
17
-
18
-
19
-
20
-
21
-
22
-
23
-
24
-
25
-
26
-
27
-
28
-
29
-
30
-
31
-
32
-
33
-
34
-
35
-
36
-
37
-
38
-
39
-
40
-
41
-
42
-
43
-
44
-
45
-
46
-
47
-
48
-
49
-
50
-
51
-
52
-
53
-
54
-
55
-
56
-
57
-
58
-
59
-
60
-
61
-
62
-
63
-
64
-
65
-
66
-
67
-
68
-
69
-
70
-
71
-
72
-
73
-
74
-
75
-
76
-
77
-
78
-
79
-
80
-
81
-
82
-
83
-
84
-
85
-
86
-
87
-
88
-
89
-
90
-
91
-
92
-
93
-
94
-
95
-
96
-
97
-
98
-
99
-
100
-
101
-
102
-
103
-
104
-
105
-
106
-
107
-
108
-
109
-
110
-
111
-
112
-
113
-
114
-
115
-
116
-
117
-
118
-
119
-
120
-
121
-
122
-
123
-
124
-
125
-
 126
126 -
 127
127 -
 128
128 -
 129
129 -
 130
130 -
 131
131 -
 132
132 -
 133
133 -
 134
134 -
 135
135 -
 136
136 -
137
-
138
-
139
-
140
-
141
-
142
-
143
-
144
-
145
-
146
-
147
-
148
-
149
-
150
-
151
-
152
-
153
-
154
-
155
-
156
-
157
-
158
-
159
-
160
-
161
-
162
-
163
-
164
-
165
-
166
-
167
-
168
-
169
-
170
-
171
-
172
-
173
-
174
-
175
-
176
-
177
-
178
-
179
-
180
-
181
-
182
-
183
-
184
-
185
-
186
-
187
-
188
-
189
-
190
-
191
-
192
-
193
-
194
-
195
-
196
-
197
-
198
-
199
-
200
-
201
-
202
-
203
-
204
-
205
-
206
-
207
-
208
-
209
-
210
-
211
-
212
-
213
-
214
-
215
-
216
-
217
-
218
-
219
-
220
-
221
-
222
-
223
-
224
-
225
-
226
-
227
-
228
-
229
-
230
-
231
-
232
-
233
-
234
-
235
-
236
-
237
-
238
-
239
-
240
-
241
-
242
-
243
-
244
-
245
-
246
-
247
-
248
-
249
-
250
-
251
-
252
-
253
-
254
-
255
 |
 |
