Canon EOS C700 FF PL EOS C700 EOS C700 PL EOS C700 GS PL EOS C700 FF EOS C700 - Page 169
Checking the Network’s Status and Settings, Checking and Changing Network Settings
 |
View all Canon EOS C700 FF PL manuals
Add to My Manuals
Save this manual to your list of manuals |
Page 169 highlights
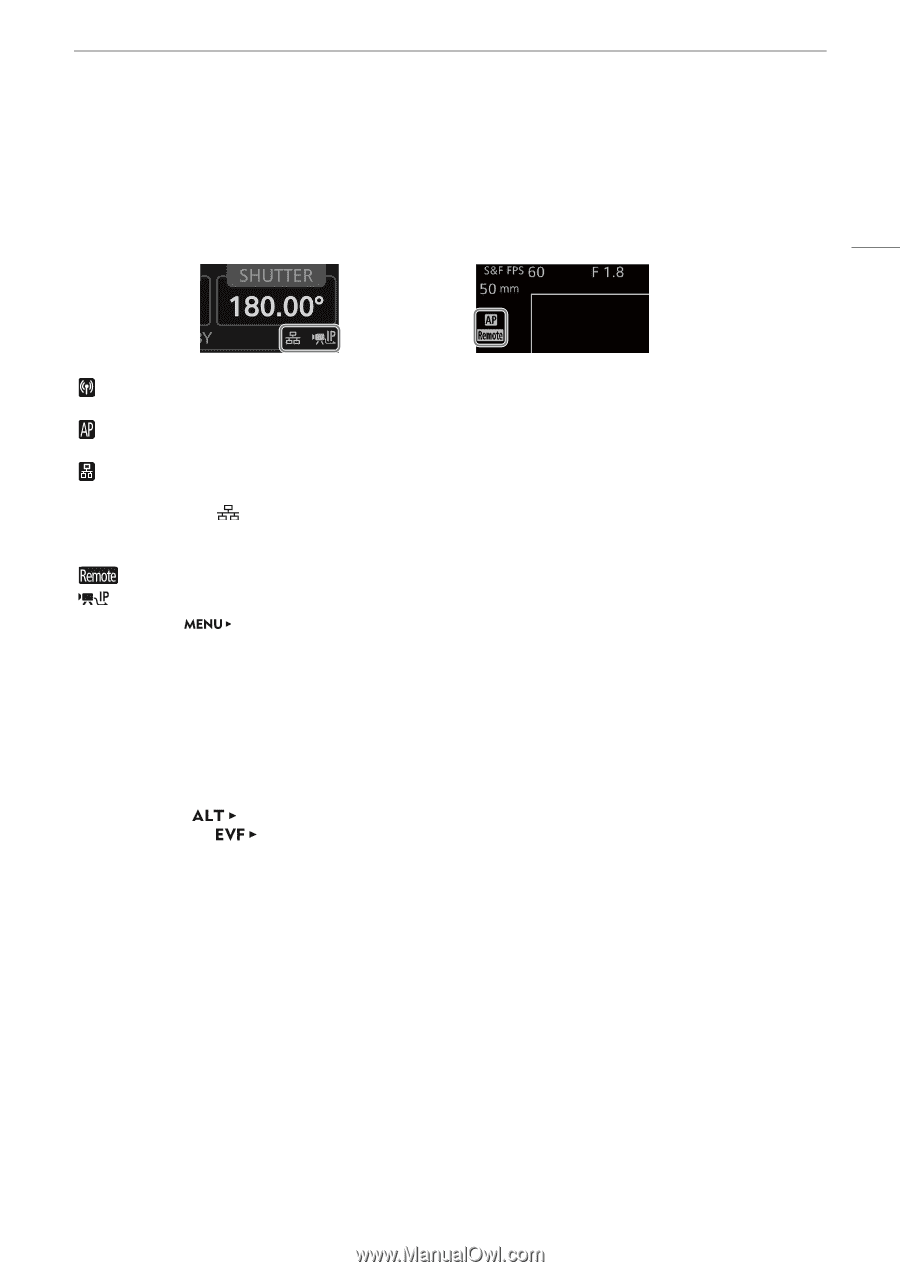
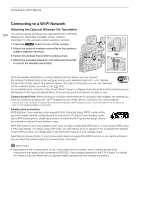
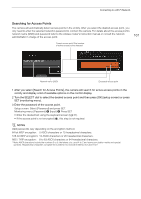
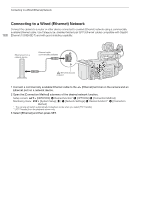
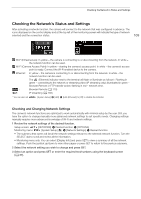
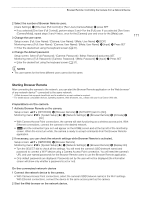
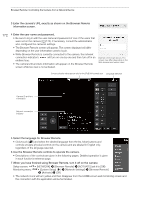
Checking the Network's Status and Settings Checking the Network's Status and Settings After activating a network function, the camera will connect to the network that was configured in advance. The icons displayed on the control display and at the top left of the monitoring screen will indicate the type of network selected and the connection status. 169 Wi-Fi (Infrastructure): In yellow - the camera is connecting to or disconnecting from the network. In white - the network function can be used. Wi-Fi (Camera Access Point): In yellow - starting the camera's access point. In white - the camera's access point is ready. Connect the Wi-Fi enabled device to the camera. Ethernet: In yellow - the camera is connecting to or disconnecting from the network. In white - the network function can be used. The (Ethernet) indicator next to the terminal will flash or illuminate as follows*: Flashing in green - connecting to the network or streaming video (IP streaming only); illuminated in green - Browser Remote or FTP transfer active; flashing in red - network error. : Browser Remote (A 170) : IP streaming (A 182) * You can also set [System Setup] > [LED] > [LAN (Ethernet)] to [Off] to disable the indicator. Checking and Changing Network Settings The camera's network functions are optimized to work automatically with minimal setup by the user. Still, you have the option to change manually more advanced network settings to suit specific needs. Changing settings manually requires more advanced knowledge of Wi-Fi and network settings. 1 Review the network settings of the desired function. Setup screen: Monitoring menu: [NETWORK] > Desired function > [OPTIONS] [System Setup] (B) > [Network Settings] > Desired function • The submenu that opens will list all the network settings relevant to the selected network function. Turn the SELECT dial to scroll and review all the information. • Monitoring menu only: You can select [Display Info] and press SET to view a summary of all the network settings. Push the joystick up/down to view other pages or press SET to return to the previous submenu. 2 Select the network setting you wish to change and press SET. 3 Select an option and press SET or enter the required text/numbers using the keyboard screen (A 37).
-
 1
1 -
2
-
3
-
4
-
5
-
6
-
7
-
8
-
9
-
10
-
11
-
12
-
13
-
14
-
15
-
16
-
17
-
18
-
19
-
20
-
21
-
22
-
23
-
24
-
25
-
26
-
27
-
28
-
29
-
30
-
31
-
32
-
33
-
34
-
35
-
36
-
37
-
38
-
39
-
40
-
41
-
42
-
43
-
44
-
45
-
46
-
47
-
48
-
49
-
50
-
51
-
52
-
53
-
54
-
55
-
56
-
57
-
58
-
59
-
60
-
61
-
62
-
63
-
64
-
65
-
66
-
67
-
68
-
69
-
70
-
71
-
72
-
73
-
74
-
75
-
76
-
77
-
78
-
79
-
80
-
81
-
82
-
83
-
84
-
85
-
86
-
87
-
88
-
89
-
90
-
91
-
92
-
93
-
94
-
95
-
96
-
97
-
98
-
99
-
100
-
101
-
102
-
103
-
104
-
105
-
106
-
107
-
108
-
109
-
110
-
111
-
112
-
113
-
114
-
115
-
116
-
117
-
118
-
119
-
120
-
121
-
122
-
123
-
124
-
125
-
126
-
127
-
128
-
129
-
130
-
131
-
132
-
133
-
134
-
135
-
136
-
137
-
138
-
139
-
140
-
141
-
142
-
143
-
144
-
145
-
146
-
147
-
148
-
149
-
150
-
151
-
152
-
153
-
154
-
155
-
156
-
157
-
158
-
159
-
160
-
161
-
162
-
163
-
 164
164 -
 165
165 -
 166
166 -
 167
167 -
 168
168 -
 169
169 -
 170
170 -
 171
171 -
 172
172 -
 173
173 -
 174
174 -
175
-
176
-
177
-
178
-
179
-
180
-
181
-
182
-
183
-
184
-
185
-
186
-
187
-
188
-
189
-
190
-
191
-
192
-
193
-
194
-
195
-
196
-
197
-
198
-
199
-
200
-
201
-
202
-
203
-
204
-
205
-
206
-
207
-
208
-
209
-
210
-
211
-
212
-
213
-
214
-
215
-
216
-
217
-
218
-
219
-
220
-
221
-
222
-
223
-
224
-
225
-
226
-
227
-
228
-
229
-
230
-
231
-
232
-
233
-
234
-
235
-
236
-
237
-
238
-
239
-
240
-
241
-
242
-
243
-
244
-
245
-
246
-
247
-
248
-
249
-
250
-
251
-
252
-
253
-
254
-
255
 |
 |