Canon EOS C700 FF PL EOS C700 EOS C700 PL EOS C700 GS PL EOS C700 FF EOS C700 - Page 203
Using the CDX-36150 Recorder, Preparations, Attaching the CDX-36150 Recorder to the Camera
 |
View all Canon EOS C700 FF PL manuals
Add to My Manuals
Save this manual to your list of manuals |
Page 203 highlights
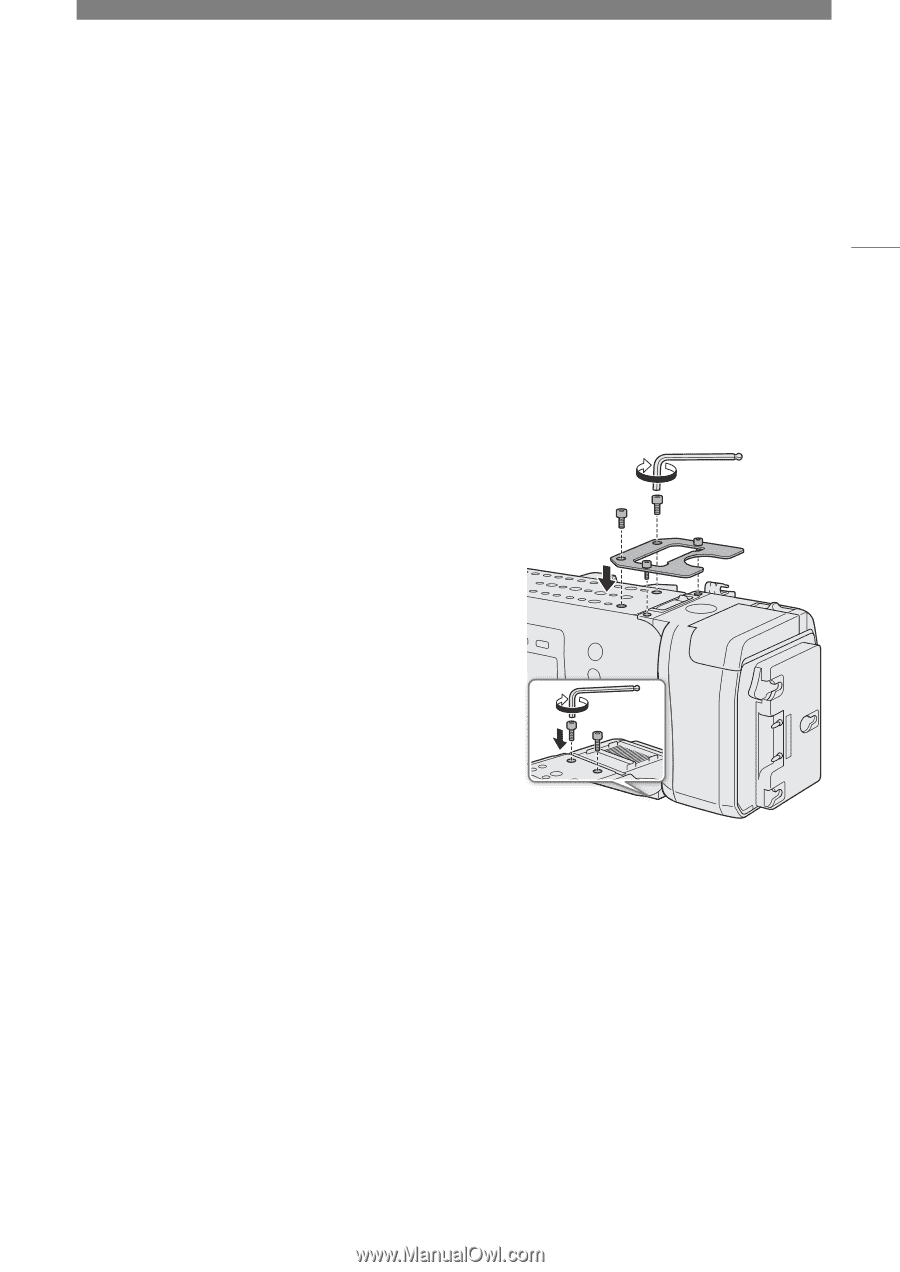
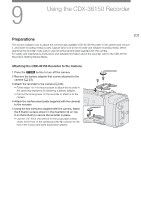
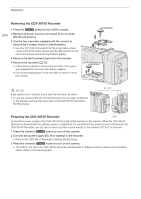
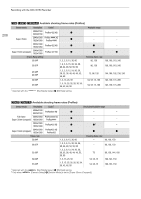
9 Using the CDX-36150 Recorder Preparations This section explains how to attach the commercially available CDX-36150 Recorder to the camera and remove it, and insert recording media (Codex Capture Drive 2.0) to the recorder and initialize recording media. When attaching the recorder, make sure to use the reinforcement plate supplied with the camera. For safety and maintenance instructions and detailed information about the recorder, refer to the CDX-36150 Recorder's Getting Started Guide. 203 Attaching the CDX-36150 Recorder to the Camera 1 Press the Q button to turn off the camera. 2 Remove the battery adapter that comes attached to the camera (A 23). 3 Attach the recorder to the camera (A 24). • Follow steps 1 to 4 in the procedure to attach the recorder in the same way explained for attaching a battery adapter. • Pull out the locking lever on the recorder to attach it to the camera. 4 Attach the reinforcement plate (supplied with the camera) to the recorder. 5 Using the hex wrenches supplied with the camera, fasten the 6 fixation screws shown in the illustration (4 on top, 2 on the bottom) to secure the recorder in place. • Use the 1/4" (0.64 cm) wrench for the 2 top plate screws closer to the front of the camera and the M4 wrench for the rest of the screws and bolts (top/bottom plates).
-
 1
1 -
2
-
3
-
4
-
5
-
6
-
7
-
8
-
9
-
10
-
11
-
12
-
13
-
14
-
15
-
16
-
17
-
18
-
19
-
20
-
21
-
22
-
23
-
24
-
25
-
26
-
27
-
28
-
29
-
30
-
31
-
32
-
33
-
34
-
35
-
36
-
37
-
38
-
39
-
40
-
41
-
42
-
43
-
44
-
45
-
46
-
47
-
48
-
49
-
50
-
51
-
52
-
53
-
54
-
55
-
56
-
57
-
58
-
59
-
60
-
61
-
62
-
63
-
64
-
65
-
66
-
67
-
68
-
69
-
70
-
71
-
72
-
73
-
74
-
75
-
76
-
77
-
78
-
79
-
80
-
81
-
82
-
83
-
84
-
85
-
86
-
87
-
88
-
89
-
90
-
91
-
92
-
93
-
94
-
95
-
96
-
97
-
98
-
99
-
100
-
101
-
102
-
103
-
104
-
105
-
106
-
107
-
108
-
109
-
110
-
111
-
112
-
113
-
114
-
115
-
116
-
117
-
118
-
119
-
120
-
121
-
122
-
123
-
124
-
125
-
126
-
127
-
128
-
129
-
130
-
131
-
132
-
133
-
134
-
135
-
136
-
137
-
138
-
139
-
140
-
141
-
142
-
143
-
144
-
145
-
146
-
147
-
148
-
149
-
150
-
151
-
152
-
153
-
154
-
155
-
156
-
157
-
158
-
159
-
160
-
161
-
162
-
163
-
164
-
165
-
166
-
167
-
168
-
169
-
170
-
171
-
172
-
173
-
174
-
175
-
176
-
177
-
178
-
179
-
180
-
181
-
182
-
183
-
184
-
185
-
186
-
187
-
188
-
189
-
190
-
191
-
192
-
193
-
194
-
195
-
196
-
197
-
 198
198 -
 199
199 -
 200
200 -
 201
201 -
 202
202 -
 203
203 -
 204
204 -
 205
205 -
 206
206 -
 207
207 -
 208
208 -
209
-
210
-
211
-
212
-
213
-
214
-
215
-
216
-
217
-
218
-
219
-
220
-
221
-
222
-
223
-
224
-
225
-
226
-
227
-
228
-
229
-
230
-
231
-
232
-
233
-
234
-
235
-
236
-
237
-
238
-
239
-
240
-
241
-
242
-
243
-
244
-
245
-
246
-
247
-
248
-
249
-
250
-
251
-
252
-
253
-
254
-
255
 |
 |