Canon EOS C700 FF PL EOS C700 EOS C700 PL EOS C700 GS PL EOS C700 FF EOS C700 - Page 122
Using Anamorphic Lenses
 |
View all Canon EOS C700 FF PL manuals
Add to My Manuals
Save this manual to your list of manuals |
Page 122 highlights
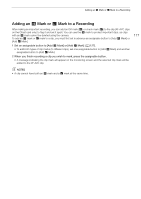
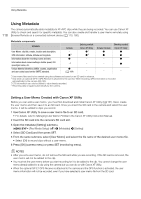
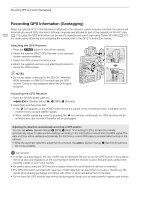
Using Anamorphic Lenses Using Anamorphic Lenses 122 You can attach an anamorphic lens to the camera and set the anamorphic desqueeze ratio used to display the image from the camera on monitoring devices while shooting or during playback. 1 Open the [Anamorphic] submenu. [Monitoring Setup] (¢) > [Anamorphic] 2 Select [VIDEO Output] and/or [MON.+HDMI Output], select [On] and then press SET. • Alternatively, you can press an assignable button set to [Anamorphic: VIDEO] (optional viewfinder only), [Anamorphic: MON.+HDMI] (external monitors only) or [Anamorphic] (all monitoring devices at once) (A 127). 3 From the same submenu select [Desqueeze Ratio]. 4 Select the desired option and then press SET. • You can select a fixed desqueeze factor (x1.3 or x2.0) or use the lens's squeeze factor as defined in the metadata ([Lens Squeeze Factor]). NOTES • You can record the lens's squeeze factor in the clip's metadata with the [Metadata] > [Lens Squeeze] setting. [Rec/Media Setup] > • In the following cases the image from the camera will not be desqueezed. - When the HDMI OUT terminal's resolution is set to 4096x2160 or 3840x2160, the image will not be desqueezed on the monitor connected to the HDMI OUT terminal. - During photo playback. - The camera's live view image in the Browser Remote application.
-
 1
1 -
2
-
3
-
4
-
5
-
6
-
7
-
8
-
9
-
10
-
11
-
12
-
13
-
14
-
15
-
16
-
17
-
18
-
19
-
20
-
21
-
22
-
23
-
24
-
25
-
26
-
27
-
28
-
29
-
30
-
31
-
32
-
33
-
34
-
35
-
36
-
37
-
38
-
39
-
40
-
41
-
42
-
43
-
44
-
45
-
46
-
47
-
48
-
49
-
50
-
51
-
52
-
53
-
54
-
55
-
56
-
57
-
58
-
59
-
60
-
61
-
62
-
63
-
64
-
65
-
66
-
67
-
68
-
69
-
70
-
71
-
72
-
73
-
74
-
75
-
76
-
77
-
78
-
79
-
80
-
81
-
82
-
83
-
84
-
85
-
86
-
87
-
88
-
89
-
90
-
91
-
92
-
93
-
94
-
95
-
96
-
97
-
98
-
99
-
100
-
101
-
102
-
103
-
104
-
105
-
106
-
107
-
108
-
109
-
110
-
111
-
112
-
113
-
114
-
115
-
116
-
 117
117 -
 118
118 -
 119
119 -
 120
120 -
 121
121 -
 122
122 -
 123
123 -
 124
124 -
 125
125 -
 126
126 -
 127
127 -
128
-
129
-
130
-
131
-
132
-
133
-
134
-
135
-
136
-
137
-
138
-
139
-
140
-
141
-
142
-
143
-
144
-
145
-
146
-
147
-
148
-
149
-
150
-
151
-
152
-
153
-
154
-
155
-
156
-
157
-
158
-
159
-
160
-
161
-
162
-
163
-
164
-
165
-
166
-
167
-
168
-
169
-
170
-
171
-
172
-
173
-
174
-
175
-
176
-
177
-
178
-
179
-
180
-
181
-
182
-
183
-
184
-
185
-
186
-
187
-
188
-
189
-
190
-
191
-
192
-
193
-
194
-
195
-
196
-
197
-
198
-
199
-
200
-
201
-
202
-
203
-
204
-
205
-
206
-
207
-
208
-
209
-
210
-
211
-
212
-
213
-
214
-
215
-
216
-
217
-
218
-
219
-
220
-
221
-
222
-
223
-
224
-
225
-
226
-
227
-
228
-
229
-
230
-
231
-
232
-
233
-
234
-
235
-
236
-
237
-
238
-
239
-
240
-
241
-
242
-
243
-
244
-
245
-
246
-
247
-
248
-
249
-
250
-
251
-
252
-
253
-
254
-
255
 |
 |
