Canon EOS C700 FF PL EOS C700 EOS C700 PL EOS C700 GS PL EOS C700 FF EOS C700 - Page 45
Removing an EF Lens, Updating the Firmware of an EF Lens, System Setup]
 |
View all Canon EOS C700 FF PL manuals
Add to My Manuals
Save this manual to your list of manuals |
Page 45 highlights
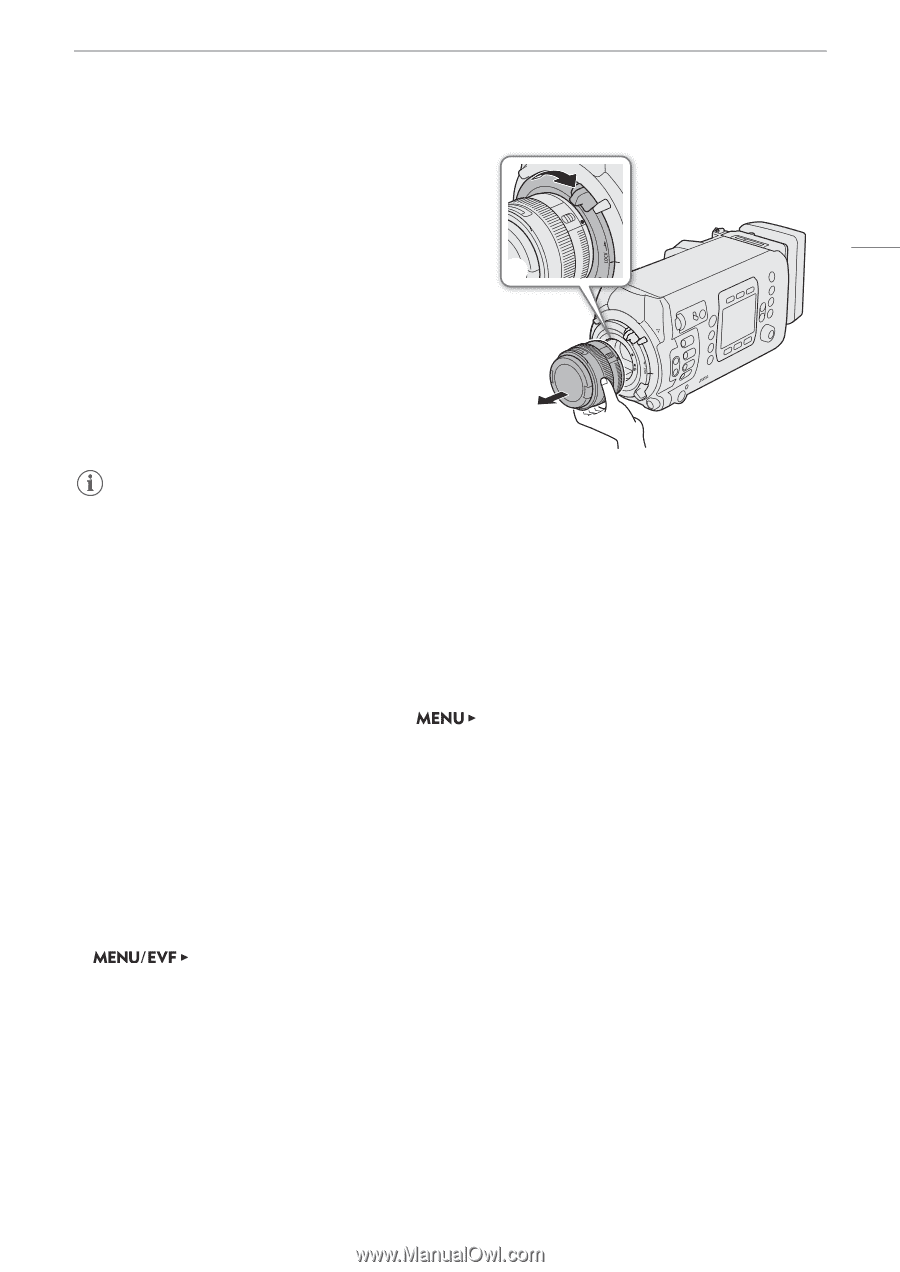
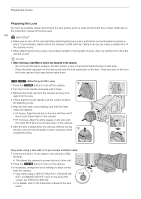
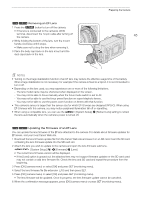
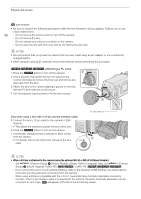
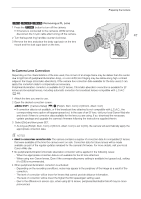
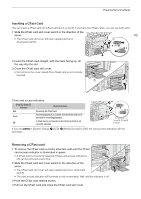
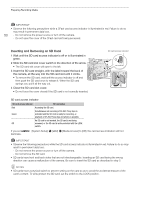
Zq Removing an EF Lens 1 Press the Q button to turn off the camera. • If the lens is connected to the camera's LENS terminal, disconnect the 12-pin cable after turning off the camera. 2 While holding the bottom of the lens, turn the mount ባ handle clockwise until it stops. • Make sure not to drop the lens when removing it. 3 Place the body cap back on the lens mount and the dust caps back on the lens. Preparing the Camera 45 NOTES • Turning on the image stabilization function of an EF lens may reduce the effective usage time of the battery. When image stabilization is not necessary, for example if the camera is fixed to a tripod, it is recommended to turn it off. • Depending on the lens used, you may experience one or more of the following limitations. - The lens model name may be shortened when displayed on the screen. - You may not be able to focus manually when the focus mode switch is set to AF. - You may not be able to use the focus preset function on super telephoto lenses. - You may not be able to use the power zoom function on lenses with that function. • This camera's sensor is larger than the sensor size for which EF-S lenses are designed (APS-C). When using EF-S lenses with this camera, you may notice peripheral illumination fall-off or vignetting. • When using a compatible lens, you can use the [System Setup] > [Retract Lens] setting to retract the lens automatically when the camera's power is turned off. Zq Updating the Firmware of an EF Lens You can update the lens firmware of the EF lens attached to the camera. For details about firmware updates for EF lenses, visit your local Canon Web site. 1 Download the lens firmware update file from the Canon Web site and save it on an SD card. Insert the SD card containing the lens firmware update into the SD card slot. 2 Attach the lens you wish to update to the camera and open the lens firmware submenu. [System Setup] (B) > [Firmware] > [Lens] • The current lens firmware version will be displayed. • If the [Lens] option is grayed out, the attached lens may not support firmware updates or the SD card used may not contain a valid lens firmware file. Check the lens and SD card and repeat the procedure from the beginning. 3 Press [OK] (camera menu) or select [OK] and press SET (monitoring menu). 4 Select the lens firmware file (file extension .LFU) and then press SET. 5 Press [OK] (camera menu) or select [OK] and press SET (monitoring menu). • The lens firmware will be updated. Once in progress, the lens firmware update cannot be canceled. 6 When the confirmation message appears, press [OK] (camera menu) or press SET (monitoring menu).
-
 1
1 -
2
-
3
-
4
-
5
-
6
-
7
-
8
-
9
-
10
-
11
-
12
-
13
-
14
-
15
-
16
-
17
-
18
-
19
-
20
-
21
-
22
-
23
-
24
-
25
-
26
-
27
-
28
-
29
-
30
-
31
-
32
-
33
-
34
-
35
-
36
-
37
-
38
-
39
-
 40
40 -
 41
41 -
 42
42 -
 43
43 -
 44
44 -
 45
45 -
 46
46 -
 47
47 -
 48
48 -
 49
49 -
 50
50 -
51
-
52
-
53
-
54
-
55
-
56
-
57
-
58
-
59
-
60
-
61
-
62
-
63
-
64
-
65
-
66
-
67
-
68
-
69
-
70
-
71
-
72
-
73
-
74
-
75
-
76
-
77
-
78
-
79
-
80
-
81
-
82
-
83
-
84
-
85
-
86
-
87
-
88
-
89
-
90
-
91
-
92
-
93
-
94
-
95
-
96
-
97
-
98
-
99
-
100
-
101
-
102
-
103
-
104
-
105
-
106
-
107
-
108
-
109
-
110
-
111
-
112
-
113
-
114
-
115
-
116
-
117
-
118
-
119
-
120
-
121
-
122
-
123
-
124
-
125
-
126
-
127
-
128
-
129
-
130
-
131
-
132
-
133
-
134
-
135
-
136
-
137
-
138
-
139
-
140
-
141
-
142
-
143
-
144
-
145
-
146
-
147
-
148
-
149
-
150
-
151
-
152
-
153
-
154
-
155
-
156
-
157
-
158
-
159
-
160
-
161
-
162
-
163
-
164
-
165
-
166
-
167
-
168
-
169
-
170
-
171
-
172
-
173
-
174
-
175
-
176
-
177
-
178
-
179
-
180
-
181
-
182
-
183
-
184
-
185
-
186
-
187
-
188
-
189
-
190
-
191
-
192
-
193
-
194
-
195
-
196
-
197
-
198
-
199
-
200
-
201
-
202
-
203
-
204
-
205
-
206
-
207
-
208
-
209
-
210
-
211
-
212
-
213
-
214
-
215
-
216
-
217
-
218
-
219
-
220
-
221
-
222
-
223
-
224
-
225
-
226
-
227
-
228
-
229
-
230
-
231
-
232
-
233
-
234
-
235
-
236
-
237
-
238
-
239
-
240
-
241
-
242
-
243
-
244
-
245
-
246
-
247
-
248
-
249
-
250
-
251
-
252
-
253
-
254
-
255
 |
 |