ZyXEL NAS540 User Guide - Page 54

Basic, RAID 0, RAID 1, RAID 5, RAID 6, RAID 10, Cancel, Multiple volumes on RAID Disk, Group X,

Page 54 highlights

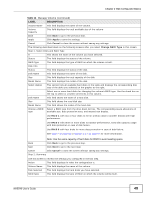
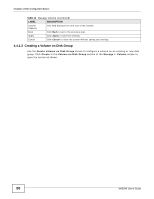
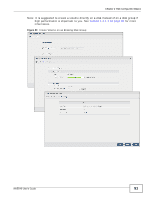
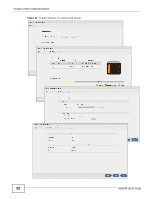
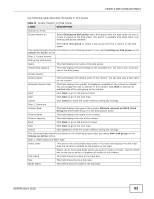
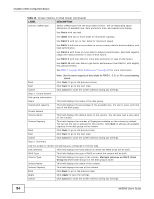
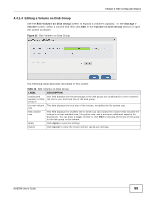
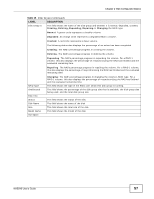
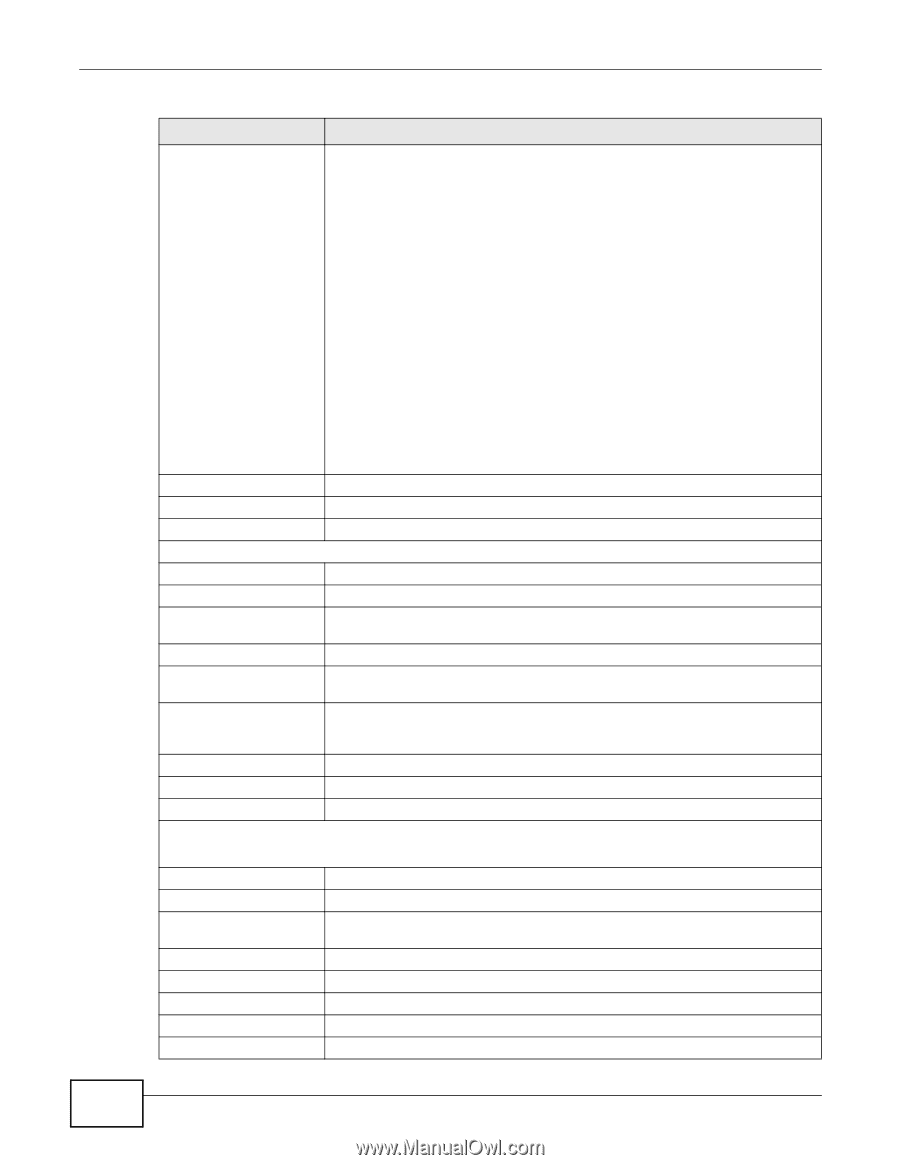
Chapter 4 Web Configurator Basics Table 13 Create Volume on Disk Group (continued) LABEL Choose a RAID type DESCRIPTION Select a RAID type from the drop-down list box. The corresponding space allocations of available size, data protection area, and wasted size display. Use Basic with one disk. Use JBOD with two or more disks for maximum capacity. Use RAID 0 with two or four disks for maximum speed. Use RAID 1 with two or more disks to mirror primary data to another disk(s) with high performance. Use RAID 5 with three or more disks to balance performance, hard disk capacity usage with data protection in case of disk failure. Use RAID 6 with four disks for more data protection in case of disk failure. Use RAID 10 with four disks to get better performance than RAID 6, with slightly less data protection. See Table 7 on page 36 or Section 4.4.7 on page 67 for more information. Back Next Cancel Step 2. Create Volume Disk group information Name Unallocated capacity Create Volume Volume Name Volume Capacity Back Next Cancel Step 3. Summary Note: Use the same capacity of hard disks for RAID 1, 5, 6, or 10 to avoid wasting space. Click Back to go to the previous screen. Click Next to go to the next step. Click Cancel to close the screen without saving any settings. This field displays the name of the disk group. This field displays the percentage of the available size, the size in used, and total size of the disk group. This field displays the default name of the volume. You can also type a new name for the volume. This field displays the number of Gigabytes available on the volume by default. You can set the size to allocate for this volume. Click MAX to allocate all available capacity of the disk group to the volume. Click Back to go to the previous step. Click Next to go to the next step. Click Cancel to close the screen without saving any settings. Use this screen to review the settings you configured in the last step. Disk Selected This field displays the hard disk(s) on which the RAID array will be built. RAID Type This field displays the type of RAID on which the volume will be built. Volume Type This field displays the type of the volume, Multiple volumes on RAID (Disk Group X) where Disk Group X is the disk group's name. Volume Name This field displays the name of the volume. Volume Capacity This field displays the size of the volume. Back Click Back to go to the previous step. Apply Click Apply to save the settings. Cancel Click Cancel to close the screen without saving any settings. 54 NAS540 User's Guide
  • 1
  • 2
  • 3
  • 4
  • 5
  • 6
  • 7
  • 8
  • 9
  • 10
  • 11
  • 12
  • 13
  • 14
  • 15
  • 16
  • 17
  • 18
  • 19
  • 20
  • 21
  • 22
  • 23
  • 24
  • 25
  • 26
  • 27
  • 28
  • 29
  • 30
  • 31
  • 32
  • 33
  • 34
  • 35
  • 36
  • 37
  • 38
  • 39
  • 40
  • 41
  • 42
  • 43
  • 44
  • 45
  • 46
  • 47
  • 48
  • 49
  • 50
  • 51
  • 52
  • 53
  • 54
  • 55
  • 56
  • 57
  • 58
  • 59
  • 60
  • 61
  • 62
  • 63
  • 64
  • 65
  • 66
  • 67
  • 68
  • 69
  • 70
  • 71
  • 72
  • 73
  • 74
  • 75
  • 76
  • 77
  • 78
  • 79
  • 80
  • 81
  • 82
  • 83
  • 84
  • 85
  • 86
  • 87
  • 88
  • 89
  • 90
  • 91
  • 92
  • 93
  • 94
  • 95
  • 96
  • 97
  • 98
  • 99
  • 100
  • 101
  • 102
  • 103
  • 104
  • 105
  • 106
  • 107
  • 108
  • 109
  • 110
  • 111
  • 112
  • 113
  • 114
  • 115
  • 116
  • 117
  • 118
  • 119
  • 120
  • 121
  • 122
  • 123
  • 124
  • 125
  • 126
  • 127
  • 128
  • 129
  • 130
  • 131
  • 132
  • 133
  • 134
  • 135
  • 136
  • 137
  • 138
  • 139
  • 140
  • 141
  • 142
  • 143
  • 144
  • 145
  • 146
  • 147
  • 148
  • 149
  • 150
  • 151
  • 152
  • 153
  • 154
  • 155
  • 156
  • 157
  • 158
  • 159
  • 160
  • 161
  • 162
  • 163
  • 164
  • 165
  • 166
  • 167
  • 168
  • 169
  • 170
  • 171
  • 172
  • 173
  • 174
  • 175
  • 176
  • 177
  • 178
  • 179
  • 180
  • 181
  • 182
  • 183
  • 184
  • 185
  • 186
  • 187
  • 188
  • 189
  • 190
  • 191
  • 192
  • 193
  • 194
  • 195
  • 196
  • 197
  • 198
  • 199
  • 200
  • 201
  • 202
  • 203
  • 204
  • 205
  • 206
  • 207
  • 208
  • 209
  • 210
  • 211
  • 212
  • 213
  • 214
  • 215
  • 216
  • 217
  • 218
  • 219
  • 220
  • 221
  • 222
  • 223
  • 224
  • 225
  • 226
  • 227
  • 228
  • 229
  • 230
  • 231
  • 232
  • 233
  • 234
  • 235
  • 236
  • 237
  • 238
  • 239
  • 240
  • 241
  • 242
  • 243
  • 244
  • 245
  • 246
  • 247
  • 248
  • 249
  • 250
  • 251
  • 252
  • 253
  • 254
  • 255
  • 256
  • 257
  • 258
  • 259
  • 260
  • 261
  • 262
  • 263
  • 264
  • 265
  • 266
  • 267
  • 268
  • 269
  • 270
  • 271
  • 272
  • 273
  • 274
  • 275
  • 276
  • 277
  • 278
  • 279
  • 280
  • 281
  • 282
  • 283
  • 284
  • 285
  • 286
  • 287
  • 288
  • 289
  • 290
  • 291
  • 292
  • 293
  • 294
  • 295
  • 296
  • 297
  • 298
  • 299
  • 300
  • 301
  • 302
  • 303
  • 304
  • 305
  • 306
  • 307
  • 308
  • 309
  • 310
  • 311
  • 312
  • 313
  • 314
  • 315
  • 316
  • 317
  • 318
  • 319
  • 320
  • 321
  • 322
  • 323
  • 324
  • 325
  • 326
  • 327
  • 328
  • 329
  • 330
  • 331
  • 332
  • 333
  • 334
  • 335
  • 336
  • 337
  • 338
  • 339
  • 340
  • 341
  • 342
  • 343
  • 344
  • 345
  • 346
  • 347
  • 348
  • 349
  • 350
  • 351
  • 352
  • 353
  • 354
  • 355
  • 356
  • 357
  • 358
  • 359
  • 360
  • 361
  • 362
  • 363
  • 364
  • 365
  • 366
  • 367
  • 368
  • 369
  • 370
  • 371
  • 372
  • 373
  • 374
  • 375
  • 376

Chapter 4 Web Configurator Basics
NAS540 User’s Guide
54
Choose a RAID type
Select a RAID type from the drop-down list box. The corresponding space
allocations of available size, data protection area, and wasted size display.
Use
Basic
with one disk.
Use
JBOD
with two or more disks for maximum capacity.
Use
RAID 0
with two or four disks for maximum speed.
Use
RAID 1
with two or more disks to mirror primary data to another disk(s) with
high performance.
Use
RAID 5
with three or more disks to balance performance, hard disk capacity
usage with data protection in case of disk failure.
Use
RAID 6
with four disks for more data protection in case of disk failure.
Use
RAID 10
with four disks to get better performance than RAID 6, with slightly
less data protection.
See
Table 7 on page 36
or
Section 4.4.7 on page 67
for more information.
Note: Use the same capacity of hard disks for RAID 1, 5, 6, or 10 to avoid wasting
space.
Back
Click
Back
to go to the previous screen.
Next
Click
Next
to go to the next step.
Cancel
Click
Cancel
to close the screen without saving any settings.
Step 2. Create Volume
Disk group information
Name
This field displays the name of the disk group.
Unallocated capacity
This field displays the percentage of the available size, the size in used, and total
size of the disk group.
Create Volume
Volume Name
This field displays the default name of the volume. You can also type a new name
for the volume.
Volume Capacity
This field displays the number of Gigabytes available on the volume by default.
You can set the size to allocate for this volume. Click
MAX
to allocate all available
capacity of the disk group to the volume.
Back
Click
Back
to go to the previous step.
Next
Click
Next
to go to the next step.
Cancel
Click
Cancel
to close the screen without saving any settings.
Step 3. Summary
Use this screen to review the settings you configured in the last step.
Disk Selected
This field displays the hard disk(s) on which the RAID array will be built.
RAID Type
This field displays the type of RAID on which the volume will be built.
Volume Type
This field displays the type of the volume,
Multiple volumes on RAID (Disk
Group X)
where Disk Group X is the disk group’s name.
Volume Name
This field displays the name of the volume.
Volume Capacity
This field displays the size of the volume.
Back
Click
Back
to go to the previous step.
Apply
Click
Apply
to save the settings.
Cancel
Click
Cancel
to close the screen without saving any settings.
Table 13
Create Volume on Disk Group (continued)
LABEL
DESCRIPTION