HP Officejet 7200 User Guide - Page 14
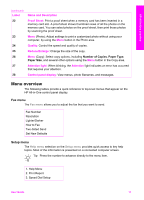
Menu overview, Fax menu, Setup menu - not printing
 |
View all HP Officejet 7200 manuals
Add to My Manuals
Save this manual to your list of manuals |
Page 14 highlights
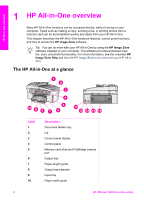
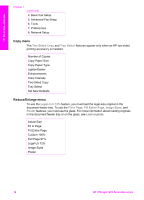
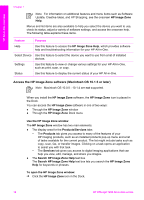
HP All-in-One overview (continued) Label 22 23 24 25 26 27 28 Name and Description Proof Sheet: Print a proof sheet when a memory card has been inserted in a memory card slot. A proof sheet shows thumbnail views of all the photos on the memory card. You can select photos on the proof sheet, then print those photos by scanning the proof sheet. Menu (Photo): Adjust settings to print a customized photo without using your computer, by using the Menu button in the Photo area. Quality: Control the speed and quality of copies. Reduce/Enlarge: Change the size of the copy. Menu (Copy): Select copy options, including Number of Copies, Paper Type, Paper Size, and several other options using the Menu button in the Copy area. Attention light: When blinking, the Attention light indicates an error has occurred that requires your attention. Control panel display: View menus, photo filenames, and messages. Menu overview The following tables provide a quick reference to top-level menus that appear on the HP All-in-One control panel display. Fax menu The Fax menu allows you to adjust the fax that you want to send. Fax Number Resolution Lighter/Darker How to Fax Two-Sided Send Set New Defaults Setup menu The Help menu selection on the Setup menu provides quick access to key help topics. Most of the information is presented on a connected computer screen. Tip Press the number to advance directly to the menu item. 1. Help Menu 2. Print Report 3. Speed Dial Setup User Guide 11
-
 1
1 -
2
-
3
-
4
-
5
-
6
-
7
-
8
-
 9
9 -
 10
10 -
 11
11 -
 12
12 -
 13
13 -
 14
14 -
 15
15 -
 16
16 -
 17
17 -
 18
18 -
 19
19 -
20
-
21
-
22
-
23
-
24
-
25
-
26
-
27
-
28
-
29
-
30
-
31
-
32
-
33
-
34
-
35
-
36
-
37
-
38
-
39
-
40
-
41
-
42
-
43
-
44
-
45
-
46
-
47
-
48
-
49
-
50
-
51
-
52
-
53
-
54
-
55
-
56
-
57
-
58
-
59
-
60
-
61
-
62
-
63
-
64
-
65
-
66
-
67
-
68
-
69
-
70
-
71
-
72
-
73
-
74
-
75
-
76
-
77
-
78
-
79
-
80
-
81
-
82
-
83
-
84
-
85
-
86
-
87
-
88
-
89
-
90
-
91
-
92
-
93
-
94
-
95
-
96
-
97
-
98
-
99
-
100
-
101
-
102
-
103
-
104
-
105
-
106
-
107
-
108
-
109
-
110
-
111
-
112
-
113
-
114
-
115
-
116
-
117
-
118
-
119
-
120
-
121
-
122
-
123
-
124
-
125
-
126
-
127
-
128
-
129
-
130
-
131
-
132
-
133
-
134
-
135
-
136
-
137
-
138
-
139
-
140
-
141
-
142
-
143
-
144
-
145
-
146
-
147
-
148
-
149
-
150
-
151
-
152
-
153
-
154
-
155
-
156
-
157
-
158
-
159
-
160
-
161
-
162
-
163
-
164
-
165
-
166
-
167
-
168
-
169
-
170
-
171
-
172
-
173
-
174
-
175
-
176
-
177
-
178
-
179
-
180
-
181
-
182
-
183
-
184
-
185
-
186
-
187
-
188
-
189
-
190
-
191
-
192
-
193
-
194
-
195
-
196
-
197
-
198
-
199
-
200
-
201
-
202
-
203
-
204
-
205
-
206
-
207
-
208
-
209
-
210
-
211
-
212
-
213
-
214
-
215
-
216
-
217
-
218
-
219
-
220
-
221
-
222
-
223
-
224
-
225
-
226
-
227
-
228
-
229
-
230
-
231
-
232
-
233
-
234
-
235
-
236
-
237
-
238
-
239
-
240
 |
 |