HP Officejet 7200 User Guide - Page 142
Connect additional computers, Manage your network, Use the HP All-in-One control panel
 |
View all HP Officejet 7200 manuals
Add to My Manuals
Save this manual to your list of manuals |
Page 142 highlights
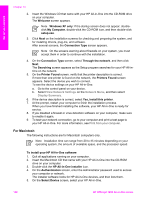
Set up your network 6. Follow the onscreen instructions to complete all the installation steps, including the Setup Assistant. When you have finished installing the software, your HP All-in-One is ready for service. 7. To test your network connection, go to your computer and print a test page to your HP All-in-One. For more information, see Print from your computer. Connect additional computers If your HP All-in-One is connected to one of the recommended networks you can share your HP All-in-One with additional computers on the network. For each additional computer, you must install the HP All-in-One software, as described in Install the software for a network connection. During installation, the software will discover the SSID (network name) of the existing network. Once you have set up your HP All-in-One on the network you will not need to configure it again when you add additional computers. Manage your network This section describes how to use the network tools on the HP All-in-One control panel and the Embedded Web Server. These tools enable you to view and edit network settings, and add advanced security to your network. Use the HP All-in-One control panel Print and view a network configuration page The Network Configuration Page lists all of the important network settings such as the IP address, link speed, DNS, and DNS-SD. To print a network configuration page 1. Press Setup. 2. Press 8, and then press 1. This selects the Network Setup menu and then selects Print Network Settings. 3. Press 1 or OK to confirm. For definitions of the items on the configuration page, see Configuration page definitions. Restore network defaults If necessary, you can reset the HP All-in-One network to factory defaults. To reset to factory defaults 1. Press Setup. 2. Press 8, and then press 4. This selects the Network Setup menu and then selects Restore Network Defaults. 3. Press OK to confirm. User Guide 139
-
 1
1 -
2
-
3
-
4
-
5
-
6
-
7
-
8
-
9
-
10
-
11
-
12
-
13
-
14
-
15
-
16
-
17
-
18
-
19
-
20
-
21
-
22
-
23
-
24
-
25
-
26
-
27
-
28
-
29
-
30
-
31
-
32
-
33
-
34
-
35
-
36
-
37
-
38
-
39
-
40
-
41
-
42
-
43
-
44
-
45
-
46
-
47
-
48
-
49
-
50
-
51
-
52
-
53
-
54
-
55
-
56
-
57
-
58
-
59
-
60
-
61
-
62
-
63
-
64
-
65
-
66
-
67
-
68
-
69
-
70
-
71
-
72
-
73
-
74
-
75
-
76
-
77
-
78
-
79
-
80
-
81
-
82
-
83
-
84
-
85
-
86
-
87
-
88
-
89
-
90
-
91
-
92
-
93
-
94
-
95
-
96
-
97
-
98
-
99
-
100
-
101
-
102
-
103
-
104
-
105
-
106
-
107
-
108
-
109
-
110
-
111
-
112
-
113
-
114
-
115
-
116
-
117
-
118
-
119
-
120
-
121
-
122
-
123
-
124
-
125
-
126
-
127
-
128
-
129
-
130
-
131
-
132
-
133
-
134
-
135
-
136
-
 137
137 -
 138
138 -
 139
139 -
 140
140 -
 141
141 -
 142
142 -
 143
143 -
 144
144 -
 145
145 -
 146
146 -
 147
147 -
148
-
149
-
150
-
151
-
152
-
153
-
154
-
155
-
156
-
157
-
158
-
159
-
160
-
161
-
162
-
163
-
164
-
165
-
166
-
167
-
168
-
169
-
170
-
171
-
172
-
173
-
174
-
175
-
176
-
177
-
178
-
179
-
180
-
181
-
182
-
183
-
184
-
185
-
186
-
187
-
188
-
189
-
190
-
191
-
192
-
193
-
194
-
195
-
196
-
197
-
198
-
199
-
200
-
201
-
202
-
203
-
204
-
205
-
206
-
207
-
208
-
209
-
210
-
211
-
212
-
213
-
214
-
215
-
216
-
217
-
218
-
219
-
220
-
221
-
222
-
223
-
224
-
225
-
226
-
227
-
228
-
229
-
230
-
231
-
232
-
233
-
234
-
235
-
236
-
237
-
238
-
239
-
240
 |
 |