HP Visualize J5000 hp Visualize J5000, J7000 workstations service handbook (a4 - Page 100
Internal Storage Devices, Hard Disk Drives, Removing a Hard Disk Drive
 |
View all HP Visualize J5000 manuals
Add to My Manuals
Save this manual to your list of manuals |
Page 100 highlights
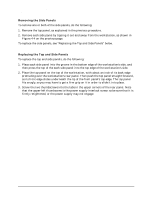
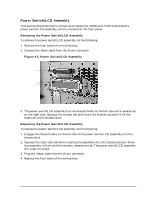
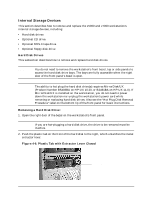
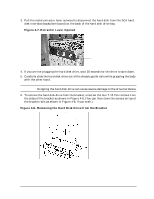
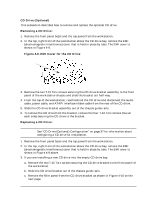
Field Replaceable Units (FRUs) FRU Removal and Replacement Internal Storage Devices This section describes how to remove and replace the J5000 and J7000 workstation's internal storage devices, including: • Hard disk drives • Optional CD drive • Optional DDS-3 tape drive • Optional floppy disk drive Hard Disk Drives This subsection describes how to remove and replace hard disk drives. NOTE You do not need to remove the workstation's front bezel, top or side panels to access the hard disk drive bays. The bays are fully accessible when the right door of the front panel's bezel is open. NOTE The ability to hot plug the hard disk drive(s) requires MirrorDisk/UX (Product Number B5403BA on HP-UX 10.20, or B2491BA on HP-UX 11.0). If MirrorDisk/UX is installed on the workstation, you do not need to power down the workstation nor unplug the workstation's power cord while removing or replacing hard disk drives. Also see the "Hot Plug Disk Removal Procedure" label on the bottom lip of the front panel for basic instructions. Removing a Hard Disk Drive: 1. Open the right door of the bezel on the workstation's front panel. CAUTION If you are hot-plugging a hard disk drive, the drive to be removed must be inactive. 2. Push the plastic tab on the front of the hard disk to the right, which unlatches the metal extractor lever. Figure 4-6. Plastic Tab with Extractor Lever Closed Plastic tab 96 Chapter 4
-
 1
1 -
2
-
3
-
4
-
5
-
6
-
7
-
8
-
9
-
10
-
11
-
12
-
13
-
14
-
15
-
16
-
17
-
18
-
19
-
20
-
21
-
22
-
23
-
24
-
25
-
26
-
27
-
28
-
29
-
30
-
31
-
32
-
33
-
34
-
35
-
36
-
37
-
38
-
39
-
40
-
41
-
42
-
43
-
44
-
45
-
46
-
47
-
48
-
49
-
50
-
51
-
52
-
53
-
54
-
55
-
56
-
57
-
58
-
59
-
60
-
61
-
62
-
63
-
64
-
65
-
66
-
67
-
68
-
69
-
70
-
71
-
72
-
73
-
74
-
75
-
76
-
77
-
78
-
79
-
80
-
81
-
82
-
83
-
84
-
85
-
86
-
87
-
88
-
89
-
90
-
91
-
92
-
93
-
94
-
 95
95 -
 96
96 -
 97
97 -
 98
98 -
 99
99 -
 100
100 -
 101
101 -
 102
102 -
 103
103 -
 104
104 -
 105
105 -
106
-
107
-
108
-
109
-
110
-
111
-
112
-
113
-
114
-
115
-
116
-
117
-
118
-
119
-
120
-
121
-
122
-
123
-
124
-
125
-
126
-
127
-
128
-
129
-
130
-
131
-
132
-
133
-
134
-
135
-
136
-
137
-
138
-
139
-
140
-
141
-
142
-
143
-
144
-
145
-
146
-
147
-
148
-
149
-
150
-
151
-
152
-
153
-
154
-
155
-
156
-
157
-
158
-
159
-
160
-
161
-
162
-
163
-
164
-
165
-
166
-
167
-
168
-
169
-
170
-
171
-
172
-
173
-
174
-
175
-
176
-
177
-
178
-
179
-
180
-
181
-
182
-
183
-
184
-
185
-
186
-
187
-
188
-
189
-
190
-
191
-
192
-
193
-
194
-
195
-
196
-
197
-
198
-
199
-
200
-
201
-
202
-
203
-
204
-
205
-
206
-
207
-
208
-
209
-
210
-
211
-
212
 |
 |