HP Visualize J5000 hp Visualize J5000, J7000 workstations service handbook (a4 - Page 101
Extractor Lever Opened, Removing the Hard Disk Drive from the Bracket
 |
View all HP Visualize J5000 manuals
Add to My Manuals
Save this manual to your list of manuals |
Page 101 highlights
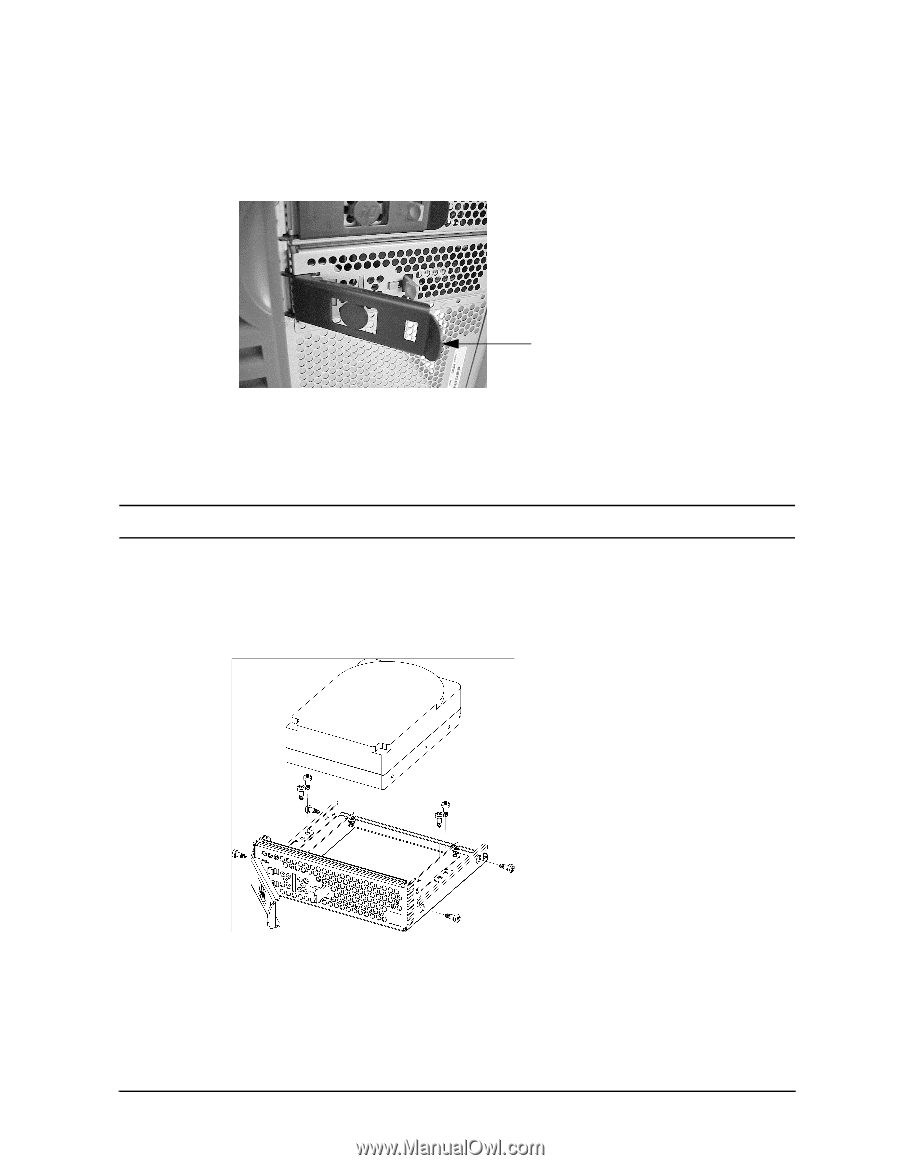
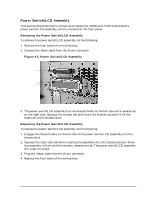
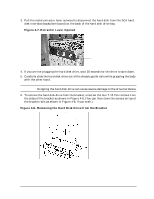
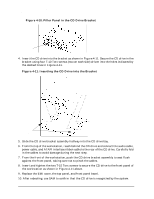
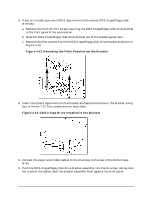
Field Replaceable Units (FRUs) FRU Removal and Replacement 3. Pull the metal extractor lever outward to disconnect the hard disk from the SCA hard disk interface (backplane board) on the back of the hard disk drive bay. Figure 4-7. Extractor Lever Opened Extractor lever 4. If you are hot-plugging the hard disk drive, wait 30 seconds for the drive to spin down. 5. Carefully slide the hard disk drive out of the chassis guide rails while grasping the body with the other hand. CAUTION Dropping the hard disk drive can cause severe damage to the drive hardware. 6. To remove the hard disk drive from the bracket, unscrew the four T-15 Torx screws from the sides of the bracket as shown in Figure 4-8. (You can then store the screws on top of the bracket rails as shown in Figure 4-8, if you wish.) Figure 4-8. Removing the Hard Disk Drive from the Bracket Chapter 4 97
-
 1
1 -
2
-
3
-
4
-
5
-
6
-
7
-
8
-
9
-
10
-
11
-
12
-
13
-
14
-
15
-
16
-
17
-
18
-
19
-
20
-
21
-
22
-
23
-
24
-
25
-
26
-
27
-
28
-
29
-
30
-
31
-
32
-
33
-
34
-
35
-
36
-
37
-
38
-
39
-
40
-
41
-
42
-
43
-
44
-
45
-
46
-
47
-
48
-
49
-
50
-
51
-
52
-
53
-
54
-
55
-
56
-
57
-
58
-
59
-
60
-
61
-
62
-
63
-
64
-
65
-
66
-
67
-
68
-
69
-
70
-
71
-
72
-
73
-
74
-
75
-
76
-
77
-
78
-
79
-
80
-
81
-
82
-
83
-
84
-
85
-
86
-
87
-
88
-
89
-
90
-
91
-
92
-
93
-
94
-
95
-
 96
96 -
 97
97 -
 98
98 -
 99
99 -
 100
100 -
 101
101 -
 102
102 -
 103
103 -
 104
104 -
 105
105 -
 106
106 -
107
-
108
-
109
-
110
-
111
-
112
-
113
-
114
-
115
-
116
-
117
-
118
-
119
-
120
-
121
-
122
-
123
-
124
-
125
-
126
-
127
-
128
-
129
-
130
-
131
-
132
-
133
-
134
-
135
-
136
-
137
-
138
-
139
-
140
-
141
-
142
-
143
-
144
-
145
-
146
-
147
-
148
-
149
-
150
-
151
-
152
-
153
-
154
-
155
-
156
-
157
-
158
-
159
-
160
-
161
-
162
-
163
-
164
-
165
-
166
-
167
-
168
-
169
-
170
-
171
-
172
-
173
-
174
-
175
-
176
-
177
-
178
-
179
-
180
-
181
-
182
-
183
-
184
-
185
-
186
-
187
-
188
-
189
-
190
-
191
-
192
-
193
-
194
-
195
-
196
-
197
-
198
-
199
-
200
-
201
-
202
-
203
-
204
-
205
-
206
-
207
-
208
-
209
-
210
-
211
-
212
 |
 |