HP Visualize J5000 hp Visualize J5000, J7000 workstations service handbook (a4 - Page 104
Filler Panel in the CD Drive Bracket
 |
View all HP Visualize J5000 manuals
Add to My Manuals
Save this manual to your list of manuals |
Page 104 highlights
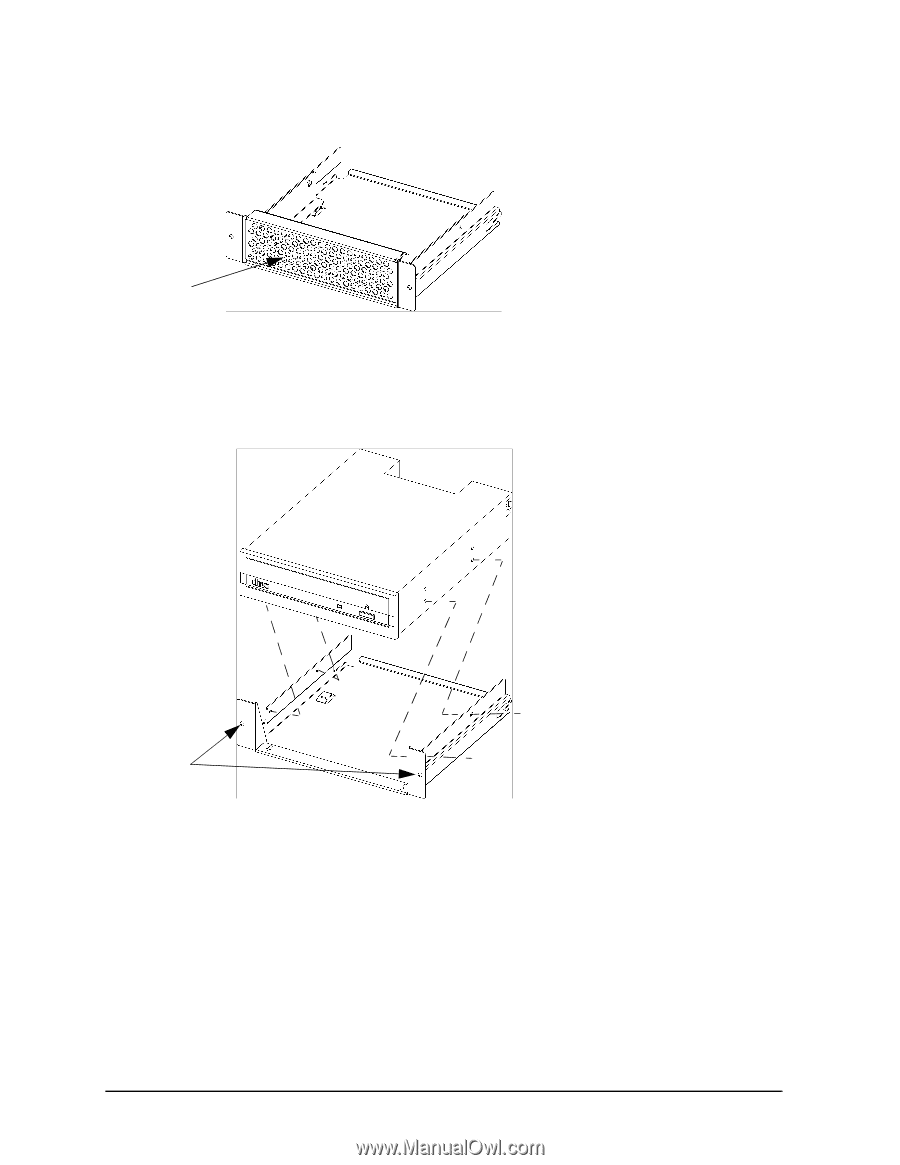
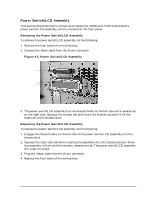
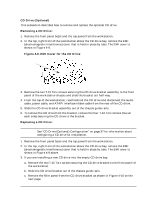
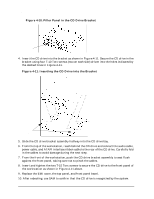
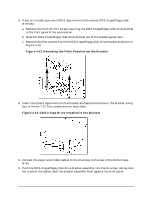
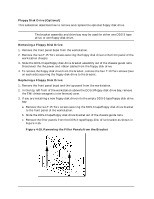
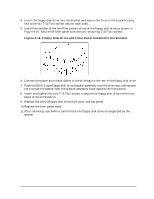
Field Replaceable Units (FRUs) FRU Removal and Replacement Figure 4-10. Filler Panel in the CD Drive Bracket Filler panel 4. Insert the CD drive into the bracket as shown in Figure 4-11. Secure the CD drive in the bracket using four T-10 Torx screws (two on each side) driven into the holes indicated by the dashed lines in Figure 4-11. Figure 4-11. Inserting the CD Drive into the Bracket Screw holes for securing CD drive to front panel 5. Slide the CD drive bracket assembly halfway into the CD drive bay. 6. From the top of the workstation, reach behind the CD drive and connect the audio cable, power cable, and ATAPI interface ribbon cable to the rear of the CD drive. Carefully fold in the cables to avoid damage during the next step. 7. From the front of the workstation, push the CD drive bracket assembly to seat flush against the front panel, taking care not to pinch the cables. 8. Insert and tighten the two T-15 Torx screws to secure the CD drive to the front panel of the workstation as shown in Figure 4-11 above. 9. Replace the EMI cover, the top panel, and front panel bezel. 10. After rebooting, use SAM to confirm that the CD drive is recognized by the system. 100 Chapter 4
-
 1
1 -
2
-
3
-
4
-
5
-
6
-
7
-
8
-
9
-
10
-
11
-
12
-
13
-
14
-
15
-
16
-
17
-
18
-
19
-
20
-
21
-
22
-
23
-
24
-
25
-
26
-
27
-
28
-
29
-
30
-
31
-
32
-
33
-
34
-
35
-
36
-
37
-
38
-
39
-
40
-
41
-
42
-
43
-
44
-
45
-
46
-
47
-
48
-
49
-
50
-
51
-
52
-
53
-
54
-
55
-
56
-
57
-
58
-
59
-
60
-
61
-
62
-
63
-
64
-
65
-
66
-
67
-
68
-
69
-
70
-
71
-
72
-
73
-
74
-
75
-
76
-
77
-
78
-
79
-
80
-
81
-
82
-
83
-
84
-
85
-
86
-
87
-
88
-
89
-
90
-
91
-
92
-
93
-
94
-
95
-
96
-
97
-
98
-
 99
99 -
 100
100 -
 101
101 -
 102
102 -
 103
103 -
 104
104 -
 105
105 -
 106
106 -
 107
107 -
 108
108 -
 109
109 -
110
-
111
-
112
-
113
-
114
-
115
-
116
-
117
-
118
-
119
-
120
-
121
-
122
-
123
-
124
-
125
-
126
-
127
-
128
-
129
-
130
-
131
-
132
-
133
-
134
-
135
-
136
-
137
-
138
-
139
-
140
-
141
-
142
-
143
-
144
-
145
-
146
-
147
-
148
-
149
-
150
-
151
-
152
-
153
-
154
-
155
-
156
-
157
-
158
-
159
-
160
-
161
-
162
-
163
-
164
-
165
-
166
-
167
-
168
-
169
-
170
-
171
-
172
-
173
-
174
-
175
-
176
-
177
-
178
-
179
-
180
-
181
-
182
-
183
-
184
-
185
-
186
-
187
-
188
-
189
-
190
-
191
-
192
-
193
-
194
-
195
-
196
-
197
-
198
-
199
-
200
-
201
-
202
-
203
-
204
-
205
-
206
-
207
-
208
-
209
-
210
-
211
-
212
 |
 |