HP Visualize J5000 hp Visualize J5000, J7000 workstations service handbook (a4 - Page 144
Removing the Fan from the Mounting Bracket, Replacing the I/O Cooling Fan
 |
View all HP Visualize J5000 manuals
Add to My Manuals
Save this manual to your list of manuals |
Page 144 highlights
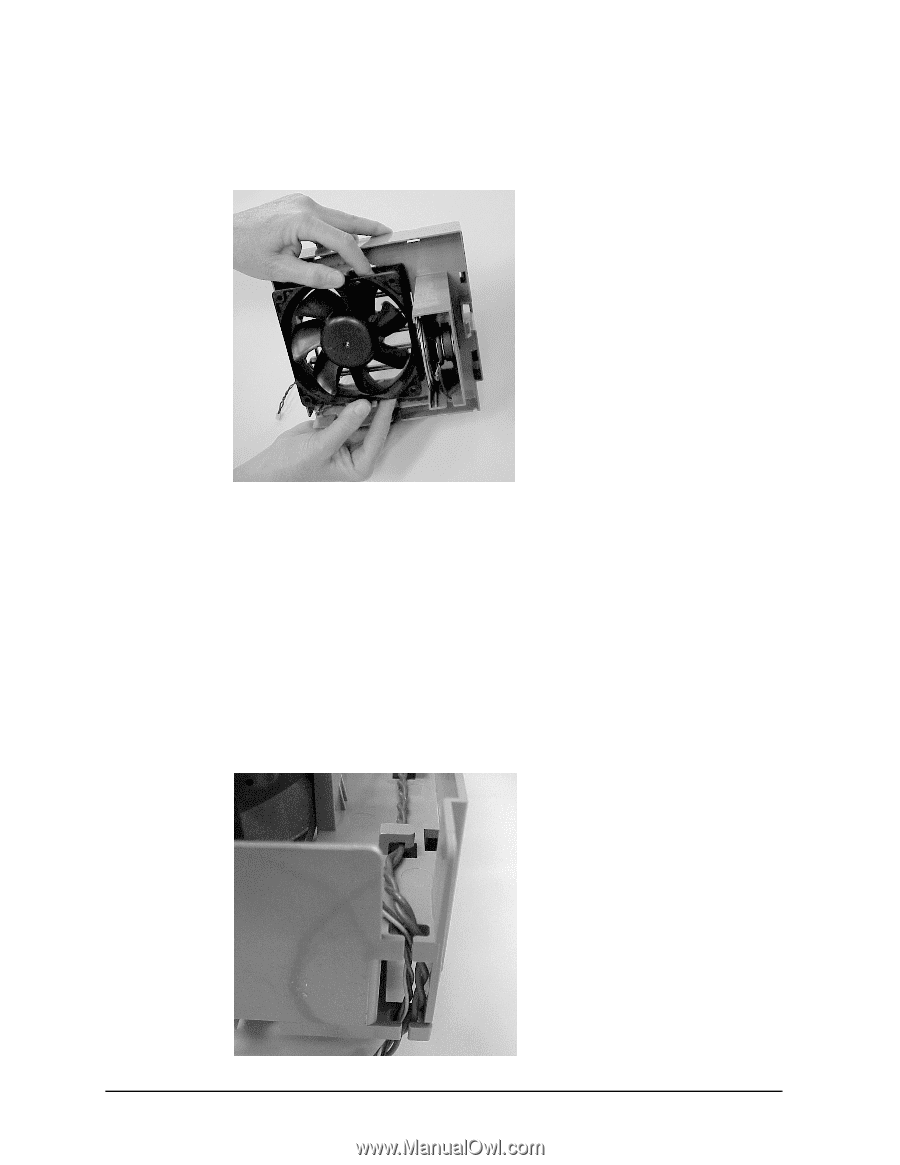
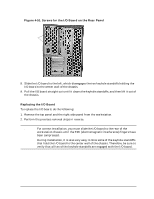
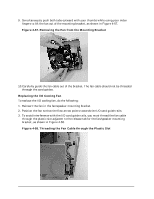
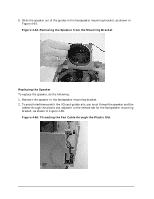
Field Replaceable Units (FRUs) FRU Removal and Replacement 9. Simultaneously push both tabs outward with your thumbs while using your index fingers to lift the fan out of the mounting bracket, as shown in Figure 4-57. Figure 4-57. Removing the Fan from the Mounting Bracket 10.Carefully guide the fan cable out of the bracket. The fan cable should not be threaded through the card guides. Replacing the I/O Cooling Fan To replace the I/O cooling fan, do the following: 1. Reinsert the fan in the fan/speaker mounting bracket. 2. Position the fan so that the flow arrow points towards the I/O card guide rails. 3. To avoid interference with the I/O card guide rails, you must thread the fan cable through the plastic slot adjacent to the release tab for the fan/speaker mounting bracket, as shown in Figure 4-58. Figure 4-58. Threading the Fan Cable through the Plastic Slot 140 Chapter 4
-
 1
1 -
2
-
3
-
4
-
5
-
6
-
7
-
8
-
9
-
10
-
11
-
12
-
13
-
14
-
15
-
16
-
17
-
18
-
19
-
20
-
21
-
22
-
23
-
24
-
25
-
26
-
27
-
28
-
29
-
30
-
31
-
32
-
33
-
34
-
35
-
36
-
37
-
38
-
39
-
40
-
41
-
42
-
43
-
44
-
45
-
46
-
47
-
48
-
49
-
50
-
51
-
52
-
53
-
54
-
55
-
56
-
57
-
58
-
59
-
60
-
61
-
62
-
63
-
64
-
65
-
66
-
67
-
68
-
69
-
70
-
71
-
72
-
73
-
74
-
75
-
76
-
77
-
78
-
79
-
80
-
81
-
82
-
83
-
84
-
85
-
86
-
87
-
88
-
89
-
90
-
91
-
92
-
93
-
94
-
95
-
96
-
97
-
98
-
99
-
100
-
101
-
102
-
103
-
104
-
105
-
106
-
107
-
108
-
109
-
110
-
111
-
112
-
113
-
114
-
115
-
116
-
117
-
118
-
119
-
120
-
121
-
122
-
123
-
124
-
125
-
126
-
127
-
128
-
129
-
130
-
131
-
132
-
133
-
134
-
135
-
136
-
137
-
138
-
 139
139 -
 140
140 -
 141
141 -
 142
142 -
 143
143 -
 144
144 -
 145
145 -
 146
146 -
 147
147 -
 148
148 -
 149
149 -
150
-
151
-
152
-
153
-
154
-
155
-
156
-
157
-
158
-
159
-
160
-
161
-
162
-
163
-
164
-
165
-
166
-
167
-
168
-
169
-
170
-
171
-
172
-
173
-
174
-
175
-
176
-
177
-
178
-
179
-
180
-
181
-
182
-
183
-
184
-
185
-
186
-
187
-
188
-
189
-
190
-
191
-
192
-
193
-
194
-
195
-
196
-
197
-
198
-
199
-
200
-
201
-
202
-
203
-
204
-
205
-
206
-
207
-
208
-
209
-
210
-
211
-
212
 |
 |