HP Visualize J5000 hp Visualize J5000, J7000 workstations service handbook (a4 - Page 169
Troubleshooting Monitor Problems, Changing the Console to an External Terminal
 |
View all HP Visualize J5000 manuals
Add to My Manuals
Save this manual to your list of manuals |
Page 169 highlights
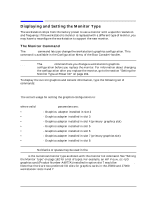
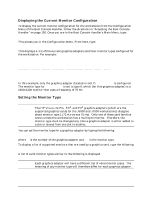
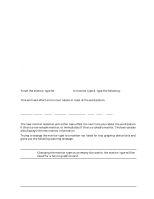
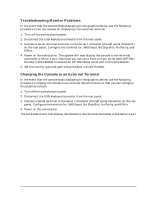
Boot Console Handler Displaying and Setting the Monitor Type Troubleshooting Monitor Problems In the event that the console stops displaying to the graphics device, use the following procedure to set the console for displaying to an external terminal: 1. Turn off the workstation's power. 2. Disconnect the USB keyboard connector from the rear panel. 3. Connect a serial terminal emulator to the Serial 1 connector (the left serial connector) on the rear panel. Configure the terminal for: 9600 baud, No Stop Bits, No Parity, and 8 Bits. 4. Power on the workstation. The system will now display the console to the terminal connected to Serial 1 port. Note that you can use a 9-pin to 9-pin serial cable (HP Part Number F1044-80002) to connect an HP OmniBook serial port to the workstation. 5. Set the monitor type and path using the Boot Console Handler. Changing the Console to an External Terminal In the event that the console stops displaying to the graphics device, use the following procedure to display the console to an external Serial terminal so that you can configure the graphics console: 1. Turn off the workstation's power. 2. Disconnect the USB keyboard connector from the rear panel. 3. Connect a Serial terminal to the Serial 1 connector (the left serial connector) on the rear panel. Configure the terminal for: 9600 baud, No Stop Bits, No Parity, and 8 Bits. 4. Power on the workstation. The workstation will now display the console to the terminal connected to the Serial 1 port. Chapter 5 165
-
 1
1 -
2
-
3
-
4
-
5
-
6
-
7
-
8
-
9
-
10
-
11
-
12
-
13
-
14
-
15
-
16
-
17
-
18
-
19
-
20
-
21
-
22
-
23
-
24
-
25
-
26
-
27
-
28
-
29
-
30
-
31
-
32
-
33
-
34
-
35
-
36
-
37
-
38
-
39
-
40
-
41
-
42
-
43
-
44
-
45
-
46
-
47
-
48
-
49
-
50
-
51
-
52
-
53
-
54
-
55
-
56
-
57
-
58
-
59
-
60
-
61
-
62
-
63
-
64
-
65
-
66
-
67
-
68
-
69
-
70
-
71
-
72
-
73
-
74
-
75
-
76
-
77
-
78
-
79
-
80
-
81
-
82
-
83
-
84
-
85
-
86
-
87
-
88
-
89
-
90
-
91
-
92
-
93
-
94
-
95
-
96
-
97
-
98
-
99
-
100
-
101
-
102
-
103
-
104
-
105
-
106
-
107
-
108
-
109
-
110
-
111
-
112
-
113
-
114
-
115
-
116
-
117
-
118
-
119
-
120
-
121
-
122
-
123
-
124
-
125
-
126
-
127
-
128
-
129
-
130
-
131
-
132
-
133
-
134
-
135
-
136
-
137
-
138
-
139
-
140
-
141
-
142
-
143
-
144
-
145
-
146
-
147
-
148
-
149
-
150
-
151
-
152
-
153
-
154
-
155
-
156
-
157
-
158
-
159
-
160
-
161
-
162
-
163
-
 164
164 -
 165
165 -
 166
166 -
 167
167 -
 168
168 -
 169
169 -
 170
170 -
 171
171 -
 172
172 -
 173
173 -
 174
174 -
175
-
176
-
177
-
178
-
179
-
180
-
181
-
182
-
183
-
184
-
185
-
186
-
187
-
188
-
189
-
190
-
191
-
192
-
193
-
194
-
195
-
196
-
197
-
198
-
199
-
200
-
201
-
202
-
203
-
204
-
205
-
206
-
207
-
208
-
209
-
210
-
211
-
212
 |
 |