HP Visualize J5000 hp Visualize J5000, J7000 workstations service handbook (a4 - Page 108
Floppy Disk Drive Optional, Removing a Floppy Disk Drive
 |
View all HP Visualize J5000 manuals
Add to My Manuals
Save this manual to your list of manuals |
Page 108 highlights
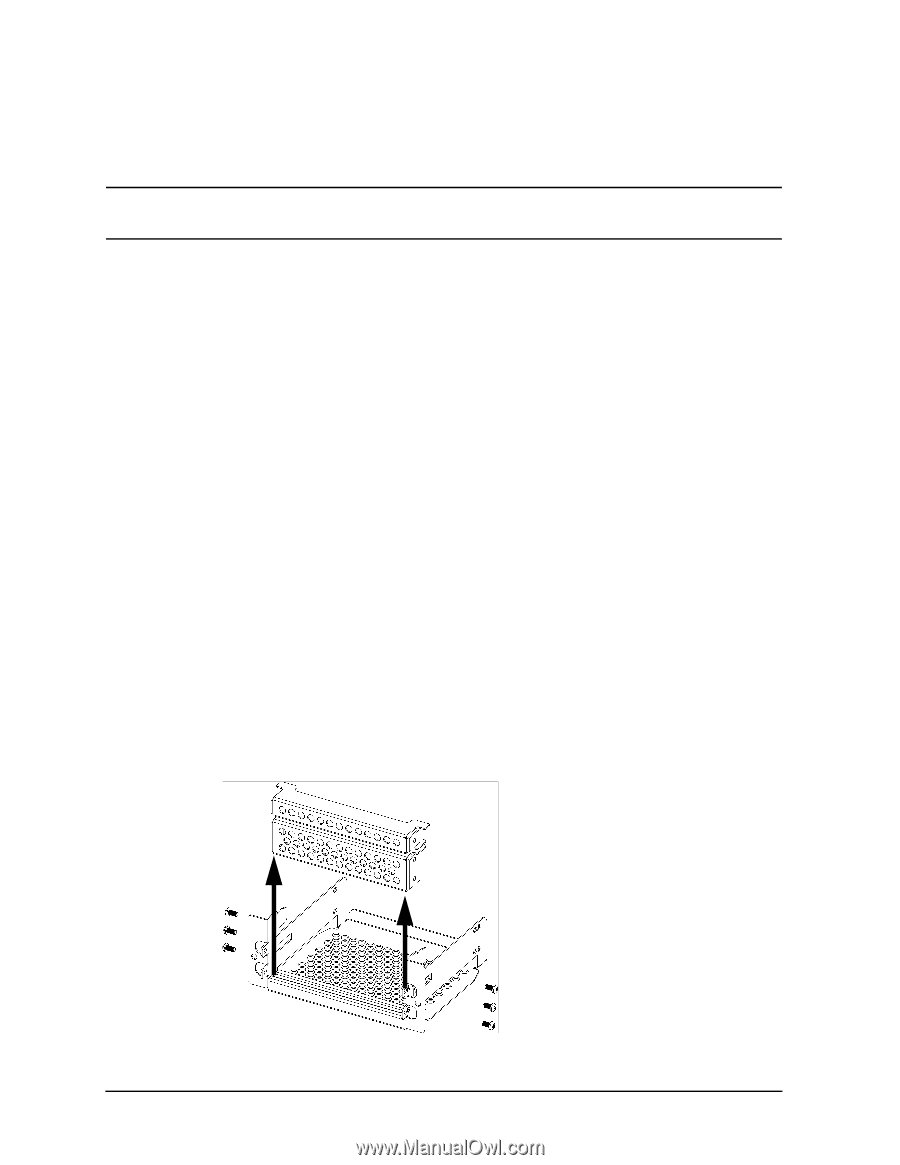
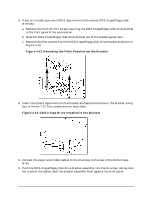
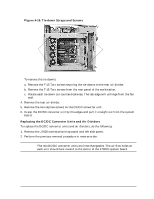
Field Replaceable Units (FRUs) FRU Removal and Replacement Floppy Disk Drive (Optional) This subsection describes how to remove and replace the optional floppy disk drive. NOTE The bracket assembly and drive bay may be used for either one DDS-3 tape drive, or one floppy disk drive. Removing a Floppy Disk Drive: 1. Remove the front panel bezel from the workstation. 2. Remove the two T-15 Torx screws securing the floppy disk drive to the front panel of the workstation chassis. 3. Slide the DDS-3 tape/floppy disk drive bracket assembly out of the chassis guide rails. Disconnect the the power and ribbon cables from the floppy disk drive. 4. To remove the floppy disk drive from the bracket, remove the four T-10 Torx screws (two on each side) securing the floppy disk drive to the bracket. Replacing a Floppy Disk Drive: 1. Remove the front panel bezel and the top panel from the workstation. 2. In the top, left front of the workstation above the DDS-3/floppy disk drive bay, remove the EMI (electromagnetic interference) cover. 3. If you are installing a new floppy disk drive into the empty DDS-3 tape/floppy disk drive bay: a. Remove the two T-15 Torx screws securing the DDS-3 tape/floppy disk drive bracket to the front panel of the workstation. b. Slide the DDS-3 tape/floppy disk drive bracket out of the chassis guide rails. c. Remove the filler panels from the DDS-3 tape/floppy disk drive bracket as shown in Figure 4-15. Figure 4-15. Removing the Filler Panels from the Bracket 104 Chapter 4
-
 1
1 -
2
-
3
-
4
-
5
-
6
-
7
-
8
-
9
-
10
-
11
-
12
-
13
-
14
-
15
-
16
-
17
-
18
-
19
-
20
-
21
-
22
-
23
-
24
-
25
-
26
-
27
-
28
-
29
-
30
-
31
-
32
-
33
-
34
-
35
-
36
-
37
-
38
-
39
-
40
-
41
-
42
-
43
-
44
-
45
-
46
-
47
-
48
-
49
-
50
-
51
-
52
-
53
-
54
-
55
-
56
-
57
-
58
-
59
-
60
-
61
-
62
-
63
-
64
-
65
-
66
-
67
-
68
-
69
-
70
-
71
-
72
-
73
-
74
-
75
-
76
-
77
-
78
-
79
-
80
-
81
-
82
-
83
-
84
-
85
-
86
-
87
-
88
-
89
-
90
-
91
-
92
-
93
-
94
-
95
-
96
-
97
-
98
-
99
-
100
-
101
-
102
-
 103
103 -
 104
104 -
 105
105 -
 106
106 -
 107
107 -
 108
108 -
 109
109 -
 110
110 -
 111
111 -
 112
112 -
 113
113 -
114
-
115
-
116
-
117
-
118
-
119
-
120
-
121
-
122
-
123
-
124
-
125
-
126
-
127
-
128
-
129
-
130
-
131
-
132
-
133
-
134
-
135
-
136
-
137
-
138
-
139
-
140
-
141
-
142
-
143
-
144
-
145
-
146
-
147
-
148
-
149
-
150
-
151
-
152
-
153
-
154
-
155
-
156
-
157
-
158
-
159
-
160
-
161
-
162
-
163
-
164
-
165
-
166
-
167
-
168
-
169
-
170
-
171
-
172
-
173
-
174
-
175
-
176
-
177
-
178
-
179
-
180
-
181
-
182
-
183
-
184
-
185
-
186
-
187
-
188
-
189
-
190
-
191
-
192
-
193
-
194
-
195
-
196
-
197
-
198
-
199
-
200
-
201
-
202
-
203
-
204
-
205
-
206
-
207
-
208
-
209
-
210
-
211
-
212
 |
 |