HP Visualize J5000 hp Visualize J5000, J7000 workstations service handbook (a4 - Page 95
Front Bezel and Outer Panels, Removing the Front Bezel, Front Bezel with Door Opened
 |
View all HP Visualize J5000 manuals
Add to My Manuals
Save this manual to your list of manuals |
Page 95 highlights
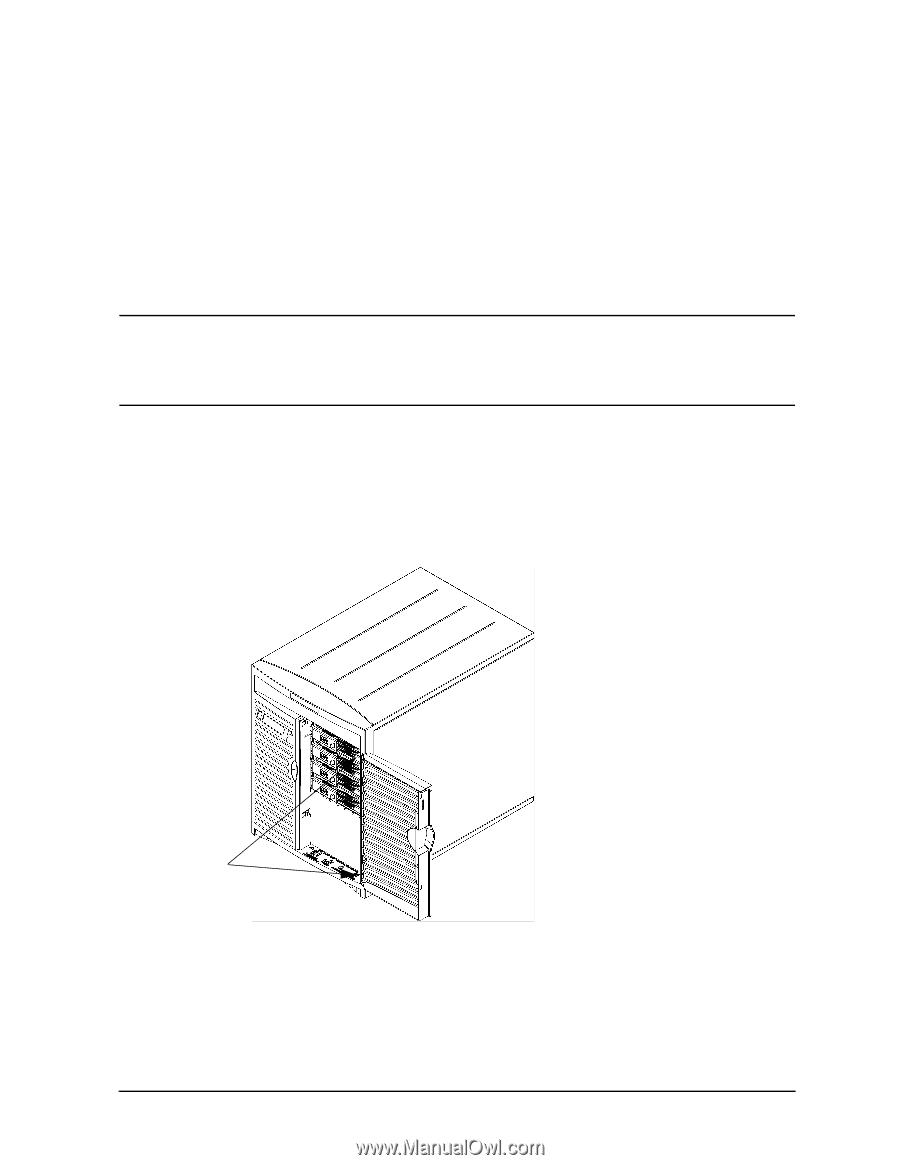
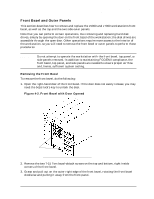
Field Replaceable Units (FRUs) FRU Removal and Replacement Front Bezel and Outer Panels This section describes how to remove and replace the J5000 and J7000 workstation's front bezel, as well as the top and the two side outer panels. Note that you can perform certain operations, like removing and replacing hard disk drives, simply by opening the door on the front bezel of the workstation; the disk drives are accessible through the open door. Other operations require more access to the interior of the workstation, so you will need to remove the front bezel or outer panels to perform those procedures. CAUTION Do not attempt to operate the workstation with the front bezel, top panel, or side panels removed. In addition to maintaining FCC/EMI compliance, the front bezel, top panel, and side panels are needed to ensure proper air flow and, hence, sufficient system cooling. Removing the Front Bezel To remove the front bezel, do the following: 1. Open the right-hand door of the front bezel. If the door does not easily release, you may need the bezel lock's key to unlock the door. Figure 4-2. Front Bezel with Door Opened Bezel-detach screw holes 2. Remove the two T-15 Torx bezel-detach screws on the top and bottom, right inside corners of the front bezel. 3. Grasp and pull out on the outer right edge of the front bezel, rotating the front bezel clockwise and pulling it away from the front panel. Chapter 4 91
-
 1
1 -
2
-
3
-
4
-
5
-
6
-
7
-
8
-
9
-
10
-
11
-
12
-
13
-
14
-
15
-
16
-
17
-
18
-
19
-
20
-
21
-
22
-
23
-
24
-
25
-
26
-
27
-
28
-
29
-
30
-
31
-
32
-
33
-
34
-
35
-
36
-
37
-
38
-
39
-
40
-
41
-
42
-
43
-
44
-
45
-
46
-
47
-
48
-
49
-
50
-
51
-
52
-
53
-
54
-
55
-
56
-
57
-
58
-
59
-
60
-
61
-
62
-
63
-
64
-
65
-
66
-
67
-
68
-
69
-
70
-
71
-
72
-
73
-
74
-
75
-
76
-
77
-
78
-
79
-
80
-
81
-
82
-
83
-
84
-
85
-
86
-
87
-
88
-
89
-
 90
90 -
 91
91 -
 92
92 -
 93
93 -
 94
94 -
 95
95 -
 96
96 -
 97
97 -
 98
98 -
 99
99 -
 100
100 -
101
-
102
-
103
-
104
-
105
-
106
-
107
-
108
-
109
-
110
-
111
-
112
-
113
-
114
-
115
-
116
-
117
-
118
-
119
-
120
-
121
-
122
-
123
-
124
-
125
-
126
-
127
-
128
-
129
-
130
-
131
-
132
-
133
-
134
-
135
-
136
-
137
-
138
-
139
-
140
-
141
-
142
-
143
-
144
-
145
-
146
-
147
-
148
-
149
-
150
-
151
-
152
-
153
-
154
-
155
-
156
-
157
-
158
-
159
-
160
-
161
-
162
-
163
-
164
-
165
-
166
-
167
-
168
-
169
-
170
-
171
-
172
-
173
-
174
-
175
-
176
-
177
-
178
-
179
-
180
-
181
-
182
-
183
-
184
-
185
-
186
-
187
-
188
-
189
-
190
-
191
-
192
-
193
-
194
-
195
-
196
-
197
-
198
-
199
-
200
-
201
-
202
-
203
-
204
-
205
-
206
-
207
-
208
-
209
-
210
-
211
-
212
 |
 |